Zum Hauptinhalt wechseln
HP Pavilion 15-au123cl CMOS Battery Replacement

HP Pavilion 15-au123cl CMOS Battery Replacement

Mohammad Gardezi

Mohammad Gardezi und eine weitere beteiligte Person

Zuletzt aktualisiert am December 28, 2017

15 - 20 Minuten
Mittel

If you are noticing the settings are wrong on the BIOS, you will want to follow this guide to reset the BIOS settings. The CMOS battery holds BIOS settings so booting up the computer after removing the battery should fix all BIOS issues.

Was du brauchst

Werkzeuge

  • Phillips #0 Screwdriver
    Phillips #0 Screwdriver
  • iFixit Opening Tool
    iFixit Opening Tool
  • Spudger
    Spudger

Mehr anzeigen …

  1. HP Pavilion 15-au123cl CMOS Battery Replacement, Battery: Schritt 1, Bild 1 von 1
    • Make sure the laptop is off and unplugged before starting.

    • Using the plastic opening tool, remove the top rubber feet on the back panel as it hides one of the screws we will be removing.

  2. HP Pavilion 15-au123cl CMOS Battery Replacement: Schritt 2, Bild 1 von 2 HP Pavilion 15-au123cl CMOS Battery Replacement: Schritt 2, Bild 2 von 2
    • Using a PH0 screwdriver, unscrew the ten 4.4mm Phillips head screws located on the back panel.

  3. HP Pavilion 15-au123cl CMOS Battery Replacement: Schritt 3, Bild 1 von 2 HP Pavilion 15-au123cl CMOS Battery Replacement: Schritt 3, Bild 2 von 2
    • Using the plastic opening tool, remove the back cover of the laptop.

    • It is recommended that you start with a corner and run the tool throughout the edges of the cover.

    • Be sure not to bend the cover by applying too much force.

  4. HP Pavilion 15-au123cl CMOS Battery Replacement: Schritt 4, Bild 1 von 2 HP Pavilion 15-au123cl CMOS Battery Replacement: Schritt 4, Bild 2 von 2
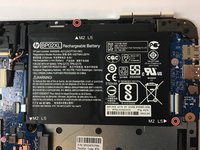
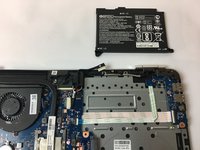
    • Using a PH0 screwdriver, unscrew the two 3.8mm PH0 Phillips head screws that hold the battery in place.

  5. HP Pavilion 15-au123cl CMOS Battery Replacement: Schritt 5, Bild 1 von 3 HP Pavilion 15-au123cl CMOS Battery Replacement: Schritt 5, Bild 2 von 3 HP Pavilion 15-au123cl CMOS Battery Replacement: Schritt 5, Bild 3 von 3
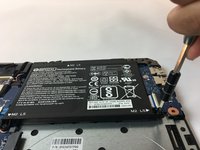
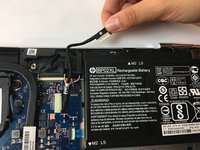
    • Carefully disconnect the cable connecting the top of the battery and remove the battery.

  6. HP Pavilion 15-au123cl CMOS Battery Replacement, CMOS Battery: Schritt 6, Bild 1 von 2 HP Pavilion 15-au123cl CMOS Battery Replacement, CMOS Battery: Schritt 6, Bild 2 von 2
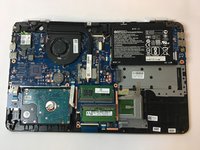
    • The CMOS battery is located toward the middle left area of the motherboard.

    • Using the spudger, lift the CMOS battery out of its plastic casing.

  7. HP Pavilion 15-au123cl CMOS Battery Replacement: Schritt 7, Bild 1 von 1
    • Fully remove the CMOS battery from the motherboard.

Abschluss

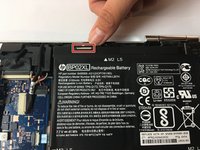
To reassemble your device, follow these instructions in reverse order.

2 weitere Personen haben diese Anleitung absolviert.

Team

USF Tampa, Team S13-G3, Cagle Fall 2017 Mitglied von USF Tampa, Team S13-G3, Cagle Fall 2017

USFT-CAGLE-F17S13G3

2 Mitglieder

6 Anleitungen geschrieben

0 Kommentare

Kommentar hinzufügen

Seitenaufrufe:

Letzte 24 Stunden: 7

Letzte 7 Tage: 42

Letzte 30 Tage: 173

Insgesamt: 25,922