Zum Hauptinhalt wechseln
HP Pavilion 17-g192dx RAM stick Replacement

HP Pavilion 17-g192dx RAM stick Replacement

Dominic Perito

Dominic Perito und 5 weitere Mitwirkende

Zuletzt aktualisiert am December 18, 2023

10 - 15 Minuten
Mittel

RAM is one of the main parts of a computer. RAM stores temporary data in order for your processor to be able to find data quickly instead of going through long-term storage devices to pull data. If your HP Pavilion 17-g192dx is consistently slow and has unresponsive programs, this guide will successfully walk you through step by step on how to replace your RAM in your device. Before you begin, be sure you have the proper tools, located on the right side of this webpage, as well as a new RAM stick that will be replacing the old one.

Was du brauchst

Werkzeuge

Mehr anzeigen …

  1. HP Pavilion 17-g192dx RAM stick Replacement, Battery: Schritt 1, Bild 1 von 3 HP Pavilion 17-g192dx RAM stick Replacement, Battery: Schritt 1, Bild 2 von 3 HP Pavilion 17-g192dx RAM stick Replacement, Battery: Schritt 1, Bild 3 von 3
    • Turn off the laptop.

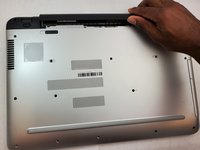
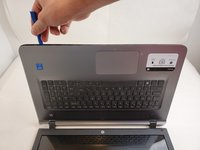
    • Slide the battery lock to the right until you see the open lock symbol.

  2. HP Pavilion 17-g192dx RAM stick Replacement: Schritt 2, Bild 1 von 1
    • Slide the battery release to the left until the battery pops up.

    • This may require significant force.

  3. HP Pavilion 17-g192dx RAM stick Replacement: Schritt 3, Bild 1 von 2 HP Pavilion 17-g192dx RAM stick Replacement: Schritt 3, Bild 2 von 2
    • Lift the battery up.

  4. HP Pavilion 17-g192dx RAM stick Replacement, laptop: Schritt 4, Bild 1 von 1
    • Using the metal spudger, pry up the screw covers.

  5. HP Pavilion 17-g192dx RAM stick Replacement: Schritt 5, Bild 1 von 1
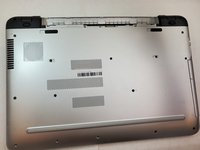
    • Remove the fifteen 7mm screws holding the back casing on using the Phillips #00 screwdriver.

  6. HP Pavilion 17-g192dx RAM stick Replacement: Schritt 6, Bild 1 von 2 HP Pavilion 17-g192dx RAM stick Replacement: Schritt 6, Bild 2 von 2
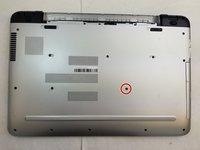
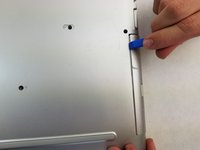
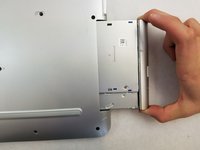
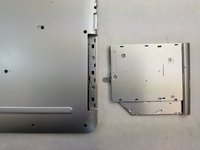
    • Remove the 7mm screw holding the disc drive in place using the Phillips #00 head screwdriver.

  7. HP Pavilion 17-g192dx RAM stick Replacement: Schritt 7, Bild 1 von 3 HP Pavilion 17-g192dx RAM stick Replacement: Schritt 7, Bild 2 von 3 HP Pavilion 17-g192dx RAM stick Replacement: Schritt 7, Bild 3 von 3
    • Using an iFixit opening tool, push the disc drive away from the outer case.

    • Once the disk drive is out far enough, it easily slides out.

  8. HP Pavilion 17-g192dx RAM stick Replacement: Schritt 8, Bild 1 von 3 HP Pavilion 17-g192dx RAM stick Replacement: Schritt 8, Bild 2 von 3 HP Pavilion 17-g192dx RAM stick Replacement: Schritt 8, Bild 3 von 3
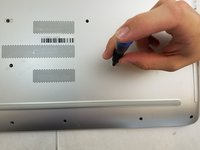
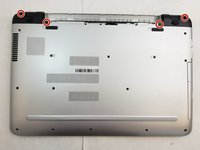
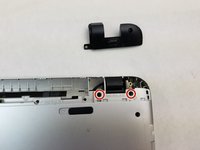
    • Remove the four 7mm screws holding the back resting plates on using the Phillips #00 screwdriver.

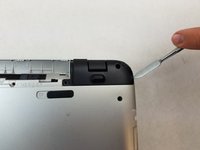
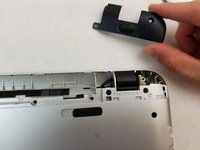
    • Using a metal spudger, lift up on the back resting plate until it pops off.

  9. HP Pavilion 17-g192dx RAM stick Replacement: Schritt 9, Bild 1 von 2 HP Pavilion 17-g192dx RAM stick Replacement: Schritt 9, Bild 2 von 2
    • Remove the two 7 mm screws behind the plate using a Phillips #00 screwdriver.

  10. HP Pavilion 17-g192dx RAM stick Replacement: Schritt 10, Bild 1 von 3 HP Pavilion 17-g192dx RAM stick Replacement: Schritt 10, Bild 2 von 3 HP Pavilion 17-g192dx RAM stick Replacement: Schritt 10, Bild 3 von 3
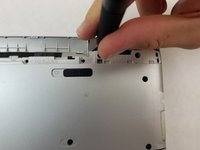
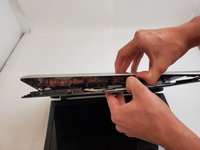
    • Pry up on the case with an iFixit opening tool until you can feel a snap.

    • Pry around the remainder until you can separate the case from the keyboard with your hands.

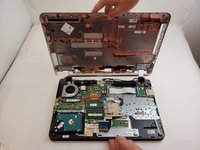
    • Gently separate the two.

  11. HP Pavilion 17-g192dx RAM stick Replacement, RAM stick: Schritt 11, Bild 1 von 3 HP Pavilion 17-g192dx RAM stick Replacement, RAM stick: Schritt 11, Bild 2 von 3 HP Pavilion 17-g192dx RAM stick Replacement, RAM stick: Schritt 11, Bild 3 von 3
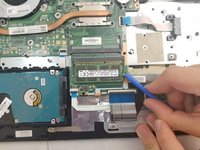
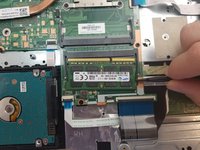
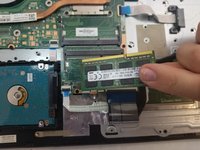
    • Use your fingers to pry the two black tabs on either side of the RAM stick outwards until the RAM swings upwards to rest at an angle.

    • Gently slide the RAM out from the port maintaining the angle at which it rests.

    • The images show the RAM stick being pried from the port without being unlocked by the tabs. Be sure to use the black tabs to release it and avoid damaging the RAM or the motherboard.

    • During reinstallation, be sure to insert the RAM stick at a similar angle to which it rested after being unlocked. Then just press the stick down into place. There should be a click as the black tabs reengage to lock it in place.

Abschluss

To reassemble your device, follow these instructions in reverse order.

Eine weitere Person hat diese Anleitung absolviert.

0 Kommentare

Kommentar hinzufügen

Seitenaufrufe:

Letzte 24 Stunden: 2

Letzte 7 Tage: 3

Letzte 30 Tage: 11

Insgesamt: 570