
Honeywell HY-204 Fan Motor Replacement
Einleitung
Zu Schritt 1 der AnleitungThis guide will walk you through the removal of your fan motor. It should be fairly easy, although you will need to crimp the wires to remove the motor.
Was du brauchst
Werkzeuge


Mehr anzeigen …
-
-
Remove the four 14 mm screws from the back of the device using the Phillips #0 Screwdriver.
-
-
-
Pull the front and back parts of the case away from each other until the back is free from the front. This may require a large amount of force.
-
-
-
-
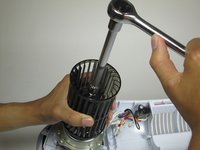
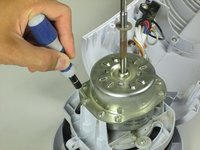
Remove the hex nut from the fan motor with a 10mm hexagonal ratcheting socket wrench.
-
-
-
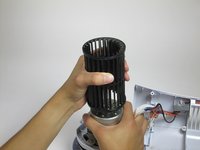
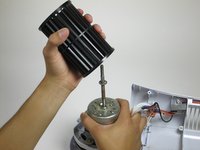
Grasp the fan blade firmly and pull upward to remove it from the center column of the fan.
-
-
-
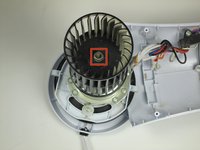
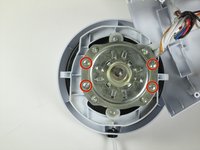
Remove the four 12.7mm screws using the Phillips #0 Screwdriver.
-
Once the screws are removed, lift the motor off its base.
-
-
-
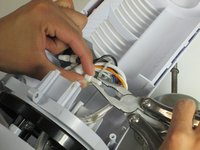
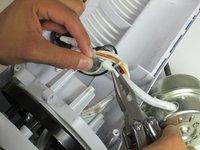
Remove the wire connectors from the black, brown, red, blue, white, grey, and green wires. To do this, grip each wire with your hand and use the pliers to de-crimp the heads of each wire connector by applying pressure to the wider ends of the connector until it falls free.
-


To reassemble your device, follow these instructions in reverse order.
To reassemble your device, follow these instructions in reverse order.
Rückgängig: Ich habe diese Anleitung nicht absolviert.
2 weitere Personen haben diese Anleitung absolviert.
Team

Cal Poly, Team 10-40, Amido Fall 2014 Mitglied von Cal Poly, Team 10-40, Amido Fall 2014
CPSU-AMIDO-F14S10G40
3 Mitglieder
7 Anleitungen geschrieben
2 Kommentare
Do you know where I can find the fan motor replacement?