How to Tighten the Nishiki Aero II Chain

Einleitung
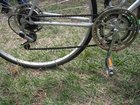
Zu Schritt 1 der AnleitungChain tension is important for the proper operation of your bike.
If the chain is too loose, then the derailleur may not function optimally, and the chain isn't as coupled with the bike's gears.
This guide shows you how to tighten your chain by simply nudging the rear wheel farther back in its housing, placing more tension on the chain so that it is no longer loose.
-
-
Shift the rear derailleur into its outermost gear, and the front derailleur into its outer gear.
-
-
-
Open the quick-release lever on the rear axle.
-
Continue to loosen the axle by hand until you can freely move the axle in its notch in the rear fork.
-
-
-
-
Move the axle farther back along the notch in the fork so that the chain is taught between the cogs.
-
-
-
Now that the axle is placed correctly, re-tighten the axle and re-apply the quick-release as shown in Step 1.
-


To reassemble your device, follow these instructions in reverse order.
To reassemble your device, follow these instructions in reverse order.

Team

Cal Poly, Team 21-53, Johann Spring 2013 Mitglied von Cal Poly, Team 21-53, Johann Spring 2013
CPSU-JOHANN-S13S21G53
4 Mitglieder
7 Anleitungen geschrieben