
Huawei MediaPad S7-301u Motherboard Replacement
Einleitung
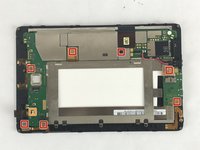
Zu Schritt 1 der AnleitungIn any device, the motherboard is the most important component of the system. It is the control center for everything in your tablet. This means that all connections have to go through it. Being the engine of the tablet, the motherboard itself holds everything together. If it is damaged or something spills on it, the tablet would not work. It is the main platform for communication between all other components in the device. The motherboard consists of various components which have their own roles to play in the functioning of the tablet.
Was du brauchst


-
-
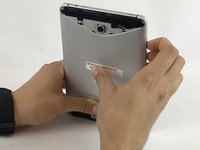
Use either your finger or a metal spudger to lift both the top and bottom black covers on the back of the tablet.
-
-
-
Use a Phillips (J000) bit screwdriver to remove the 6 (2 mm) screws located at the top and bottom of the tablet.
-
-
-
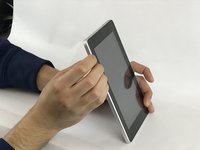
Hold the device by the silver edge and the front of the screen.
-
Then use your other hand to push gently on the center back of the tablet until the front screen is detached from the silver back cover.
-
Finally, separate the screen from the silver back casing.
-
-
-
-
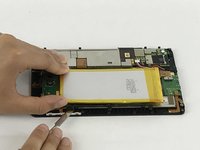
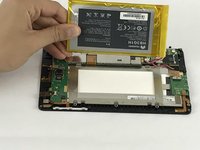
Use the plastic spudger to remove the battery from the device that is glued on the metal frame.
-
Follow the wires to where they are connected on the motherboard and simply pull the white connector out of the socket.
-
-
-
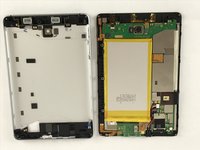
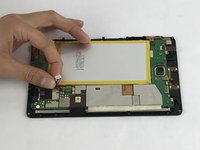
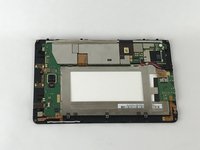
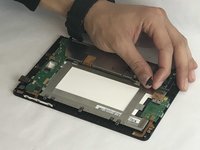
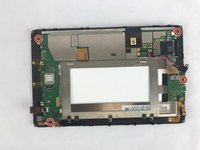
Once the battery is removed, the motherboard is ready to be removed.
-
Remove the camera from the motherboard by disconnecting the clip next to it. You can use the precision tweezer here.
-
To remove the power port from the motherboard, unscrew the two 4mm screws with a T5 bit.
-
-
In diesem Schritt verwendetes Werkzeug:Tweezers$4.99
-
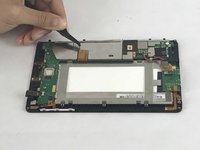
Use the precision tweezers to disconnect the 7 clips from the motherboard
-
Remove the headphone input cable from the motherboard by carefully pulling on the clip.
-
-
-
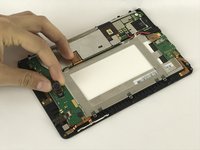
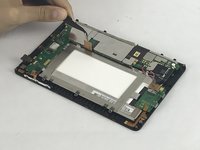
Unscrew the 4 screws 4mm with T5 bit from the edges or the frame of the motherboard to remove it
-
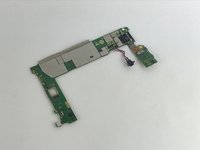
Carefully remove the motherboard from the metal frame.
-


To reassemble your device, follow these instructions in reverse order.
To reassemble your device, follow these instructions in reverse order.
Rückgängig: Ich habe diese Anleitung nicht absolviert.
2 weitere Personen haben diese Anleitung absolviert.
Team

USF Tampa, Team S11-G5, Passmore Fall 2017 Mitglied von USF Tampa, Team S11-G5, Passmore Fall 2017
USFT-PASSMORE-F17S11G5
4 Mitglieder
8 Anleitungen geschrieben