
Intertek 20006 Fan Replacement
Einleitung
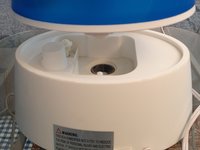
Zu Schritt 1 der AnleitungIf your Intertek Air Humidifier model 20006 doesn’t make any cool mist due to the faulty fan, use this guide to replace the cool mist making fan. The fan makes cool mist to humidify the air by using water. Before using this guide, remove the water and wipe the water chamber with a dry cloth or paper towel.
Step 4 requires taking off the cover plate that protects the power connections of all parts. Take caution around the cover plate’s sharp edges.
Before beginning, switch off the power and unplug the power cable from the power outlet.
Was du brauchst
Werkzeuge


Mehr anzeigen …
-
-
Turn off the air humidifier using the 0/1 switch at the bottom edge of back side.
-
Hold the top-back of the air humidifier and remove the upper part from the lower part.
-
Remove water from the water chamber and wipe it.
-
-
-
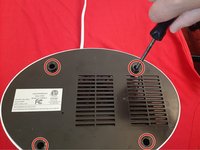
Flip the humidifier so that the bottom is facing upwards.
-
Use a Phillips # 2 screwdriver to remove four 13 mm screws from the bottom cover hole.
-
Remove the bottom cover to access the fan and other parts of the humidifier.
-
-
-
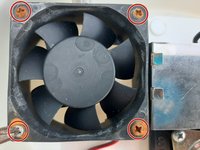
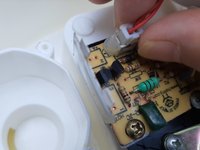
Use a Phillips #2 screwdriver to remove four 30 mm screws from the fan.
-
Remove the fan from its place and keep it close to its power connector.
-
-
-
-
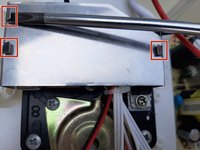
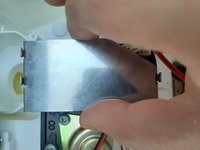
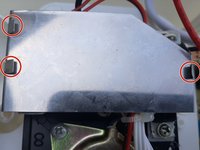
Using a spudger, straighten all three metal latches.
-
Hold both edges of the metal cover with your finger and pull upward to take it out from its position.
-
-
-
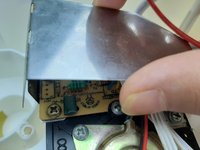
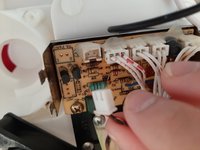
Pull out the power connector of the fan from its port.
-
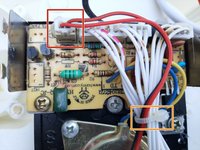
Use a wire cutter to cut the tie rope around the wires.
-
Remove the fan from the humidifier.
-
Plug in the new fan's power connector.
-
Tie all cables together using a twist tie.
-
-
-
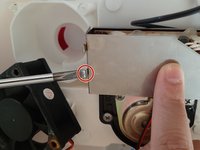
Attach the metal cover where it was before.
-
Bend the latches halfway down using a spudger to secure the metal cover.
-
-
-
Put the bottom cover back in place.
-
Secure the bottom cover with the four 13 mm screws using a Phillips #2 screwdriver.
-
Flip the humidifier right-side up, and attach the upper part
-


Rückgängig: Ich habe diese Anleitung nicht absolviert.
Eine weitere Person hat diese Anleitung absolviert.