Motorola SLVR L9 Camera Lens Cover Replacement
Einleitung
Zu Schritt 1 der AnleitungThe Camera Lens Cover Replacement Guide provides a list of the tools and parts that you need to replace the camera lens cover on the Motorola SLVR L9. As you begin the replacement process, look for the pictures provided with each step to better guide you.
The camera lens on the Motorola SLVR L9 cellular phone is attached to the transceiver PC board shield. In order to replace the camera lens, you will need to replace the entire transceiver PC board shield.
Was du brauchst
-
-
Turn the phone over so that the back of the phone is facing towards you.
-
-
-
Press down on the battery cover latch located at the top of the phone.
-
Pull the battery cover down and away from the latch; then lift it up to remove the battery cover.
-
-
-
-
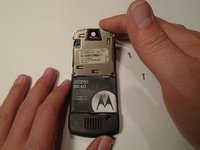
Remove the four housing screws (1/8") from each corner of the transceiver PC board shield. Use a screwdriver with a T6 Torx screwdriver head to turn the screws counter-clockwise (left).
-
-
-
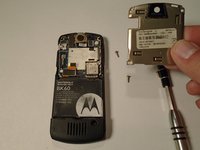
Once you have removed all of the screws, lift the transceiver PC board shield up to remove it.
-
To reassemble your device, follow these instructions in reverse order.
To reassemble your device, follow these instructions in reverse order.
Rückgängig: Ich habe diese Anleitung nicht absolviert.
Eine weitere Person hat diese Anleitung absolviert.


