
Motorola V325 External Casing Replacement
Einleitung
Zu Schritt 1 der AnleitungThe outer housing can be removed to be cleaned or swapped to a custom housing.
Was du brauchst

-
-
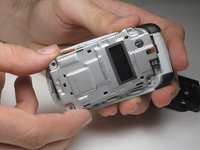
Remove the rearmost panel by pushing down on the silver button, then simultaneously pulling downward on the panel.
-
Lift the panel off of the phone.
-
-
-
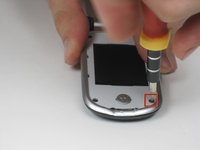
Using your thumbnail or a thin flat head screwdriver, peel back the screen protector on the inside of the phone: It is only held on by glue but may take a good amount of force to be removed.
-
-
-
-
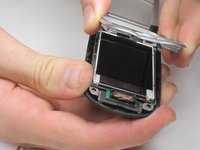
Peel back the screen protector frame. Close phone at the hinge, then pull off the front outer casing.
-


To reassemble your device, follow these instructions in reverse order.
To reassemble your device, follow these instructions in reverse order.
Team

Cal Poly, Team 4-15, Forte Winter 2010 Mitglied von Cal Poly, Team 4-15, Forte Winter 2010
CPSU-FORTE-W10S4G15
5 Mitglieder
8 Anleitungen geschrieben