
Nerf N-Strike Maverick O-Ring Replacement
Einleitung
Zu Schritt 1 der AnleitungThis guide shows the steps necessary to replace the O-Ring on the Nerf N-Strike Maverick. First, you should consult steps 1 through 4 of the Nerf N-Strike Maverick Teardown guide. Make sure you have a replacement O-Ring on hand.
Was du brauchst
Ersatzteile

Werkzeuge


Mehr anzeigen …
-
-
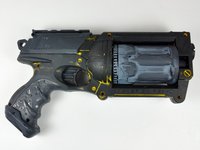
The Redeemer. Looks badass with its rotating barrel, but it's going to get a whole lot more badasserer quite soon...
-
Reminds me of a gun from the Fifth Element.
-
-
-
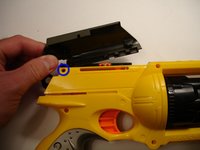
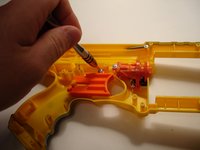
First thing's first: let's remove some screws. All screws are conveniently Phillips, and all can be removed with a #0 or #00 size screwdriver.
-
Remove all ten Phillips screws.
-
-
-
Another Phillips screw hides beneath the cocking mechanism thing. Remove that one as well.
-
The cocking mechanism's quite simple. A metal lever pulls back on the air plunger and compresses the large spring. Another small spring returns the slider back into its original position once it's done doing the dirty business..
-
-
-
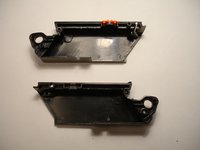
And just like that, the gun comes apart.
-
Visible in the top left corner is the large spring and air plunger.
-
I later opened the gun again and put a folded piece of paper in this area. It gave the gun a bit more "punch" when sending darts on their merry way.
-
-
-
-
The trigger is held in place by a sole Phillips screw. It also has a small spring for that authentic handgun "springy" feeling...
-
-
-
The trigger's spring also attaches via a Phillips screw. A couple of twists with the screwdriver and it comes right out.
-
The fancy rotator for the barrel is next. I assume that were the gun to break, this would be the part that fails. It's the most complex part of the gun.
-
-
-
Looking down the gun's business end.
-
I didn't bother to take the barrel apart. I didn't feel that adventurous.
-
-
-
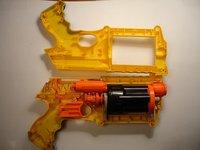
Here it is -- the whole gun taken apart.
-
It's so easy to assemble, a child could do it. Maybe Nerf's motto is "From our kids to your kids"?
-
-
-
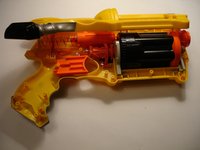
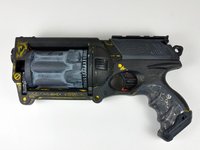
The finished product.
-
I took the gun to work and shot these pictures under a better lighting/camera setup... A much better lighting/camera setup.
-
-
-
Follow steps 1 through 4 of the Nerf N-Strike Maverick Teardown guide.
-
-
-
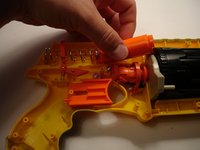
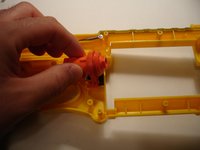
Locate the air plunger in the upper left hand corner of the opened nerf gun. Push back on the spring and carefully pull the plunger toward you to remove it.
-
-
-
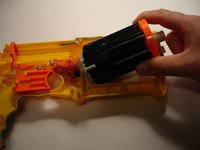
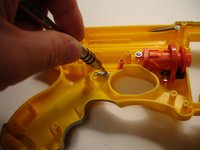
Once you have the air plunger removed, locate the O-Ring by pulling the two pieces of the air plunger apart.
-
-
In diesem Schritt verwendetes Werkzeug:Tweezers$4.99
-
Use a pair of tweezers to remove the O-Ring from the top of the air plunger.
-
-
-
Follow steps 1 through 4 of the "Nerf N-Strike Maverick Teardown" guide in reverse order to reassemble the gun.
-


To reassemble your device, follow these instructions in reverse order.
To reassemble your device, follow these instructions in reverse order.
Team

University of Maine, Team 1-2, Diaz Fall 2014 Mitglied von University of Maine, Team 1-2, Diaz Fall 2014
UMAINE-DIAZ-F14S1G2
3 Mitglieder
3 Anleitungen geschrieben