
Nikon COOLPIX S9500 Outer Case Replacement
Einleitung
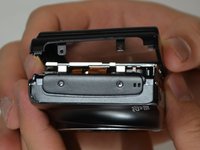
Zu Schritt 1 der AnleitungIn order to access any of the inner parts of the camera, the outer case must be taken apart first. [PREREQUISITE ONLY]
Was du brauchst


-
-
Remove the three 4 mm screws from the bottom of the camera using a #00 Phillips screwdriver.
-
Remove the single 3.5 mm screw from the bottom of the camera using a #00 Phillips screwdriver.
-
-
-
With the bottom of the camera facing you, slide the latch on the compartment to the left.
-
Swing the battery compartment door open.
-
Remove the 3.5 mm screw from the inside with a #00 Phillips screwdriver.
-
-
-
-
With the screen facing you, locate the two 3.5 mm screws on the left face of the camera. Remove them using a #00 Phillips screwdriver.
-
-
-
With the screen facing you, locate the three 3.5 mm screws on the right face of the camera. Remove them with a #00 Phillips screwdriver.
-
-
-
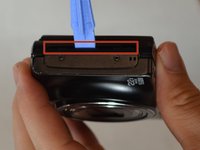
Locate the crease where the case comes together.
-
Using a plastic prying tool, pry at the line to remove the camera case.
-


To reassemble your device, follow these instructions in reverse order.
To reassemble your device, follow these instructions in reverse order.
Team

USF Tampa, Team 1-4, Blackwell Winter 2015 Mitglied von USF Tampa, Team 1-4, Blackwell Winter 2015
USFT-BLACKWELL-W15S1G4
4 Mitglieder
12 Anleitungen geschrieben