
Ninja AF161 Max XL Back Vent Cover Replacement

Einleitung
Zu Schritt 1 der AnleitungIf you need to replace the back vent cover, use this guide to assist you. Additionally, this is a required step for disassembly to replace other parts on the unit.
Was du brauchst


-
-
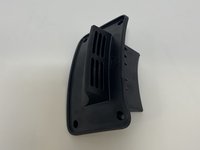
The back vent cover is directly above where the power cord protrudes.
-
-
-
-
Use a Phillips #2 screwdriver to unscrew and remove four 1 cm screws from the panel.
-


To reassemble your device, follow these instructions in reverse order.
To reassemble your device, follow these instructions in reverse order.
Rückgängig: Ich habe diese Anleitung nicht absolviert.
Eine weitere Person hat diese Anleitung absolviert.

Team

Utah Tech University, Team 1-10, Randazzo Fall 2023 Mitglied von Utah Tech University, Team 1-10, Randazzo Fall 2023
UTAHTECH-RANDAZZO-F23S1G10
1 Mitglied
3 Anleitungen geschrieben