
Nintendo 3DS 2015 Motherboard Replacement
Einleitung
Zu Schritt 1 der AnleitungReplacing the motherboard should be a last resort and shouldn't be taken lightly. There are many delicate ribbon cables so be careful and go slow.
Was du brauchst


-
-
Unscrew the two 3mm Phillips #1 head screws along the top edge of the device.
-
-
-
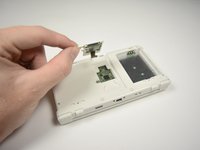
Pull the top corner tabs of the front face plate outward and towards you.
-
Pull the faceplate up and out of the slots at the bottom of the device.
-
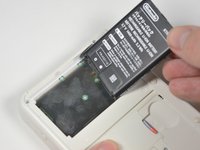
Set aside the back faceplate.
-
-
-
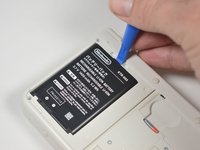
Insert a plastic opening tool into the notch at the top of the battery.
-
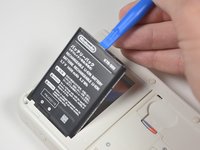
Pry the battery up with the plastic opening tool.
-
-
-
Unscrew the three 3mm Y0 screws along the right and bottom of the SD card reader.
-
-
-
Pull the SD card reader from the edge with two holes gently to free the tab at the top of the SD card reader.
-
Reorient the device so that the power jack faces you.
-
-
-
-
Lift the SD card reader gently.
-
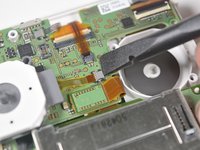
Use a plastic opening tool to pry the SD card ribbon cable off the socket on the motherboard.
-
Lift the SD card reader out off of the lower casing.
-
-
In diesem Schritt verwendetes Werkzeug:Tweezers$4.99
-
Reorient the device so that the game slot now faces you.
-
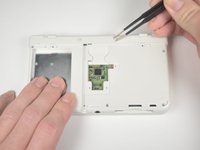
Remove the two rubber bumpers along the top of the device using tweezers.
-
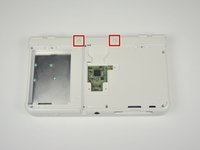
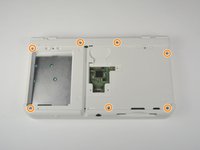
Unscrew the seven 6mm Phillips #00 screws along the top and bottom of the 3DS.
-
-
-
Lift the top edge of the lower case slightly off on the 3DS.
-
Pry the ribbon cable socket under the right trigger using a plastic opening tool.
-
Pry the ribbon cable socket under the infrared receiver cover using a plastic opening tool.
-
-
-
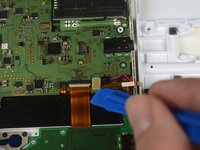
Open the device slowly from its top edge. Be careful not to tug the ribbon cable connected near the bottom edge of the device.
-
Pry the last ribbon cable attached to the lower case using a plastic opening tool.
-
-
-
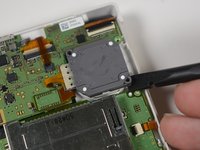
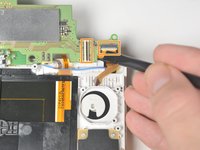
Locate the joystick assembly near the top right corner of the motherboard.
-
Remove the two 8mm Phillips #00 screws from the back of the joystick.
-
Use the flat end of the spudger to pry off the joystick pad from its plastic housing.
-
-
-
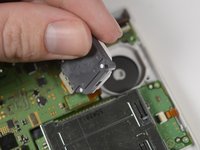
Lift the joystick pad and place it on its back. This will reveal the ribbon cable connected to the joystick pad.
-
Use the flat end of the spudger to pry up the retaining flap for the ribbon cable.
-
Lift the joystick out of the device.
-
-
-
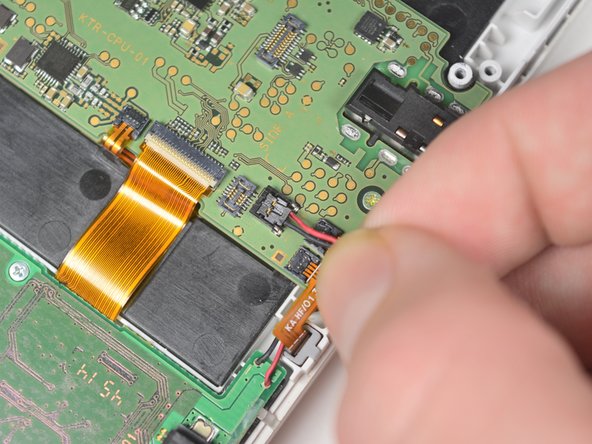
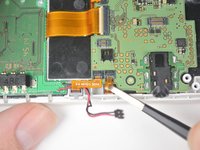
Remove the power cable, indicated by the black and red wires, by gently pulling it up and out of the connector.
-
Gently pull the ribbon cables out of the 4 ZIF connectors.
-
-
In diesem Schritt verwendetes Werkzeug:Tweezers$4.99
-
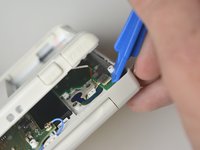
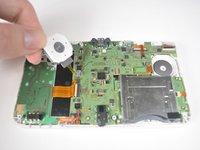
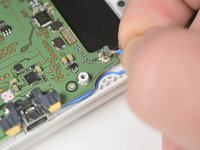
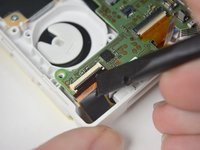
Pull up gently on the blue wifi antenna.
-
Pry the retaining tab on the connector behind the infrared receiver and gently pull the ribbon cable from the connector with tweezers.
-
-
-
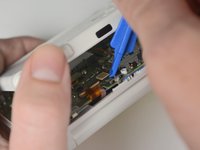
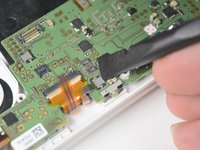
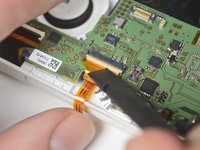
Lift the retaining tab and remove the large ribbon cable on the left side of the motherboard.
-
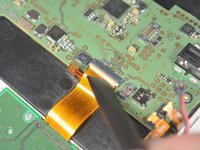
Lift the retaining tab and remove the large ribbon cable on the top of the motherboard behind the infrared receiver.
-
Lift the retaining tab and remove the large ribbon cable on the top of the motherboard just above the joysitck housing.
-
-
-
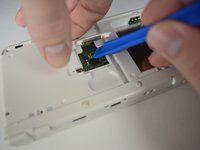
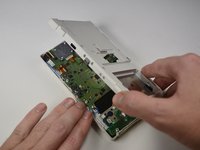
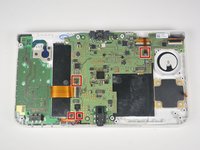
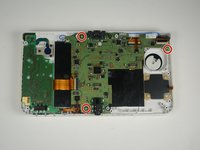
Remove the three, 3mm Phillips #00 screws that secure the motherboard to the device housing.
-
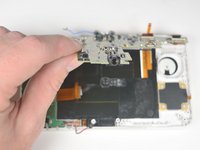
Lift the motherboard gently by the headphone jack.
-
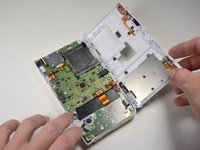
Remove the two ribbons on the back of the device by lifting the retaining tabs on the ZIF connectors.
-


To reassemble your device, follow these instructions in reverse order.
To reassemble your device, follow these instructions in reverse order.
Rückgängig: Ich habe diese Anleitung nicht absolviert.
6 weitere Personen haben diese Anleitung absolviert.
Team

Cal Poly, Team 4-6, Livingston Fall 2016 Mitglied von Cal Poly, Team 4-6, Livingston Fall 2016
CPSU-LIVINGSTON-F16S4G6
4 Mitglieder
35 Anleitungen geschrieben