Zum Hauptinhalt wechseln
Nintendo 3DS 2015 Motherboard Replacement

Nintendo 3DS 2015 Motherboard Replacement

Tyler Starr

Tyler Starr und 4 weitere Mitwirkende

Zuletzt aktualisiert am November 27, 2024

30 Minuten
Schwierig

Replacing the motherboard should be a last resort and shouldn't be taken lightly. There are many delicate ribbon cables so be careful and go slow.

Was du brauchst

Werkzeuge

Mehr anzeigen …

  1. Nintendo 3DS 2015 Motherboard Replacement, Battery: Schritt 1, Bild 1 von 1
    • Unscrew the two 3mm Phillips #1 head screws along the top edge of the device.

    • The screws on the back panel strip easily. Go slowly and press down firmly.

    • The screws on the back panel are held in by locking washers, so they won't come out of the back panel.

  2. Nintendo 3DS 2015 Motherboard Replacement: Schritt 2, Bild 1 von 2 Nintendo 3DS 2015 Motherboard Replacement: Schritt 2, Bild 2 von 2
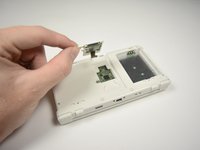
    • Pull the top corner tabs of the front face plate outward and towards you.

    • Pull the faceplate up and out of the slots at the bottom of the device.

    • Set aside the back faceplate.

  3. Nintendo 3DS 2015 Motherboard Replacement: Schritt 3, Bild 1 von 3 Nintendo 3DS 2015 Motherboard Replacement: Schritt 3, Bild 2 von 3 Nintendo 3DS 2015 Motherboard Replacement: Schritt 3, Bild 3 von 3
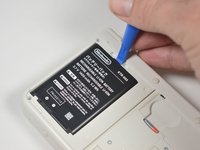
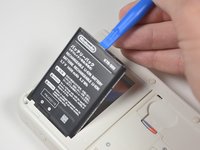
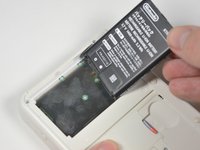
    • Insert a plastic opening tool into the notch at the top of the battery.

    • Pry the battery up with the plastic opening tool.

  4. Nintendo 3DS 2015 Motherboard Replacement, SD Card Reader: Schritt 4, Bild 1 von 1
    • Unscrew the three 3mm Y0 screws along the right and bottom of the SD card reader.

    • The bottom of the SD card reader should slightly pop out after removing the screws.

  5. Nintendo 3DS 2015 Motherboard Replacement: Schritt 5, Bild 1 von 1
    • Pull the SD card reader from the edge with two holes gently to free the tab at the top of the SD card reader.

    • Don't completely pull the SD card out of the device yet. There is a ribbon cable connected under the SD card reader.

    • Reorient the device so that the power jack faces you.

  6. Nintendo 3DS 2015 Motherboard Replacement: Schritt 6, Bild 1 von 2 Nintendo 3DS 2015 Motherboard Replacement: Schritt 6, Bild 2 von 2
    • Lift the SD card reader gently.

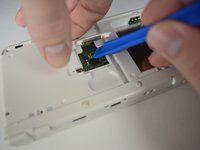
    • Use a plastic opening tool to pry the SD card ribbon cable off the socket on the motherboard.

    • Lift the SD card reader out off of the lower casing.

    Where can I buy a new SD card reader? Cant seem to find any.

    Aldair - Antwort

  7. Nintendo 3DS 2015 Motherboard Replacement, Lower Case: Schritt 7, Bild 1 von 3 Nintendo 3DS 2015 Motherboard Replacement, Lower Case: Schritt 7, Bild 2 von 3 Nintendo 3DS 2015 Motherboard Replacement, Lower Case: Schritt 7, Bild 3 von 3
    In diesem Schritt verwendetes Werkzeug:
    Tweezers
    $4.99
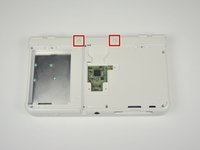
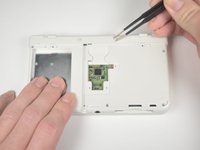
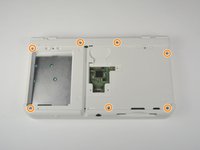
    • Reorient the device so that the game slot now faces you.

    • Remove the two rubber bumpers along the top of the device using tweezers.

    • Unscrew the seven 6mm Phillips #00 screws along the top and bottom of the 3DS.

  8. Nintendo 3DS 2015 Motherboard Replacement: Schritt 8, Bild 1 von 2 Nintendo 3DS 2015 Motherboard Replacement: Schritt 8, Bild 2 von 2
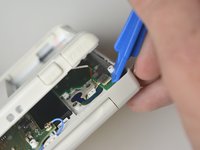
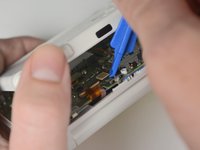
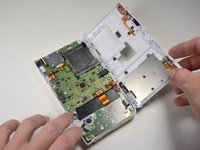
    • Lift the top edge of the lower case slightly off on the 3DS.

    • Don't pull the lower casing completely off, you may break those connections. There are ribbon cables that must be disconnected first.

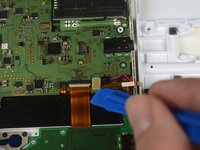
    • Pry the ribbon cable socket under the right trigger using a plastic opening tool.

    • Pry the ribbon cable socket under the infrared receiver cover using a plastic opening tool.

  9. Nintendo 3DS 2015 Motherboard Replacement: Schritt 9, Bild 1 von 3 Nintendo 3DS 2015 Motherboard Replacement: Schritt 9, Bild 2 von 3 Nintendo 3DS 2015 Motherboard Replacement: Schritt 9, Bild 3 von 3
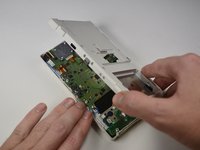
    • Open the device slowly from its top edge. Be careful not to tug the ribbon cable connected near the bottom edge of the device.

    • Pry the last ribbon cable attached to the lower case using a plastic opening tool.

  10. Nintendo 3DS 2015 Motherboard Replacement, Circle Pad: Schritt 10, Bild 1 von 3 Nintendo 3DS 2015 Motherboard Replacement, Circle Pad: Schritt 10, Bild 2 von 3 Nintendo 3DS 2015 Motherboard Replacement, Circle Pad: Schritt 10, Bild 3 von 3
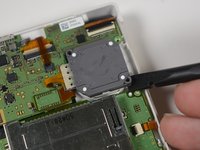
    • Locate the joystick assembly near the top right corner of the motherboard.

    • Remove the two 8mm Phillips #00 screws from the back of the joystick.

    • Use the flat end of the spudger to pry off the joystick pad from its plastic housing.

  11. Nintendo 3DS 2015 Motherboard Replacement: Schritt 11, Bild 1 von 2 Nintendo 3DS 2015 Motherboard Replacement: Schritt 11, Bild 2 von 2
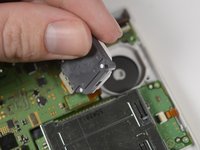
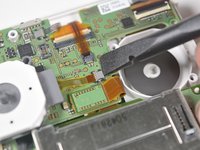
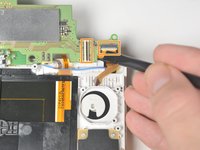
    • Lift the joystick pad and place it on its back. This will reveal the ribbon cable connected to the joystick pad.

    • Use the flat end of the spudger to pry up the retaining flap for the ribbon cable.

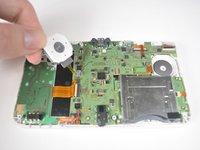
    • Lift the joystick out of the device.

  12. Nintendo 3DS 2015 Motherboard Replacement, Motherboard: Schritt 12, Bild 1 von 3 Nintendo 3DS 2015 Motherboard Replacement, Motherboard: Schritt 12, Bild 2 von 3 Nintendo 3DS 2015 Motherboard Replacement, Motherboard: Schritt 12, Bild 3 von 3
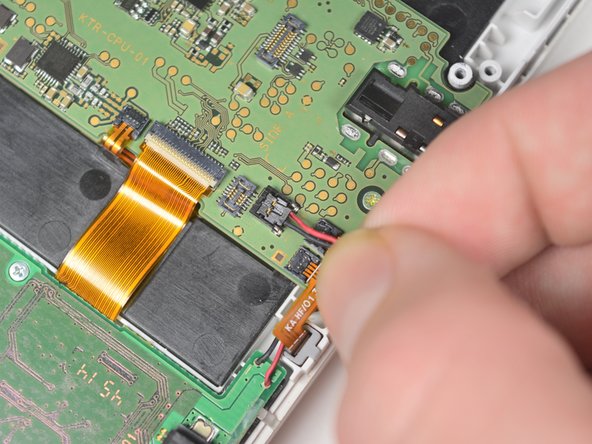
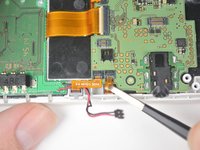
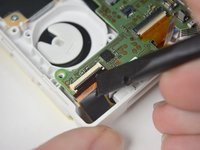
    • Remove the power cable, indicated by the black and red wires, by gently pulling it up and out of the connector.

    • Gently pull the ribbon cables out of the 4 ZIF connectors.

    • Do not lift up on the tabs on these ZIF connectors. Lifting these tabs will break the connectors.

    is this possible to fix these connectors once they are “broken” ?

    Nefeh Aiden - Antwort

    Another bump, but I am also wondering if it is possible to fix these ZIF connectors.

    Ilija Manojlovic - Antwort

  13. Nintendo 3DS 2015 Motherboard Replacement: Schritt 13, Bild 1 von 2 Nintendo 3DS 2015 Motherboard Replacement: Schritt 13, Bild 2 von 2
    In diesem Schritt verwendetes Werkzeug:
    Tweezers
    $4.99
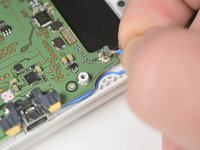
    • Pull up gently on the blue wifi antenna.

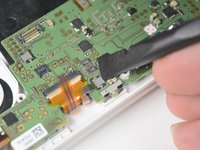
    • Pry the retaining tab on the connector behind the infrared receiver and gently pull the ribbon cable from the connector with tweezers.

  14. Nintendo 3DS 2015 Motherboard Replacement: Schritt 14, Bild 1 von 3 Nintendo 3DS 2015 Motherboard Replacement: Schritt 14, Bild 2 von 3 Nintendo 3DS 2015 Motherboard Replacement: Schritt 14, Bild 3 von 3
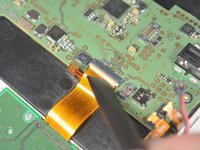
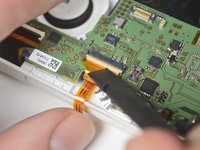
    • Lift the retaining tab and remove the large ribbon cable on the left side of the motherboard.

    • Lift the retaining tab and remove the large ribbon cable on the top of the motherboard behind the infrared receiver.

    • Lift the retaining tab and remove the large ribbon cable on the top of the motherboard just above the joysitck housing.

  15. Nintendo 3DS 2015 Motherboard Replacement: Schritt 15, Bild 1 von 3 Nintendo 3DS 2015 Motherboard Replacement: Schritt 15, Bild 2 von 3 Nintendo 3DS 2015 Motherboard Replacement: Schritt 15, Bild 3 von 3
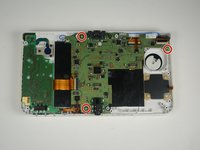
    • Double check that all motherboard connection on the top of the board have been disconnected.

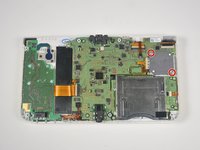
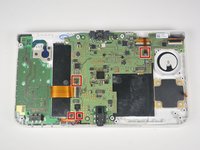
    • Remove the three, 3mm Phillips #00 screws that secure the motherboard to the device housing.

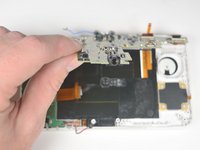
    • Lift the motherboard gently by the headphone jack.

    • Remove the two ribbons on the back of the device by lifting the retaining tabs on the ZIF connectors.

    Far right screw was already missing. It appears this occurred in the demonstration unit as well, based on the image for step 12.

    Kyle Dumouchelle - Antwort

    it's not missing ^^ it is an error by the writer or the article. this screw is actually matching with one of the outer casing

    Nefeh Aiden -

    Is this motherboard the same as the xl?

    Isak Ahlgren-McCune - Antwort

    Wondering this as well. Can’t seem to find a replacement board.

    Joseph -

Abschluss

To reassemble your device, follow these instructions in reverse order.

6 weitere Personen haben diese Anleitung absolviert.

Tyler Starr

Mitglied seit: 10/06/16

1.660 Reputation

7 Anleitungen geschrieben

Team

Cal Poly, Team 4-6, Livingston Fall 2016 Mitglied von Cal Poly, Team 4-6, Livingston Fall 2016

CPSU-LIVINGSTON-F16S4G6

4 Mitglieder

35 Anleitungen geschrieben

Ein Kommentar

Step #15 is incorrect. There are only two motherboard screws. The third screw circled, the right side of the console, is a passthrough for the rear housing screws.
Killy728 - Antwort

Kommentar hinzufügen

Seitenaufrufe:

Letzte 24 Stunden: 5

Letzte 7 Tage: 57

Letzte 30 Tage: 245

Insgesamt: 9,890