
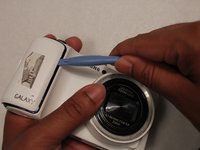
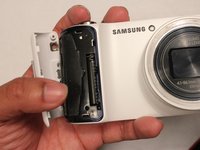
Samsung Galaxy Camera Lens and Motherboard Replacement
Was du brauchst


-
-
-
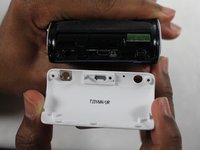
Unscrew the motherboard's screws. There are 4 3/32" screws and 3 5/32" screws.
-
-
-
Unscrew the lens' screws. There are 1 black 4/32" screw, 3 3/16" black screws, and 2 white 5/32" screws.
-


To reassemble your device, follow these instructions in reverse order.
To reassemble your device, follow these instructions in reverse order.
Rückgängig: Ich habe diese Anleitung nicht absolviert.
10 weitere Personen haben diese Anleitung absolviert.
Team

USF Tampa, Team 1-3, Sullivan Winter 2015 Mitglied von USF Tampa, Team 1-3, Sullivan Winter 2015
USFT-SULLIVAN-W15S1G3
3 Mitglieder
4 Anleitungen geschrieben