
Samsung UBD-M8500 Optical Drive Replacement

Einleitung
Zu Schritt 1 der AnleitungIf you find yourself needing to replace the disc drive in your Samsung UBD-M8500, this guide will walk you through the process step by step. The disc drive is a critical component responsible for reading and playing your favorite DVDs and Blu-rays, and if it's malfunctioning, a replacement might be necessary. To perform this task, you'll need a few tools, including a plastic opening tool and a Phillips #0 screwdriver head.
Before you begin, ensure you have a suitable replacement disc drive compatible with the Samsung UBD-M8500 model. Once you have the necessary tools and replacement part, follow these straightforward steps to successfully replace the disc drive.
Was du brauchst
Werkzeuge

-
-
On the back of the device, remove the three 8.1 mm screws with a Phillips #1 screwdriver.
-
-
-
From the back lift the case of the device upwards then forward, releasing the clips from the front.
-
-
-
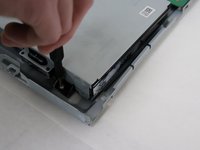
Using two fingers in a pinching motion, release the wire from the clip that is attached to the outer shell and disconnect it.
-
-
-
-
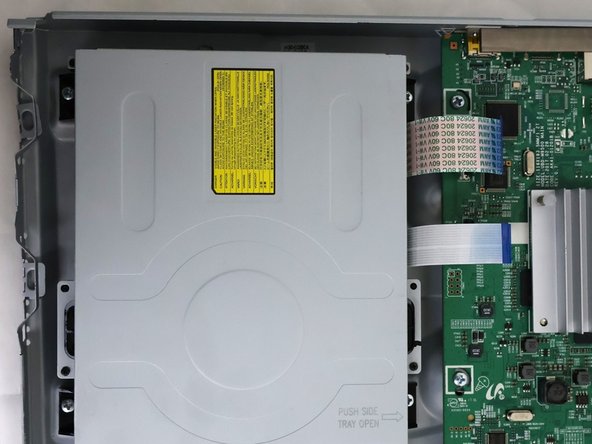
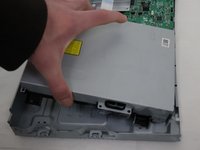
The disc drive is located to the right of the unit, it will be a large metallic rectangular box.
-
-
-
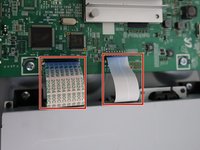
There are two blue ribbon cables located just to the right of the optical drive. Remove the cables by unhooking the thin clip on the motherboard and then pulling them gently from their sockets.
-
-
-
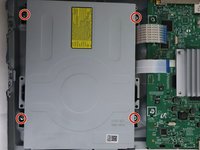
Use a Phillips #1 screwdriver to remove the four screws securing the optical drive.
-


To reassemble your device, follow these instructions in reverse order.
To reassemble your device, follow these instructions in reverse order.

Team

University of North Texas, Team 6-3, Kilpatrick Fall 2023 Mitglied von University of North Texas, Team 6-3, Kilpatrick Fall 2023
UNT-KILPATRICK-F23S6G3
5 Mitglieder
6 Anleitungen geschrieben