
Sony Cyber-shot DSC-H200 Motherboard Replacement

Einleitung
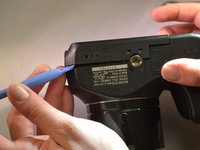
Zu Schritt 1 der AnleitungTo replace the motherboard correctly, users must get to the motherboard by first removing the LCD screen and metal plate behind it. To begin, please refer to the LCD Screen prerequisite guide to find the proper steps for the LCD removal process.
Was du brauchst


-
-
Using a screwdriver, remove the five 6mm screws located on the back panel.
-
Using a screwdriver, remove the two 3mm screws located on the back panel.
-
-
-
Using a screwdriver, remove one 6mm screw on the front panel.
-
Using a screwdriver, remove two 3mm screws on the front panel.
-
-
-
Open the SD Door, unscrew and remove the single 6mm screw closest to "PUSH IN/OUT" under the SD card slot.
-
-
-
-
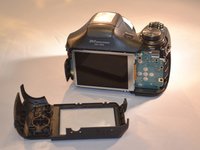
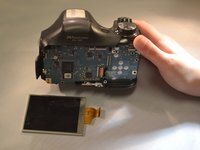
Using a screwdriver, remove the three 4mm screws that attach the LCD to the camera motherboard. (The LCD is contained in a holding plate, attached to the motherboard with a ribbon cable.)
-
-
-
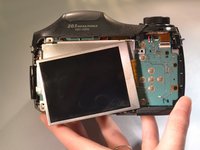
Using a screwdriver, remove the single 4mm screw at the bottom of the holding plate.
-
-
In diesem Schritt verwendetes Werkzeug:Tweezers$4.99
-
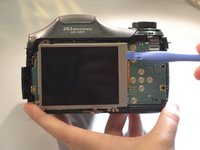
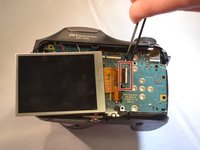
Using tweezers, open the LCD ribbon port by lifting the black hinge. (The LCD ribbon cable will detach.)
-
-
In diesem Schritt verwendetes Werkzeug:Tweezers$4.99
-
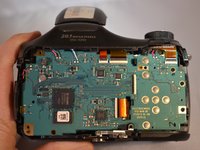
Disconnect the four amber-colored ribbon cables from the motherboard using tweezers.
-


To reassemble your device, follow these instructions in reverse order.
To reassemble your device, follow these instructions in reverse order.
Rückgängig: Ich habe diese Anleitung nicht absolviert.
3 weitere Personen haben diese Anleitung absolviert.

Team

Eastern Washington University, Team 2-3, Matresse Spring 2015 Mitglied von Eastern Washington University, Team 2-3, Matresse Spring 2015
EWU-MATRESSE-S15S2G3
4 Mitglieder
10 Anleitungen geschrieben