
Sony Cyber-shot DSC-P100 Front Casing Replacement
5 Minuten
Mittel
Falsche Werkzeuge
Benötigt Bessere Bilder
Einleitung
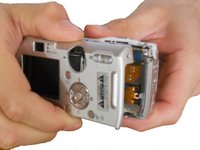
Zu Schritt 1 der AnleitungThis is a step by step guide to uninstalling the front casing of the camera.
Was du brauchst


Fast fertig!
To reassemble your device, follow these instructions in reverse order.
Abschluss
To reassemble your device, follow these instructions in reverse order.
Team

Clemson, Team 1-5, Benson Spring 2012 Mitglied von Clemson, Team 1-5, Benson Spring 2012
CLEM-BENSON-S12S1G5
4 Mitglieder
14 Anleitungen geschrieben