Zum Hauptinhalt wechseln
Sony DSC-RX100MA Screen Replacement

Sony DSC-RX100MA Screen Replacement

KC Egger

KC Egger und 4 weitere Mitwirkende

Zuletzt aktualisiert am February 8, 2021

20 Minuten
Mittel
Empfohlene Anleitung von Studierenden

If your camera's screen isn't working properly, you may need to replace it. Follow this guide to do so!

Was du brauchst

Werkzeuge

  1. Sony DSC-RX100MA Screen Replacement, Back Cover: Schritt 1, Bild 1 von 3 Sony DSC-RX100MA Screen Replacement, Back Cover: Schritt 1, Bild 2 von 3 Sony DSC-RX100MA Screen Replacement, Back Cover: Schritt 1, Bild 3 von 3
    • Remove battery by sliding the tab to open the cover

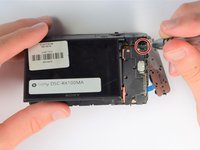
  2. Sony DSC-RX100MA Screen Replacement: Schritt 2, Bild 1 von 3 Sony DSC-RX100MA Screen Replacement: Schritt 2, Bild 2 von 3 Sony DSC-RX100MA Screen Replacement: Schritt 2, Bild 3 von 3
    • Using the screwdriver, remove all screws (black 2.5mm) from outermost layer of the assembly.

    • All screws in the camera can be removed with the PH 0 driver head.

    Split this step up into multiple steps based on where screws are being removed from or specify how many screws are removed in this step

    Alberto Rodriguez - Antwort

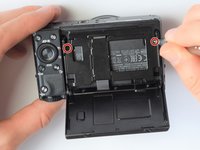
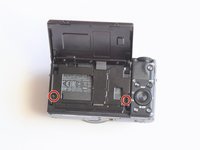
  3. Sony DSC-RX100MA Screen Replacement: Schritt 3, Bild 1 von 3 Sony DSC-RX100MA Screen Replacement: Schritt 3, Bild 2 von 3 Sony DSC-RX100MA Screen Replacement: Schritt 3, Bild 3 von 3
    • Also using the screwdriver, remove screws (black 1mm) underneath articulated LCD screen.

    • Remove the marked 2.5 mm screws with the screwdriver

    2 different types of screws are removed in this step: specify the types

    Alberto Rodriguez - Antwort

    It is not necessary to remove the hinge screws. It is much easier to remove the back panel with the LCD still attached and not flopping about everywhere.

    cheez - Antwort

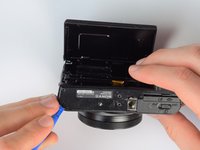
  4. Sony DSC-RX100MA Screen Replacement: Schritt 4, Bild 1 von 2 Sony DSC-RX100MA Screen Replacement: Schritt 4, Bild 2 von 2
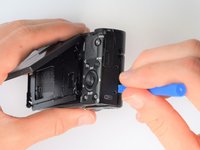
    • Using the plastic opening tools, carefully pry off the bottom plate.

    • Do not pull too hard as you may break the plastic casing.

  5. Sony DSC-RX100MA Screen Replacement: Schritt 5, Bild 1 von 3 Sony DSC-RX100MA Screen Replacement: Schritt 5, Bild 2 von 3 Sony DSC-RX100MA Screen Replacement: Schritt 5, Bild 3 von 3
    • Using the same plastic opening tools, separate the screen and back assembly from the front portion of the camera

    • Once the back assembly is slightly detached, pull the media covers for the HDMI and Multimedia ports

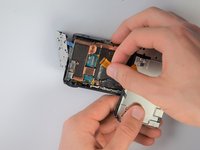
  6. Sony DSC-RX100MA Screen Replacement: Schritt 6, Bild 1 von 2 Sony DSC-RX100MA Screen Replacement: Schritt 6, Bild 2 von 2
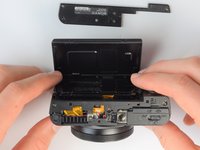
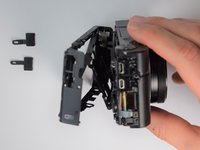
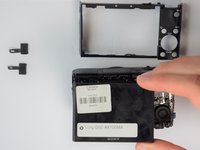
    • Remove the back cover

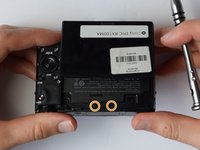
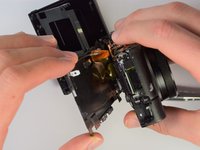
  7. Sony DSC-RX100MA Screen Replacement, Screen: Schritt 7, Bild 1 von 3 Sony DSC-RX100MA Screen Replacement, Screen: Schritt 7, Bild 2 von 3 Sony DSC-RX100MA Screen Replacement, Screen: Schritt 7, Bild 3 von 3
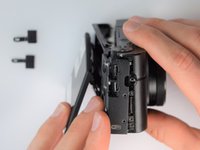
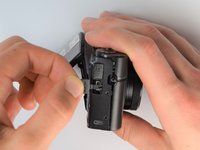
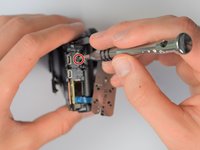
    • Move side panel to get access to screws

    • Remove two screws (black 2.5mm) with PH #0 screwdriver

    In the second picture of the side, it is not the upper screw by the USB that needs removing, but the lower one by the SD/battery door

    James Robinson - Antwort

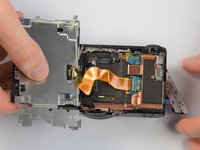
  8. Sony DSC-RX100MA Screen Replacement: Schritt 8, Bild 1 von 2 Sony DSC-RX100MA Screen Replacement: Schritt 8, Bild 2 von 2
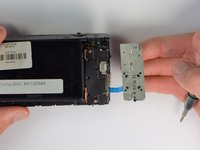
    • Remove back panel assembly while still keeping ribbon cable attached

    • Be very gentle and care not to tear the gold ribbon cable. This will be a common theme throughout these replacement guides.

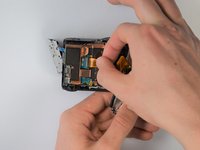
  9. Sony DSC-RX100MA Screen Replacement: Schritt 9, Bild 1 von 2 Sony DSC-RX100MA Screen Replacement: Schritt 9, Bild 2 von 2
    • Carefully unplug ribbon connector to fully detach LCD screen assembly from camera

    It is worth saying that the grey line on the left-hand edge of the flex connector flips up to release the flex.

    And Rew - Antwort

Abschluss

To reassemble your device, follow these instructions in reverse order.

2 weitere Personen haben diese Anleitung absolviert.

KC Egger

Mitglied seit: 02/10/17

294 Reputation

2 Anleitungen geschrieben

Team

Cal Poly, Team 21-1, Maness Winter 2017 Mitglied von Cal Poly, Team 21-1, Maness Winter 2017

CPSU-MANESS-W17S21G1

5 Mitglieder

10 Anleitungen geschrieben

4 Kommentare zur Anleitung

Any idea where I can get a set or replacement screws? one came out of my LCD joint and I can’t find replacements anywhere online. I’ve even tried Ebay.

Alberto Lora - Antwort

Definately be careful with the gold ribbon cable, looked at mine funny and it just snapped in two.. waiting on a replacement now :(

Connor Quinn - Antwort

I’ve ripped 2 of these before - not fun! Still… cheap enough to buy but delivery took a couple of weeks.

I had a cracked screen so had to take this out to replace as well - problem i’ve had is that although i stuck it down really well (with 3M 1mm double-sided tape, it doesn’t hold great and so the screen has risen a bit and doesn’t sit flush.

Just in the process now of sticking it down again but with a touch of superglue as i need it to hold down a bit better - that should hopefully be me done then :)

Great guide by the way KC Egger - thanks for taking the time to put this together - it’s been a life saver for me!

Jamie Dunkley - Antwort

Where did you purchase your screen, I’ve been trying to find one from Sony parts dealers and can’t find it. Any links would be helpful, thanks.

Ian Cullen -

Kommentar hinzufügen

Seitenaufrufe:

Letzte 24 Stunden: 4

Letzte 7 Tage: 20

Letzte 30 Tage: 83

Insgesamt: 5,107