
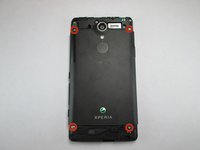
Sony Xperia TL Battery Harness Replacement
Einleitung
Zu Schritt 1 der AnleitungIt is one of the easier components to reach and replace. I will teach you how to remove it if it needs to be replaced.
Was du brauchst


-
-
Use the plastic opening tool to pry the top plastic section off.
-
-
-
Use the plastic opening tool to pry the bottom plastic section off.
-
-
-
Remove the four 5mm screws.
-
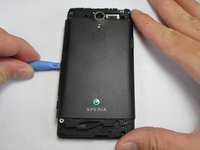
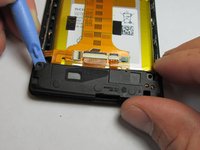
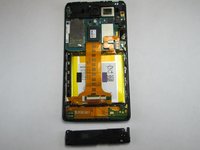
Use the plastic opening tool to pry off the back.
-
-
-
-
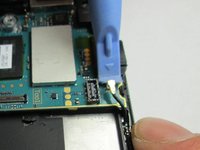
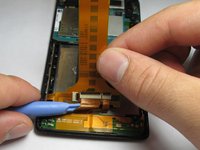
Use the plastic opening tool to unlatch the cord's ends off the motherboard and loud speaker module. The cord can be located on the right side of the phone.
-
-
-
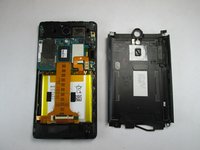
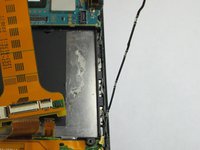
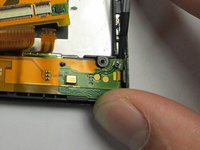
Unhook the 2 connections between the harness and phone shell.
-
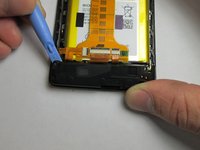
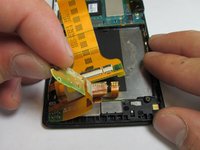
Using the plastic opening tool, pry the harness up and remove it.
-


To reassemble your device, follow these instructions in reverse order.
To reassemble your device, follow these instructions in reverse order.
Rückgängig: Ich habe diese Anleitung nicht absolviert.
Eine weitere Person hat diese Anleitung absolviert.
Team

USF Tampa, Team 4-4, Brown Fall 2014 Mitglied von USF Tampa, Team 4-4, Brown Fall 2014
USFT-BROWN-F14S4G4
3 Mitglieder
10 Anleitungen geschrieben