
Teenage Engineering OP-1 Connector Board Replacement

Einleitung
Zu Schritt 1 der AnleitungUse this guide to replace the Connector Board of the OP-1, including the microphone, the line-in / line-out connectors and the USB port.
Was du brauchst
Ersatzteile

Werkzeuge


Mehr anzeigen …
-
-
Open the back panel by using a Jimmy on the side of the panel. Be careful not to damage the OP-1 coating.
-
Lift the back panel and remove it. The Connector Board is revealed.
-
-
-
-
Disconnect the flex connector by lifting it up with a spudger.
-
Remove the three Phillips screws. Do not lose the washer at the bottom screw.
-
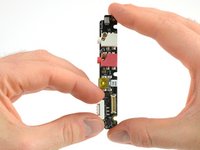
Take out the connector board.
-
-
-
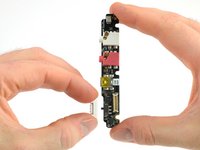
Don't forget the cover for the on/off switch.
-
Simply take it off from the old board and transfer it to the new board.
-


To reassemble your device, follow these instructions in reverse order.
To reassemble your device, follow these instructions in reverse order.
Rückgängig: Ich habe diese Anleitung nicht absolviert.
46 weitere Personen haben diese Anleitung absolviert.

Team

Teenage Engineering Mitglied von Teenage Engineering
Community
3 Mitglieder
7 Anleitungen geschrieben
44 Kommentare
Veeery useful , thank you !
Even with the Jimmy I can't seem to get the back panel off... a video would be helpful :)
Got the back panel off finally but my connector board won't come out.
Ok... finally got the connector board out. It took a bit of gentle prying using a very small thin screw driver bit on each side of the connector board. Once I had the right side popped up a bit I was able to push on the input output jacks from the outside to get clearance. Removing the connector board and putting it back in resolved the power switch issues I was experiencing. No new connector board needed! :)
Im so glad I was reading these comments. I had an OP1 with failing power as well, every bit more tougher touch would turn it off and on, or sometimes would have problems starting up.
I took it apart to see if something was bothering, and taking off the white power switch actually solved it haha.
Good I didnt order it yet!
J-J -