
Toilet Tree TTP-TRIM-1 Power button Replacement
Einleitung
Zu Schritt 1 der AnleitungThe following guide steps through the process of removing the power button and its components for replacement.
Was du brauchst
Ersatzteile
Werkzeuge


Mehr anzeigen …
-
-
Twist the battery cap found on the bottom of the device counterclockwise.
-
-
-
-
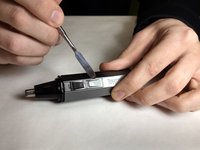
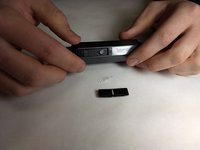
Using the metal spudger, wedge underneath the button and gently pry it out.
-
Note orientation of the switch, so that it can be replaced properly.
-
-
-
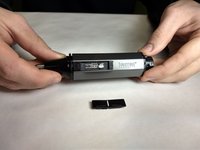
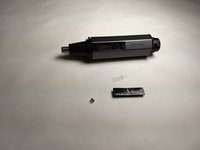
Underneath the button lies two small components. We will reference them as the o-ring assembly and clear tab. Take note of their orientation.
-
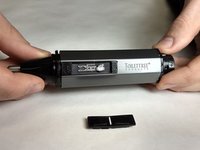
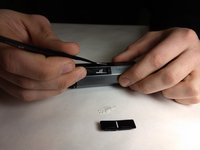
Continue disassembly by prying the clear tab upwards.
-
-
In diesem Schritt verwendetes Werkzeug:Tweezers$4.99
-
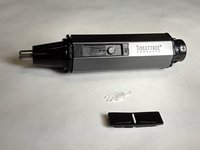
Using the tweezers, take the o-ring switch assembly out of the trimmer.
-


To reassemble your device, follow these instructions in reverse order.
To reassemble your device, follow these instructions in reverse order.
Team

IUPUI, Team S1-G5, Harley Fall 2017 Mitglied von IUPUI, Team S1-G5, Harley Fall 2017
IUPUI-HARLEY-F17S1G5
4 Mitglieder
6 Anleitungen geschrieben