Zum Hauptinhalt wechseln

Samsung Galaxy S8+のバックガラスの交換

Hinweis: Du bearbeitest eine grundständige Anleitung. Alle Änderungen, die du vornimmst, betreffen alle 5 Anleitungen, die diese beinhalten.

Englisch
Japanisch
Schritt 6
Samsung Galaxy S8+ Back Glass Replacement: Schritt 0, Bild 1 von 2 Samsung Galaxy S8+ Back Glass Replacement: Schritt 0, Bild 2 von 2
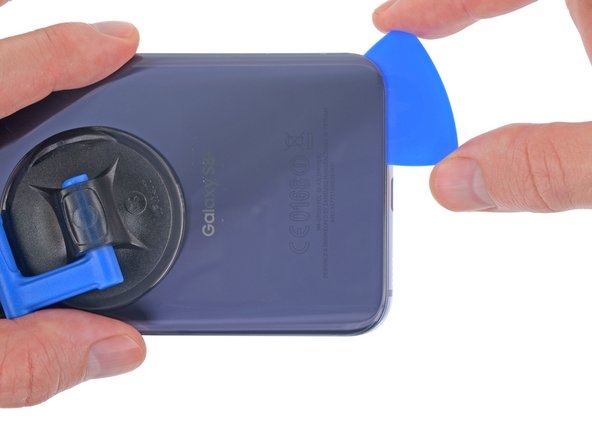
  • Continue slicing through the adhesive along the bottom edge of the phone.

  • Re-heat the back cover as needed to prevent the glue from cooling and hardening.

  • The glued area is larger here, so you'll need to insert your pick farther into the phone to fully separate it.

  • Again, it may help to leave the opening pick in place and grab another one for the following step.

続けてデバイス下側の端に沿って接着剤を切断しながらスライドします。

接着剤が冷却されて固まってきたら、必要に応じてバックカバーを再度温めてください。

この位置に付けられた接着剤の範囲は広いため、接着剤を完全に切断するには開口ピックを奥まで差し込まなければなりません。

ここでも、作業を止めた位置に開口ピックを残して、3枚目の開口ピックを準備してください。

Deine Beiträge sind lizenziert unter der Open-Source Creative Commons Lizenz.