
Acer Chromebook 14 CB3-431-C3WS Battery Replacement

Einleitung
Zu Schritt 1 der AnleitungIf your Acer Chromebook 14 CB3-431-C3WS does not turn on when the power button is pushed, doesn’t remain charged or usable unless connected to an external power source you may need to replace the battery.
Try following this troubleshooting guide before attempting to replace the battery to see if you can find an easier solution.
Before beginning, make sure that your laptop is completely turned off, and disconnected from any external power sources.
Was du brauchst
Ersatzteile

Werkzeuge


Mehr anzeigen …
-
-
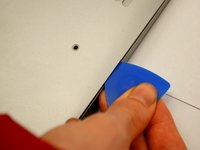
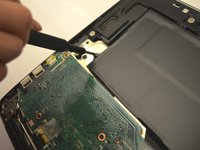
Insert an opening pick between the back panel and the sides of the computer to begin lifting the back off.
-
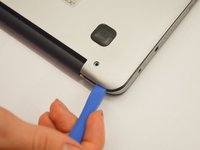
After the sides have been lifted, use the opening tool to finish opening the back cover.
-
-
-
-
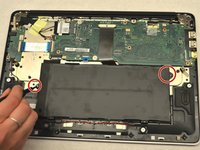
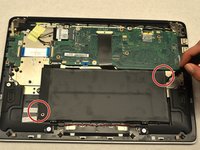
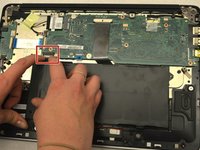
Remove the two JIS #0 screws that connect the battery to the rest of the laptop.
-
-
-
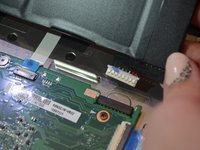
Pull the white tab connected to the battery out of the black tab that connects to the motherboard.
-


To reassemble your device, follow these instructions in reverse order.
To reassemble your device, follow these instructions in reverse order.
Rückgängig: Ich habe diese Anleitung nicht absolviert.
8 weitere Personen haben diese Anleitung absolviert.

Team

Grand Valley State University, Team S1-G3, DeVasto Fall 2019 Mitglied von Grand Valley State University, Team S1-G3, DeVasto Fall 2019
GVSU-DEVASTO-F19S1G3
5 Mitglieder
6 Anleitungen geschrieben
3 Kommentare
Bonjour vous vendez les batteries CB3-431
Vous vendez les batteries CB3-431
Instructions were great. Battery installation complete! I was very glad to find step by step instructions instead of a video. The Chromebook powered up successfully. Now waiting for it to charge. Thank you!