Zum Hauptinhalt wechseln
Acer Chromebook C720-2827 LED PCB Replacement

Acer Chromebook C720-2827 LED PCB Replacement

Sarah Westberg

Sarah Westberg und eine weitere beteiligte Person

Zuletzt aktualisiert am May 20, 2019

15 Minuten
Mittel

This guide will show you how to replace you Acer Chromebook C720-2827 LED PCB. The LED PCB is the printed control board controlling the two status LEDs (light emitting diode) on the bottom right edge of the laptop. Replace it if these two LEDs cease lighting up while the device is charging.

Was du brauchst

Werkzeuge

  • iFixit Opening Tool
    iFixit Opening Tool
  • Phillips #1 Screwdriver
    Phillips #1 Screwdriver
  • Spudger
    Spudger

Mehr anzeigen …

  1. Acer Chromebook C720-2827 LED PCB Replacement, Back Panel Assembly: Schritt 1, Bild 1 von 2 Acer Chromebook C720-2827 LED PCB Replacement, Back Panel Assembly: Schritt 1, Bild 2 von 2
    • Remove the thirteen 6.0mm screws on the back panel using your Phillips #1 screwdriver.

  2. Acer Chromebook C720-2827 LED PCB Replacement: Schritt 2, Bild 1 von 2 Acer Chromebook C720-2827 LED PCB Replacement: Schritt 2, Bild 2 von 2
    • Pry the back panel open with the plastic opening tool.

  3. Acer Chromebook C720-2827 LED PCB Replacement, Battery: Schritt 3, Bild 1 von 1
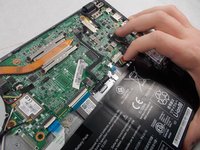
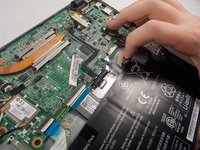
    • Remove the two 6.0mm screws securing the battery with your Phillips #1 screwdriver.

  4. Acer Chromebook C720-2827 LED PCB Replacement: Schritt 4, Bild 1 von 2 Acer Chromebook C720-2827 LED PCB Replacement: Schritt 4, Bild 2 von 2
    • Carefully pull out the battery wire connected to the battery port.

  5. Acer Chromebook C720-2827 LED PCB Replacement: Schritt 5, Bild 1 von 1
    • Slowly lift the battery to remove it from the Chromebook.

  6. Acer Chromebook C720-2827 LED PCB Replacement, LED PCB: Schritt 6, Bild 1 von 3 Acer Chromebook C720-2827 LED PCB Replacement, LED PCB: Schritt 6, Bild 2 von 3 Acer Chromebook C720-2827 LED PCB Replacement, LED PCB: Schritt 6, Bild 3 von 3
    • Use the Phillips #1 screwdriver to remove the two 3.1mm screws from the LED PCB.

    • Lift the LED PCB up with your fingers and flip it over revealing the ZIF connector.

    • The LED PCB is still tethered to the daughterboard via a ribbon cable so be sure not to yank it out or it could cause damage to the cable or its connectors.

  7. Acer Chromebook C720-2827 LED PCB Replacement: Schritt 7, Bild 1 von 3 Acer Chromebook C720-2827 LED PCB Replacement: Schritt 7, Bild 2 von 3 Acer Chromebook C720-2827 LED PCB Replacement: Schritt 7, Bild 3 von 3
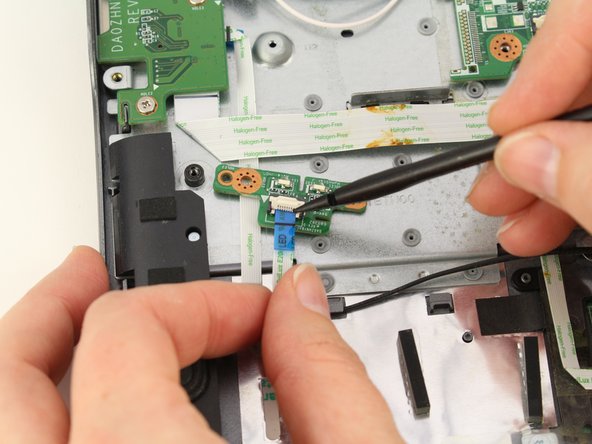
    • Set the LED PCB down and use your spudger to flip up the white bar of the ZIF connector.

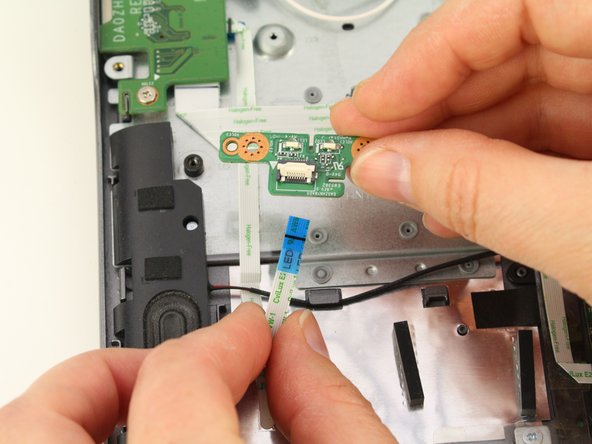
    • Pull the ribbon cable out with your fingers.

Abschluss

To reassemble your device, follow these instructions in reverse order.

Sarah Westberg

Mitglied seit: 03/11/19

29.639 Reputation

71 Anleitungen geschrieben

Team

iFixit Mitglied von iFixit

Staff

118 Mitglieder

19.548 Anleitungen geschrieben

0 Kommentare

Kommentar hinzufügen

Seitenaufrufe:

Letzte 24 Stunden: 0

Letzte 7 Tage: 0

Letzte 30 Tage: 2

Insgesamt: 259