
Canon Powershot A610 Speaker Replacement
Einleitung
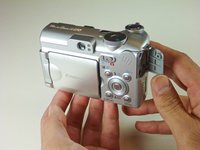
Zu Schritt 1 der AnleitungThis guide will help you remove and replace your Canon Powershot A610 speaker, bringing back the ability for your camera to use the Sound Memo Function and shutter effects again as long as that was the only underlying issue.
Before beginning this repair, power off the camera, disconnect from the power adapter, and remove the battery.
This repair requires soldering so if you're not experienced, ask for assistance and take a look at the How to Solder and Desolder Connections for more information.
Was du brauchst
Werkzeuge


Mehr anzeigen …
-
-
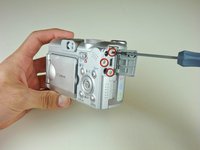
Remove the three screws attaching the side panel using a Phillips #00 screwdriver.
-
Remove the side paneling from the camera.
-
Remove the two remaining screws attached to the frame of the camera.
-
-
-
Open the battery cover.
-
Remove the four screws inside.
-
Close the battery cover.
-
-
-
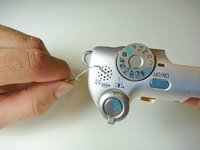
Open the "DIGITAL AV OUT" door on the camera.
-
Remove the three screws.
-
Remove the door from the camera.
-
-
-
-
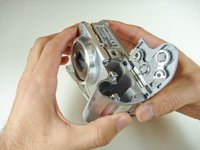
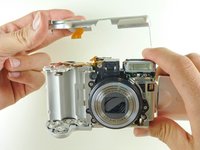
Gripping the sides of the top cover, gently pull apart the top cover from the camera.
-
-
-
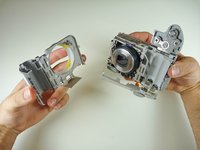
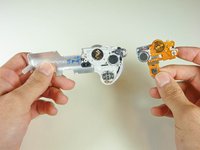
Using an opening tool, push the black attachment away from the white connection piece to detach the connector ribbon.
-
-
-
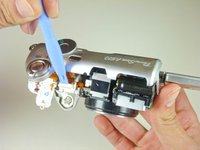
Use an unfolded paper clip to push the speaker from the top of the casing out towards the bottom.
-
Use a bit of force as the speaker is glued into the top casing.
-


To reassemble your device, follow these instructions in reverse order.
To reassemble your device, follow these instructions in reverse order.
Team

Cal Poly, Team 11-26, Maness Winter 2011 Mitglied von Cal Poly, Team 11-26, Maness Winter 2011
CPSU-MANESS-W11S11G26
3 Mitglieder
9 Anleitungen geschrieben