Dell Inspiron 15-5548 Hard Drive Replacement
Einleitung
Zu Schritt 1 der AnleitungThis guide will be helpful for those who want to replace their hard drive.
Was du brauchst
Komplettpaket für die Reparatur
Diese Kits enthalten alle Ersatzteile und Werkzeuge, die für diese Anleitung benötigt werden.
Ersatzteile
Werkzeuge
Mehr anzeigen …
-
-
Look on the bottom of the computer. Locate the 2 screws. (Picture 1)
-
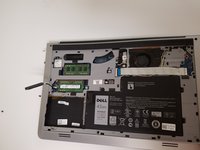
Using the Phillips 00 Screwdriver, unscrew both screws, and remove the bottom cover. The bottom cover can be hard to pull off, so you may need to pry it off with a pry tool.
-
-
-
-
Remove the 4 - M2.5 x 5mm screws.
-
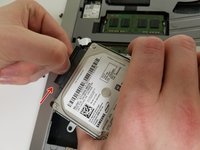
Using the tab, lift the Hard Drive out of the laptop. (picture 3)
-
-
-
After lifting the Hard Drive, unplug the Hard Drive connector.
-
Now the hard drive is ready to be replaced.
-
To reassemble your device, follow these instructions in reverse order.
To reassemble your device, follow these instructions in reverse order.
Rückgängig: Ich habe diese Anleitung nicht absolviert.
6 weitere Personen haben diese Anleitung absolviert.


