Zum Hauptinhalt wechseln

Dell Inspiron 5758 Heatsink and Fan Replacement

Was du brauchst

  1. Dell Inspiron 5758 Heatsink and Fan Replacement, Battery: Schritt 1, Bild 1 von 2 Dell Inspiron 5758 Heatsink and Fan Replacement, Battery: Schritt 1, Bild 2 von 2
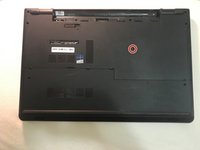
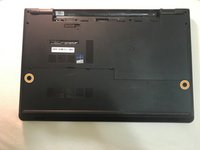
    • Flip the laptop with the serial number facing up. You should be able to see the battery release switch.

  2. Dell Inspiron 5758 Heatsink and Fan Replacement: Schritt 2, Bild 1 von 3 Dell Inspiron 5758 Heatsink and Fan Replacement: Schritt 2, Bild 2 von 3 Dell Inspiron 5758 Heatsink and Fan Replacement: Schritt 2, Bild 3 von 3
    • Slide the battery release switch towards the unlock icon.

    • You should hear a click.

    • Lift and pull the ejected battery to remove it.

  3. Dell Inspiron 5758 Heatsink and Fan Replacement, DC Jack: Schritt 3, Bild 1 von 3 Dell Inspiron 5758 Heatsink and Fan Replacement, DC Jack: Schritt 3, Bild 2 von 3 Dell Inspiron 5758 Heatsink and Fan Replacement, DC Jack: Schritt 3, Bild 3 von 3
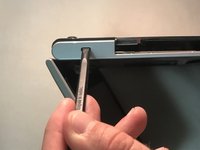
    • Remove the one 3mm optical drive screw.

    • Remove the two 8 mm screws.

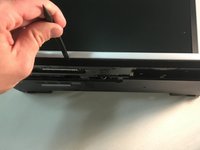
    • Pry up and remove the access door.

  4. Dell Inspiron 5758 Heatsink and Fan Replacement: Schritt 4, Bild 1 von 1
    • Remove the one 3 mm screw.

    • Remove the bracket.

  5. Dell Inspiron 5758 Heatsink and Fan Replacement: Schritt 5, Bild 1 von 2 Dell Inspiron 5758 Heatsink and Fan Replacement: Schritt 5, Bild 2 von 2
    • Unplug the antenna cables.

    • Remove the Wireless Card.

  6. Dell Inspiron 5758 Heatsink and Fan Replacement: Schritt 6, Bild 1 von 2 Dell Inspiron 5758 Heatsink and Fan Replacement: Schritt 6, Bild 2 von 2
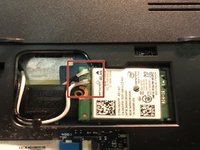
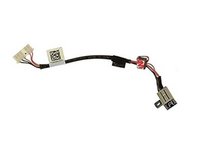
    • Unplug the hard drive cable.

    • Use a plastic opening tool or your fingernail to pop the tab of the cable connector. Then you will be able to disconnect the cable.

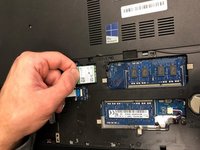
    • Remove the four 8 mm screws.

    • Remove the hard drive.

  7. Dell Inspiron 5758 Heatsink and Fan Replacement: Schritt 7, Bild 1 von 3 Dell Inspiron 5758 Heatsink and Fan Replacement: Schritt 7, Bild 2 von 3 Dell Inspiron 5758 Heatsink and Fan Replacement: Schritt 7, Bild 3 von 3
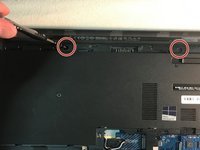
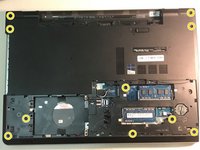
    • Remove the two 3 mm screws under the battery.

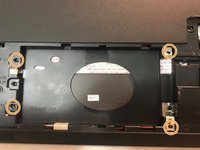
    • Remove the three 2 mm wafer screws under the optical drive.

    • Remove the ten 8 mm base screws.

  8. Dell Inspiron 5758 Heatsink and Fan Replacement: Schritt 8, Bild 1 von 1
    • Unplug the speaker cable by sliding to the right.

  9. Dell Inspiron 5758 Heatsink and Fan Replacement: Schritt 9, Bild 1 von 2 Dell Inspiron 5758 Heatsink and Fan Replacement: Schritt 9, Bild 2 von 2
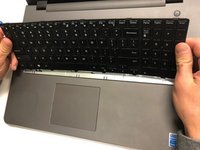
    • Press in the tabs to loosen the keyboard.

    • Carefully lift the keyboard up and turn it over.

  10. Dell Inspiron 5758 Heatsink and Fan Replacement: Schritt 10, Bild 1 von 1
    • Unplug the keyboard cable & remove the keyboard.

  11. Dell Inspiron 5758 Heatsink and Fan Replacement: Schritt 11, Bild 1 von 2 Dell Inspiron 5758 Heatsink and Fan Replacement: Schritt 11, Bild 2 von 2
    • Slide the DVD optical drive over & remove it from the laptop.

  12. Dell Inspiron 5758 Heatsink and Fan Replacement: Schritt 12, Bild 1 von 2 Dell Inspiron 5758 Heatsink and Fan Replacement: Schritt 12, Bild 2 von 2
    • Remove the four 5 mm screws.

    • Unplug the optical drive interposer cable.

  13. Dell Inspiron 5758 Heatsink and Fan Replacement: Schritt 13, Bild 1 von 2 Dell Inspiron 5758 Heatsink and Fan Replacement: Schritt 13, Bild 2 von 2
    • Unplug the power button cable.

    • Unplug the touchpad cable.

  14. Dell Inspiron 5758 Heatsink and Fan Replacement: Schritt 14, Bild 1 von 3 Dell Inspiron 5758 Heatsink and Fan Replacement: Schritt 14, Bild 2 von 3 Dell Inspiron 5758 Heatsink and Fan Replacement: Schritt 14, Bild 3 von 3
    • Carefully pry off & loosen the bottom base.

  15. Dell Inspiron 5758 Heatsink and Fan Replacement: Schritt 15, Bild 1 von 1
    • Remove the bottom base.

  16. Dell Inspiron 5758 Heatsink and Fan Replacement: Schritt 16, Bild 1 von 2 Dell Inspiron 5758 Heatsink and Fan Replacement: Schritt 16, Bild 2 von 2
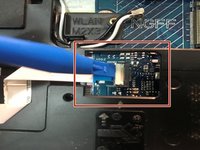
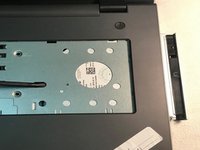
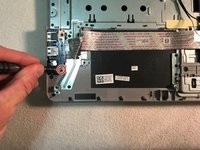
    • Remove the one 5mm screw.

    • Lift the circuit board & turn it over.
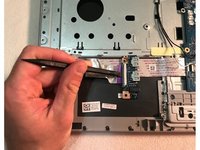
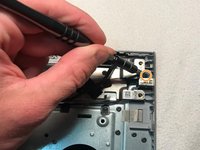
    • Unplug the cable.

    • Remove the audio/USB circuit board.

  17. Dell Inspiron 5758 Heatsink and Fan Replacement: Schritt 17, Bild 1 von 3 Dell Inspiron 5758 Heatsink and Fan Replacement: Schritt 17, Bild 2 von 3 Dell Inspiron 5758 Heatsink and Fan Replacement: Schritt 17, Bild 3 von 3
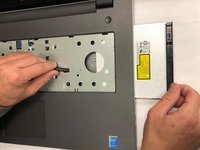
    • Loosen the audio / USB cable.

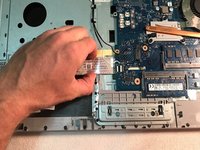
    • Remove the one 3mm motherboard screw.

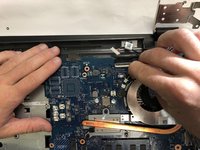
    • Lift the motherboard & carefully move it out of the way.

  18. Dell Inspiron 5758 Heatsink and Fan Replacement: Schritt 18, Bild 1 von 3 Dell Inspiron 5758 Heatsink and Fan Replacement: Schritt 18, Bild 2 von 3 Dell Inspiron 5758 Heatsink and Fan Replacement: Schritt 18, Bild 3 von 3
    • Unplug the DC jack cable.

    • Remove the one 3mm screw.

    • Remove the DC Jack.

  19. Dell Inspiron 5758 Heatsink and Fan Replacement, Heatsink and Fan: Schritt 19, Bild 1 von 1
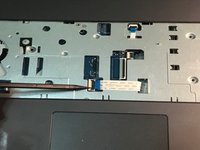
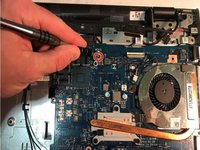
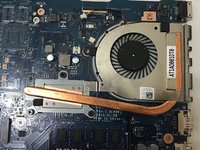
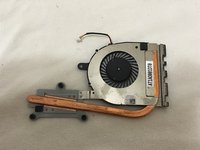
    • After removing the bottom base, you can access the heatsink and fan, which is attached to the motherboard.

  20. Dell Inspiron 5758 Heatsink and Fan Replacement: Schritt 20, Bild 1 von 3 Dell Inspiron 5758 Heatsink and Fan Replacement: Schritt 20, Bild 2 von 3 Dell Inspiron 5758 Heatsink and Fan Replacement: Schritt 20, Bild 3 von 3
    • Unplug the cable that connects the heatsink and fan to the motherboard.

  21. Dell Inspiron 5758 Heatsink and Fan Replacement: Schritt 21, Bild 1 von 2 Dell Inspiron 5758 Heatsink and Fan Replacement: Schritt 21, Bild 2 von 2
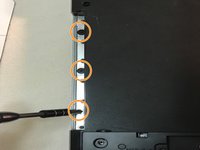
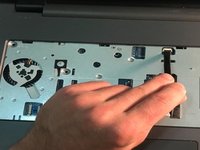
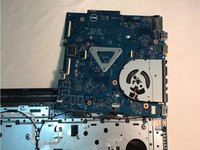
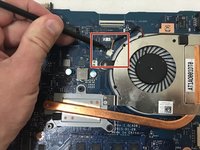
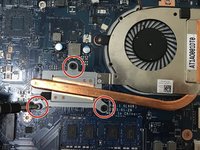
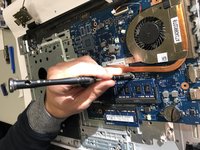
    • Loosen the three 5mm screws that connect the heatsink and fan to the motherboard.

    • The screws stay attached to the heatsink and fan. You cannot pull them out, only loosen them.

  22. Dell Inspiron 5758 Heatsink and Fan Replacement: Schritt 22, Bild 1 von 3 Dell Inspiron 5758 Heatsink and Fan Replacement: Schritt 22, Bild 2 von 3 Dell Inspiron 5758 Heatsink and Fan Replacement: Schritt 22, Bild 3 von 3
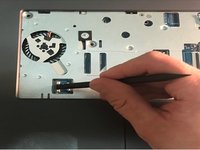
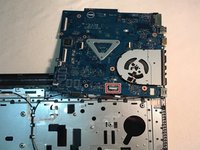
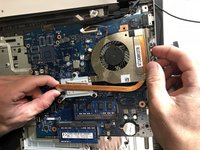
    • Remove the heatsink and fan from the motherboard. You can now clean or replace it as you see fit.

Abschluss

To reassemble your device, follow these instructions in reverse order.

Ein:e weitere:r Nutzer:in hat diese Anleitung absolviert.

Blase Martin

Mitglied seit: 09/18/18

401 Reputation

2 Anleitungen geschrieben

Team

0 Kommentare

Kommentar hinzufügen

Seitenaufrufe:

Letzte 24 Stunden: 0

Letzte 7 Tage: 0

Letzte 30 Tage: 0

Insgesamt: 579