Dell Latitude E6510 Hard Drive Replacement
Einleitung
Zu Schritt 1 der AnleitungFollow this guide in order to replace the hard drive to your Dell Latitude E6510.
Was du brauchst
Fix Kit
Dieses Kit enthält alle Ersatzteile und Werkzeuge, die für die Anleitung benötigt werden.

Ersatzteile

Werkzeuge


Mehr anzeigen …

-
-
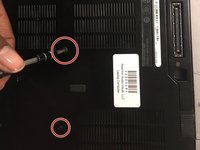
After removing the battery, unscrew the four 3 mm screws on the back plate using a Phillips #1 screwdriver.
-
-
-
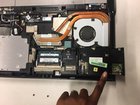
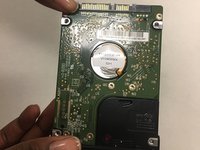
The hard drive should slide out of the laptop. However, if not, use a spudger to pry the hard drive out of the laptop.
-


To reassemble your device, follow these instructions in reverse order.
To reassemble your device, follow these instructions in reverse order.
Rückgängig: Ich habe diese Anleitung nicht absolviert.
Eine weitere Person hat diese Anleitung absolviert.
Rüste dich für deine nächste Reparatur
Alle in den Warenkorb legen


Team

Baylor, Team S8-G4, Johnson Fall 2017 Mitglied von Baylor, Team S8-G4, Johnson Fall 2017
BU-JOHNSON-F17S8G4
1 Mitglied
4 Anleitungen geschrieben