Dell OptiPlex GX260 Main Fan Replacement
Was du brauchst
Werkzeuge

-
-
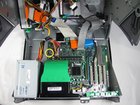
Lay the Dell Optiplex GX260 down on a clean flat surface with the rear towards you.
-
Push the oval shaped buttons located on the top and bottom of the PC simultaneously and lift the case straight up.
-
-
-
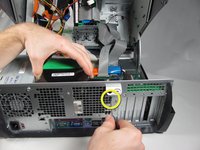
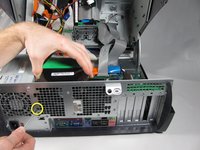
On the rear of the desktop, push the two circled black buttons straight in with a small pointed object while pulling up on the fan.
-
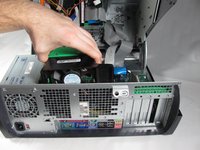
Once the fan is released, lift it straight up and out of the case.
-


To reassemble your device, follow these instructions in reverse order.
To reassemble your device, follow these instructions in reverse order.
Rückgängig: Ich habe diese Anleitung nicht absolviert.
7 weitere Personen haben diese Anleitung absolviert.
Rüste dich für deine nächste Reparatur
Alle in den Warenkorb legen


Team

Cal Poly, Team 4-48, Amido Fall 2010 Mitglied von Cal Poly, Team 4-48, Amido Fall 2010
CPSU-AMIDO-F10S4G48
4 Mitglieder
27 Anleitungen geschrieben