
GermGuardian AC4825E UV-C Bulb Replacement

Einleitung
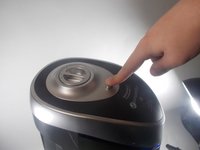
Zu Schritt 1 der AnleitungThe UV-C bulb is a vital tool for the GermGuardian AC4825E. The light eliminates bacteria, spores, and other microorganisms in the air to assist with air purification. When this bulb goes out, the UV bulb change indicator near the control panel on top of the purifier will flash blue. When this happens, it's time to replace the UV-C bulb. This guide will demonstrate the removal process for the UV-C bulb.
Was du brauchst


-
-
Check if the purifier's power cord is plugged into an electrical outlet.
-
If it is plugged in, unplug the power cord.
-
-
-
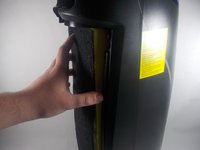
Grab the rear cover of the purifier with one finger on the Lock and Release button.
-
Press the button down, and pull the rear cover away from the purifier.
-
-
-
-
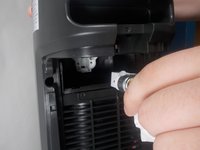
Remove the two screws from the metal UV-C shield by turning the screws counter-clockwise using a Phillips #00 screwdriver.
-
Grab and pull the UV-C shield away from the purifier to remove it.
-
-
-
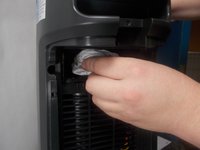
Using a tissue or a clean cloth, reach into the exposed space and grab the UV-C bulb.
-
Pull the UV-C bulb out of the exposed space to remove the bulb from its socket.
-


To reassemble your device, follow these instructions in reverse order.
To reassemble your device, follow these instructions in reverse order.
Rückgängig: Ich habe diese Anleitung nicht absolviert.
2 weitere Personen haben diese Anleitung absolviert.

Team

UMass Dartmouth, Team 2-1, Mellen Spring 2022 Mitglied von UMass Dartmouth, Team 2-1, Mellen Spring 2022
UMASSD-MELLEN-S22S2G1
4 Mitglieder
2 Anleitungen geschrieben
Ein Kommentar
you end after you pull the bulb out. do you put another bulb in (of course) is there a right/wrong way (which side up or down) then do you plug it back in prior to holding the uv button 5 seconds? do you turn it on prior to holding the uv button 5 seconds? Please explain in detail what I should do.