
HP EliteBook 8530w Hard Drive Replacement

Einleitung
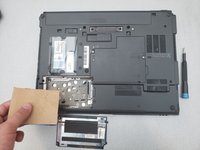
Zu Schritt 1 der AnleitungThis is a guide that will show you how to replace the drive of this laptop.
Replacing the drive of a computer may be done for a number of reasons. You will want to replace the drive if it no longer functional, want more storage, or upgrade from a hard disk drive (HDD) to a faster solid state drive (SSD).
Was du brauchst
Werkzeuge

-
-
Turn the laptop off then place it down so that the back is facing up.
-
Slide the battery release switch to the left and hold it there.
-
-
-
Pull the battery away upward and away from the laptop while continuing to hold the release switch.
-
-
-
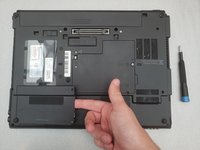
Remove the two screws from the hard drive cover using a Phillips #00 screwdriver.
-
-
-
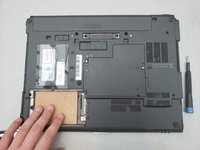
Use a finger or spudger to lift the edge of the hard drive cover that was screwed down.
-
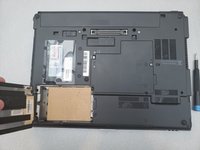
Remove the cover.
-
-
-
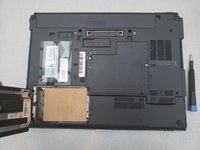
Slide the hard drive to the left to disconnect it from the connector on the right side.
-
Pull the hard drive up and out from the laptop.
-


To reassemble your device, follow these instructions in reverse order.
To reassemble your device, follow these instructions in reverse order.

Team

Embry-Riddle Aeronautical University, Team S14-G6, Lamothe Spring 2020 Mitglied von Embry-Riddle Aeronautical University, Team S14-G6, Lamothe Spring 2020
ERAU-LAMOTHE-S20S14G6
3 Mitglieder
5 Anleitungen geschrieben