Zum Hauptinhalt wechseln
HP Envy 17-J013CL Memory Module Replacement

HP Envy 17-J013CL Memory Module Replacement

Matt McBride

Matt McBride und 2 weitere Mitwirkende

Zuletzt aktualisiert am August 15, 2019

5 Minuten
Leicht

Follow this guide if your HP Envy 17-J013CL Memory module needs to be replaced. Memory, or RAM module, keeps information stored on the computer as long as it is turned on and clears when turned off. Used for quickly access applications. The Memory module is a simple part to replace as it can be done within a few minutes without any hassle. Just remember to keep yourself ground or without static electricity because shocking the module OR the port itself can cause failure.

Was du brauchst

Werkzeuge

  1. HP Envy 17-J013CL Memory Module Replacement, Battery: Schritt 1, Bild 1 von 1
    • Lay the laptop with the battery facing towards you.

    • Remember to disconnect the AC cable and other power sources from the device before replacing/repairing parts.

  2. HP Envy 17-J013CL Memory Module Replacement: Schritt 2, Bild 1 von 1
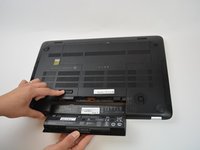
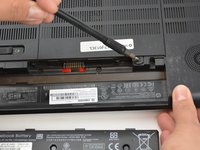
    • Grab hold of the small battery slider and apply pressure to the right.

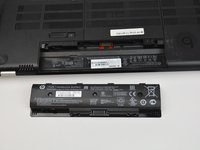
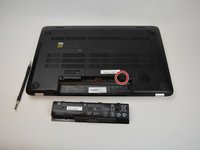
    • The laptop itself will push the battery out for you once the switch slides all the way to the right.

  3. HP Envy 17-J013CL Memory Module Replacement: Schritt 3, Bild 1 von 3 HP Envy 17-J013CL Memory Module Replacement: Schritt 3, Bild 2 von 3 HP Envy 17-J013CL Memory Module Replacement: Schritt 3, Bild 3 von 3
    • Pull the battery out and let go of the battery slider.

  4. HP Envy 17-J013CL Memory Module Replacement, Back Panel: Schritt 4, Bild 1 von 2 HP Envy 17-J013CL Memory Module Replacement, Back Panel: Schritt 4, Bild 2 von 2
    • Use a PH1-screwdriver to loosen the 7mm screw. The screw will not fully come out as it is held by a washer underneath but will come out enough to open it.

  5. HP Envy 17-J013CL Memory Module Replacement: Schritt 5, Bild 1 von 1
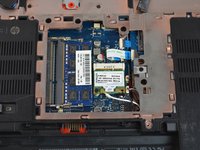
    • Gently pull the back panel off starting from the battery side towards the back.

    • Pull it back as it snaps out of the holding sockets.

    • It is preferred to use both hands when pulling the back panel off to prevent bending it out of shape.

  6. HP Envy 17-J013CL Memory Module Replacement, Memory Module: Schritt 6, Bild 1 von 2 HP Envy 17-J013CL Memory Module Replacement, Memory Module: Schritt 6, Bild 2 von 2
    • Locate the memory stick inside.

  7. HP Envy 17-J013CL Memory Module Replacement: Schritt 7, Bild 1 von 2 HP Envy 17-J013CL Memory Module Replacement: Schritt 7, Bild 2 von 2
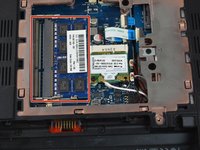
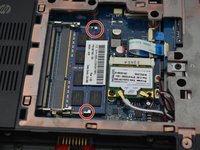
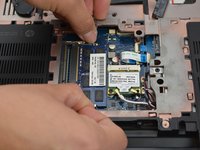
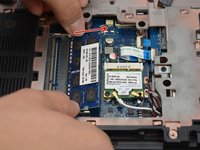
    • On both sides of the module, place a thumb on each of the metallic holding pins.

    • Gently pull on the pins to release the spring holding in the module.

  8. HP Envy 17-J013CL Memory Module Replacement: Schritt 8, Bild 1 von 2 HP Envy 17-J013CL Memory Module Replacement: Schritt 8, Bild 2 von 2
    • Gently slide the module out of the memory slot.

    • Pay in mind of the module's orientation as it will only go in one way with a little gap in the module to identify orientation.

Abschluss

To reassemble your device, follow these instructions in reverse order.

Matt McBride

Mitglied seit: 02/02/17

872 Reputation

6 Anleitungen geschrieben

Team

USF Tampa, Team 16-6, Blackwell Spring 2017 Mitglied von USF Tampa, Team 16-6, Blackwell Spring 2017

USFT-BLACKWELL-S17S16G6

3 Mitglieder

6 Anleitungen geschrieben

0 Kommentare

Kommentar hinzufügen

Seitenaufrufe:

Letzte 24 Stunden: 0

Letzte 7 Tage: 2

Letzte 30 Tage: 4

Insgesamt: 698