
MacBook Pro 14" 2021 Logic Board Replacement

Einleitung
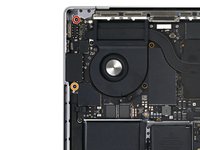
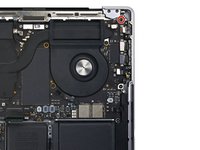
Zu Schritt 1 der AnleitungUse this guide to remove the logic board in your MacBook Pro 14" 2021.
This is a prerequisite-only guide! This guide is part of another procedure and is not meant to be used alone.
Was du brauchst
Werkzeuge


Mehr anzeigen …
-
-
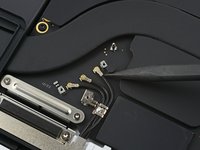
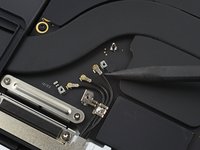
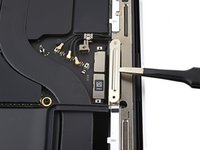
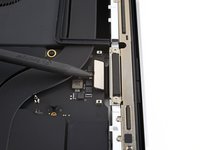
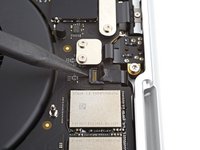
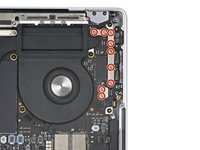
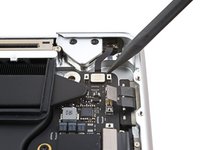
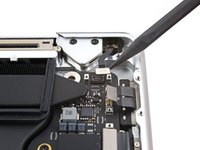
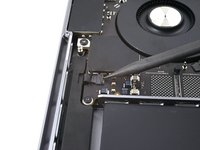
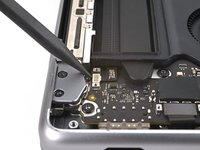
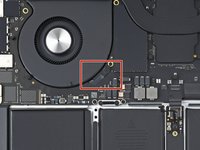
Use a T3 Torx screwdriver to remove the three 2.1 mm screws securing the antenna board bracket and coaxial cable cover to the frame.
-
-
In diesem Schritt verwendetes Werkzeug:Tweezers$4.99
-
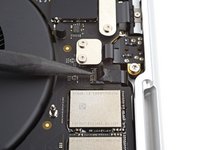
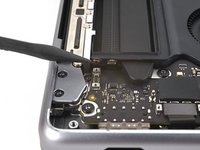
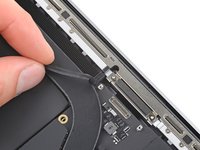
Use tweezers, or your fingers, to remove the cover on top of the antenna bar's coaxial cables.
-
-
-
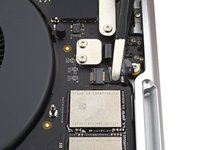
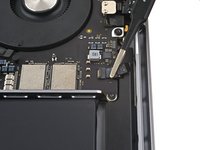
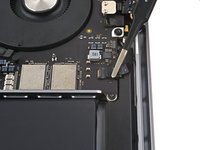
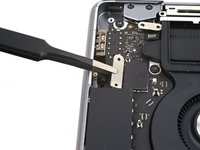
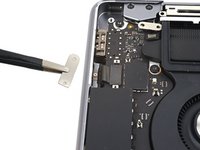
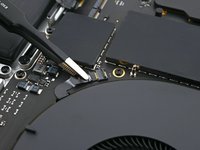
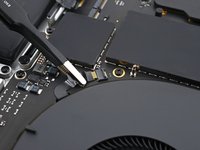
Use the tip of a spudger to pry up and disconnect the antenna bar's coaxial cable.
-
Repeat for the two other cables.
-
-
-
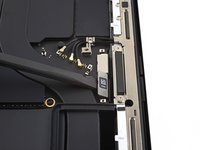
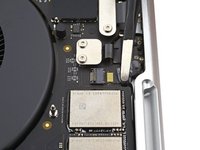
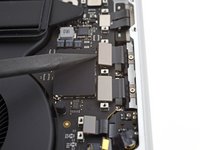
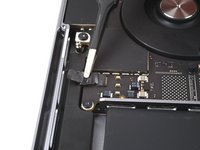
Use a T3 Torx driver to remove the four 2.1 mm screws securing the screen cable covers.
-
-
-
Use tweezers, or your fingers, to remove the two screen cable covers from the logic board.
-
-
-
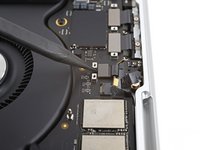
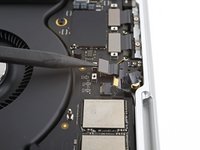
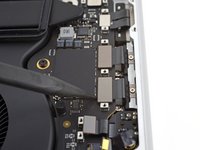
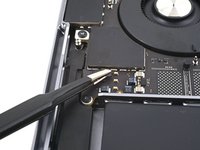
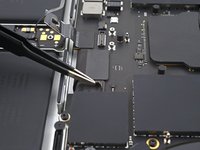
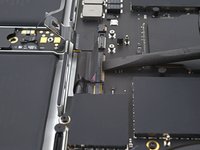
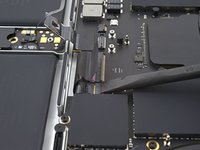
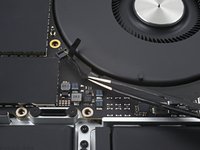
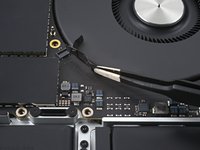
Use the flat end of a spudger to pry up and disconnect the right-most screen cable press connectors secured to the logic board.
-
-
-
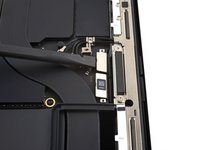
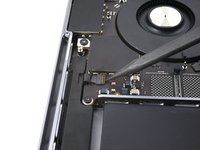
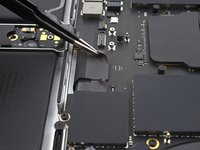
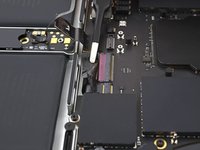
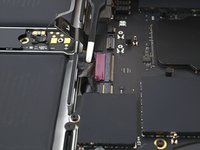
Repeat the previous disconnection process for the remaining press connector at the top left of the logic board.
-
-
-
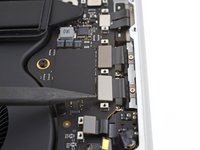
Use a spudger to gently pry up the locking flap on the ZIF connector for the microphone cable.
-
-
-
Disconnect the microphone cable by sliding it out from its socket on the logic board.
-
-
-
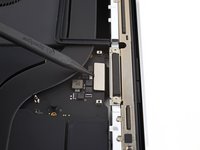
Use a T3 Torx driver to remove the nine 2.1 mm screws securing the right cable covers to the frame:
-
-
-
Use tweezers, or your fingers, to remove the five right cable covers.
-
-
-
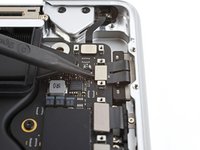
Use a spudger to gently pry up the locking flap on the ZIF connector for the right speaker cable.
-
-
-
Disconnect the right speaker cable by sliding it out from its socket on the logic board.
-
-
-
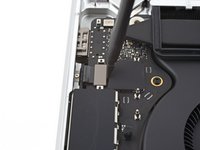
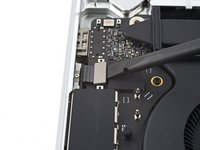
Use a spudger to pry up and disconnect the headphone jack's press connector.
-
-
-
Use a spudger to pry up and disconnect the right USB-C ports' press connectors.
-
-
-
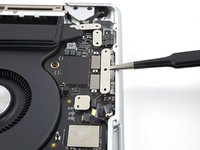
Use a spudger to pry up and disconnect the MagSafe port's press connector.
-
-
-
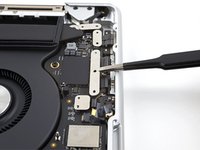
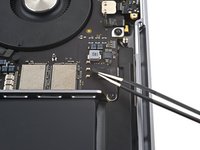
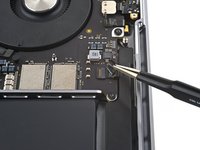
Use a spudger to pry up and disconnect the lid angle sensor's press connector.
-
-
-
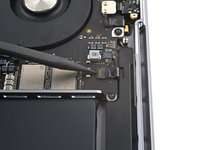
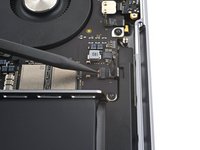
Use a T3 Torx driver to remove the four screws securing the left cable covers to the frame:
-
Two 2 mm screws
-
Two 2.1 mm screw
-
-
-
Use tweezers, or your fingers, to remove the two left cable covers.
-
-
-
Peel back any tape covering the left speaker cable.
-
-
-
Use a spudger to gently pry up the locking flap on the ZIF connector for the left speaker cable.
-
-
-
Disconnect the left speaker cable by sliding it out from its socket on the logic board.
-
-
-
Use a spudger to pry up and disconnect the left USB-C port's press connector.
-
-
-
Use a spudger to pry up and disconnect the Touch ID sensor's press connector near the top left of the device.
-
-
-
Peel back any tape covering the keyboard and keyboard backlight cable connectors.
-
-
-
Use a spudger to gently pry up the locking flap on the ZIF connectors for the keyboard cables.
-
-
-
Disconnect the keyboard and keyboard backlight cables by sliding them out from their sockets on the logic board.
-
-
-
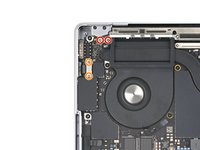
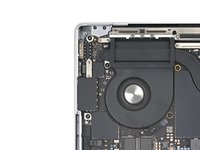
Peel back any tape covering the right fan cable connector.
-
-
-
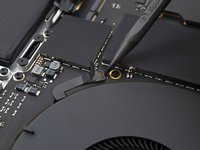
Use a spudger to gently pry up the locking flap on the ZIF connector for the right fan cable.
-
-
-
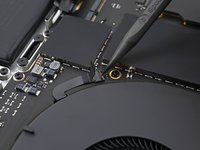
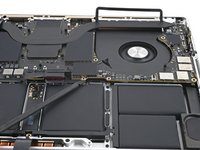
Disconnect the right fan cable by sliding it out from its socket on the logic board.
-
-
-
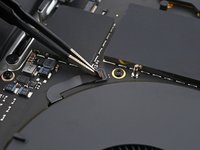
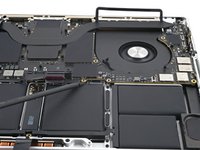
Pull the fan cable away from the logic board with tweezers to separate the adhesive.
-
-
-
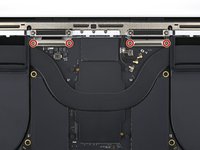
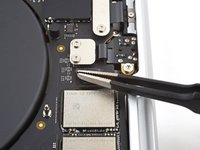
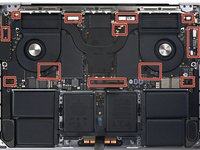
Use a T5 Torx driver to remove the 11 screws securing the logic board:
-
Four 3.6 mm screws
-
Two 4.5 mm screws
-
Two 5.2 mm screws
-
Two 3.8 mm screws
-
One 3.9 mm screw
-
-
-
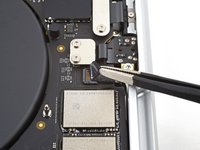
Use a T6 Torx driver to remove the three screws securing the logic board:
-
Two 4.7 mm screws
-
One 5.7 mm screw
-
-
-
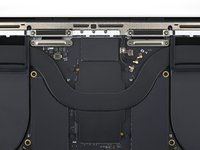
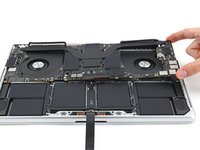
Insert a spudger between the right side of the logic board and the frame.
-
Pry up with the spudger to release the logic board from its clips.
-
-
-
Insert a spudger between the bottom of the logic board and the frame.
-
Pry up with the spudger to release the logic board from its clips.
-
-
-
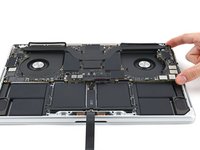
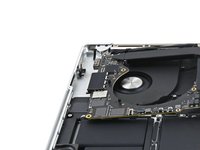
Gently lift up the logic board by its right side to release it from its alignment pegs.
-
Pull the logic board away from the left side of the device to separate the HDMI and SDXC ports from their slots in the frame.
-
Remove the logic board.
-
-
-
Make sure all 18 connectors are above the logic board before securing it back into the frame.
-
Hold the rubber spacers out of the way so the fins can drop into their recesses.
-
When reinstalling the logic board, insert the left side first to reposition the HMDI and SDXC ports.
-
Use your fingers to slightly compress the HDMI port to fit it into its recess. Otherwise, the logic board won't sit correctly.
-


To reassemble your device, follow these instructions in reverse order.
To reassemble your device, follow these instructions in reverse order.
Rückgängig: Ich habe diese Anleitung nicht absolviert.
2 weitere Personen haben diese Anleitung absolviert.

