
Motorola Atrix HD Battery Replacement
Einleitung
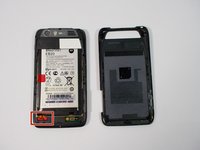
Zu Schritt 1 der AnleitungIf you find that your battery no longer holds a charge, or is causing your phone to be inoperative, this guide will help you to replace it.
The battery may be removed with or without removing the back chassis. However you choose to remove it, take extra care when removing the ribbon cable attached to the motherboard, it is very thin and easily damaged.
Was du brauchst
Ersatzteile


-
-
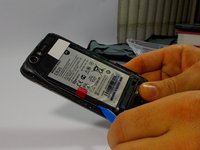
Begin taking apart the device by prying apart the back cover from the assembly using the plastic opening tool.
-
Continue working around the edge of the phone using the plastic opening tool.
-
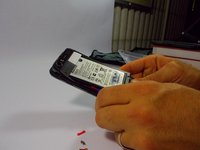
When all the edges have been lifted apart, use your hands or plastic opening tool to peel the back plate from the battery. There are small adhesive strips between the back cover and the battery, so take care not to crack the back cover while prying open.
-
-
-
The adhesive strips are shown in the orange boxes. Be sure not to use too much force to pull off the back cover, or you may risk snapping the back cover.
-
-
In diesem Schritt verwendetes Werkzeug:Tweezers$4.99
-
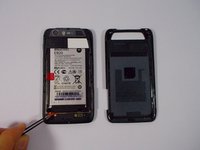
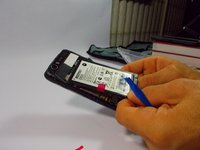
Remove the red rubber screw cover with a pair of tweezers
-
-
-
Use the T-5 Torx bit to remove the two silver 3.3 mm screws with integrated washers.
-
-
-
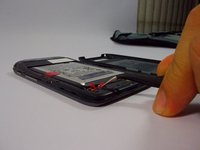
Use the plastic opening tool around the edges to loosen the battery.
-
Once the battery is loose, carefully lift from the bottom edge and remove the battery.
-


To reassemble your device, follow these instructions in reverse order.
To reassemble your device, follow these instructions in reverse order.
Rückgängig: Ich habe diese Anleitung nicht absolviert.
4 weitere Personen haben diese Anleitung absolviert.
Team

UMass Dartmouth, Team 1-8, Miles Fall 2015 Mitglied von UMass Dartmouth, Team 1-8, Miles Fall 2015
UMASSD-MILES-F15S1G8
3 Mitglieder
10 Anleitungen geschrieben
Ein Kommentar
How do you calibrate it then? Lights up green dot, charges, won't work! Multi tester shows full power.