
Vacuum Cleaner Brush Roll Replacement

Einleitung
Zu Schritt 1 der AnleitungFollow these instructions to disassemble an upright vacuum cleaner and remove debris like hair or string that may be preventing the floor brush from spinning.
*Exact part locations and the number of screws may vary according to the device model.
Was du brauchst
Werkzeuge

-
-
Be sure to unplug the device from the wall outlet before disassembling.
-
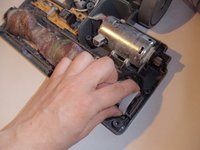
Remove the bottom head of the vacuum cleaner by pressing the push button.
-
-
-
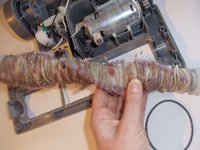
Separate the top portion of the head from the bottom.
-
Make sure not to pull off or damage the connected wires.
-
-
-
-
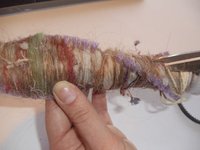
Use scissors to cut strings and other debris from the brush roll. Avoid cutting the bristles.
-


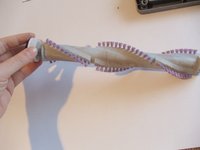

To reassemble your device, follow the disassembly instructions in reverse order.
To reassemble your device, follow the disassembly instructions in reverse order.
Rückgängig: Ich habe diese Anleitung nicht absolviert.
Eine weitere Person hat diese Anleitung absolviert.

Team

Oakland University, Team 6-12, Walwema Winter 2016 Mitglied von Oakland University, Team 6-12, Walwema Winter 2016
OAK-WALWEMA-W16S6G12
1 Mitglied
2 Anleitungen geschrieben