Zum Hauptinhalt wechseln
Gemeinsam reparieren - Jetzt registrieren

iRobot Roomba 560 Motherboard Replacement

Was du brauchst

    1. iRobot Roomba 560 Motherboard Replacement, Start: Schritt 1, Bild 1 von 1
      • Rotate the Roomba so the bumper is in front of you.

      Frag FixBot

      Kommentar hinzufügen

    2. iRobot Roomba 560 Motherboard Replacement, Wheel Removal: Schritt 2, Bild 1 von 1
      • Remove the wheel using a spudger. You can probably also do this with your hand depending on how dirty the wheel is.

      Frag FixBot

      Kommentar hinzufügen

    3. iRobot Roomba 560 Motherboard Replacement, Wheel Removal: Schritt 3, Bild 1 von 1
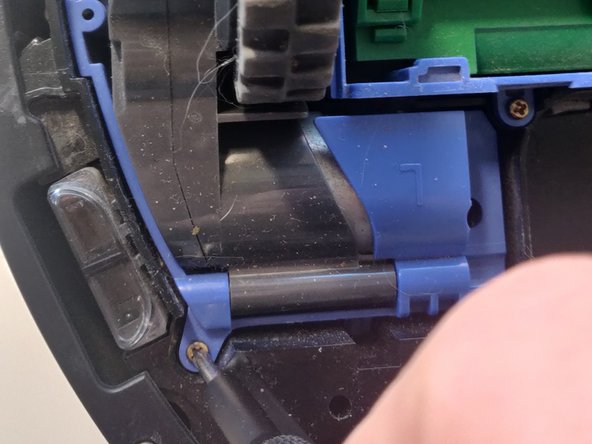
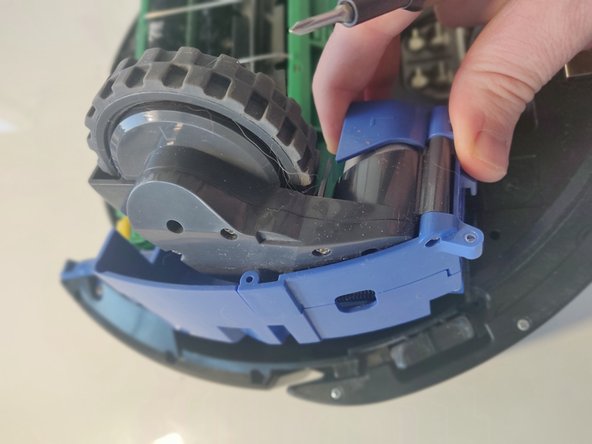
      • Remove the wheel guiding inlay using the spudger or your hand.

      Frag FixBot

      Kommentar hinzufügen

    4. iRobot Roomba 560 Motherboard Replacement, Remove Main Brush: Schritt 4, Bild 1 von 1
      • Remove the main brush by unscrewing the single 5 mm screw on the yellow side sweeper using the Phillips #1 driver.

      • Once the screw is removed, lift out the brush and store the screw and brush.

      Frag FixBot

      Kommentar hinzufügen

    5. iRobot Roomba 560 Motherboard Replacement, Accessing the Battery: Schritt 5, Bild 1 von 3 iRobot Roomba 560 Motherboard Replacement, Accessing the Battery: Schritt 5, Bild 2 von 3 iRobot Roomba 560 Motherboard Replacement, Accessing the Battery: Schritt 5, Bild 3 von 3
      • Using the Phillips #1 driver, remove the four 10 mm screws that hold the back panel in place.

      • Once the four screws are removed, store the safely and lift up the back panel.

      Frag FixBot

      Kommentar hinzufügen

    6. iRobot Roomba 560 Motherboard Replacement, Remove the Vacuum-tray: Schritt 6, Bild 1 von 2 iRobot Roomba 560 Motherboard Replacement, Remove the Vacuum-tray: Schritt 6, Bild 2 von 2
      • Remove the vacuum try to have an easier repair.

      Frag FixBot

      Kommentar hinzufügen

    7. iRobot Roomba 560 Motherboard Replacement, Removing the Battery: Schritt 7, Bild 1 von 2 iRobot Roomba 560 Motherboard Replacement, Removing the Battery: Schritt 7, Bild 2 von 2
      • Locate the battery.

      • Lift up the yellow battery by pulling up the green tabs on its side.

      • Handle the battery with care.

      Frag FixBot

      Kommentar hinzufügen

    8. iRobot Roomba 560 Motherboard Replacement, Removing the wheels.: Schritt 8, Bild 1 von 3 iRobot Roomba 560 Motherboard Replacement, Removing the wheels.: Schritt 8, Bild 2 von 3 iRobot Roomba 560 Motherboard Replacement, Removing the wheels.: Schritt 8, Bild 3 von 3
      • Using the Phillips #1 driver, remove the three screws that hold back the wheel unit on each side. This is not required but will make the repair easier.

      • Lift out the wheel units and store safely.

      • Repeat on the other side.

      Frag FixBot

      Kommentar hinzufügen

    9. iRobot Roomba 560 Motherboard Replacement, Prepare for the mainboard extraction: Schritt 9, Bild 1 von 2 iRobot Roomba 560 Motherboard Replacement, Prepare for the mainboard extraction: Schritt 9, Bild 2 von 2
      • Check that the unit now looks like this and all the parts are removed.

      • Flip the unit around.

      Frag FixBot

      Kommentar hinzufügen

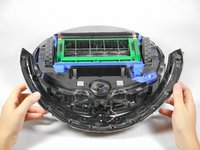
    10. iRobot Roomba 560 Motherboard Replacement, Unhook front panel: Schritt 10, Bild 1 von 1
      • Use your hands to unhook the snaps between the silver panel from the black panel located where the vacuum bin was.

      Frag FixBot

      Kommentar hinzufügen

    11. iRobot Roomba 560 Motherboard Replacement, Remove top panel: Schritt 11, Bild 1 von 3 iRobot Roomba 560 Motherboard Replacement, Remove top panel: Schritt 11, Bild 2 von 3 iRobot Roomba 560 Motherboard Replacement, Remove top panel: Schritt 11, Bild 3 von 3
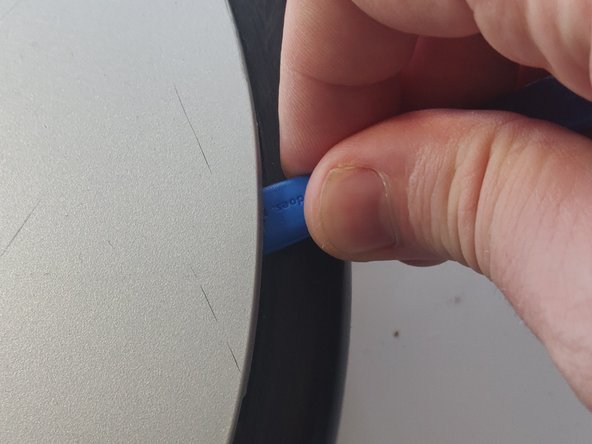
      • Using the ifixit spudgers pry under the main silver panel.

      Frag FixBot

      Kommentar hinzufügen

    12. iRobot Roomba 560 Motherboard Replacement, Panel removal: Schritt 12, Bild 1 von 1
      • Lift off the panel.

      Frag FixBot

      Kommentar hinzufügen

    13. iRobot Roomba 560 Motherboard Replacement, Remove front bumper: Schritt 13, Bild 1 von 1
      • Turn the unit around again and locate the 10 screws on the front bumper.

      • Using the Phillips #1 driver, remove the ten 10 mm screws on the bumper that run along the outer edge of the Roomba.

      Frag FixBot

      Kommentar hinzufügen

    14. iRobot Roomba 560 Motherboard Replacement, Lift off bumper: Schritt 14, Bild 1 von 3 iRobot Roomba 560 Motherboard Replacement, Lift off bumper: Schritt 14, Bild 2 von 3 iRobot Roomba 560 Motherboard Replacement, Lift off bumper: Schritt 14, Bild 3 von 3
      • Lift the thin top cover that holds the bumper in place.

      • Be very vigilant with the attached sensor. Otherwise you risk ripping off the cable and damaging the entire sensor.

      Frag FixBot

      Kommentar hinzufügen

    15. iRobot Roomba 560 Motherboard Replacement, Unscrew sensor: Schritt 15, Bild 1 von 2 iRobot Roomba 560 Motherboard Replacement, Unscrew sensor: Schritt 15, Bild 2 von 2
      • Lift the bumper upwards for easier access.

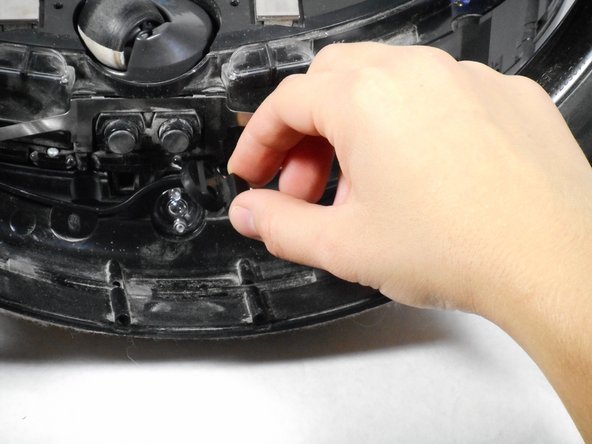
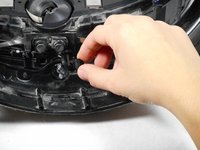
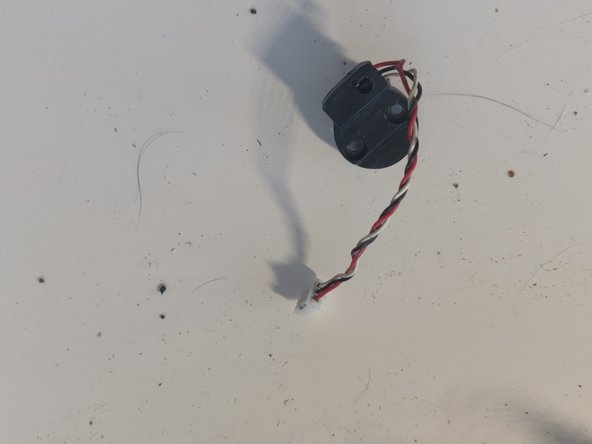
      • Unscrew the two 5 mm screws that connect the red and white wires to the device using the Phillips #1 driver.

      • Lift the circular black panel off the sensor housing.

      Frag FixBot

      Kommentar hinzufügen

    16. iRobot Roomba 560 Motherboard Replacement, Turn: Schritt 16, Bild 1 von 1
      • Turn the unit back around.

      Frag FixBot

      Kommentar hinzufügen

    17. iRobot Roomba 560 Motherboard Replacement, Remove top screws: Schritt 17, Bild 1 von 1
      • Using the Phillips #1 driver, unscrew the following 13 screws that hold the black panel in place:

      • Two 5 mm on the bottom ends of the semicircle handle.

      • Ten 7.5 mm scattered on the Roomba.

      • One 5 mm at the bottom of control board.

      Frag FixBot

      Kommentar hinzufügen

    18. iRobot Roomba 560 Motherboard Replacement, Lift panel off: Schritt 18, Bild 1 von 1
      • Lift the black panel off the device.

      Frag FixBot

      Kommentar hinzufügen

    19. iRobot Roomba 560 Motherboard Replacement, Mainboard access: Schritt 19, Bild 1 von 3 iRobot Roomba 560 Motherboard Replacement, Mainboard access: Schritt 19, Bild 2 von 3 iRobot Roomba 560 Motherboard Replacement, Mainboard access: Schritt 19, Bild 3 von 3
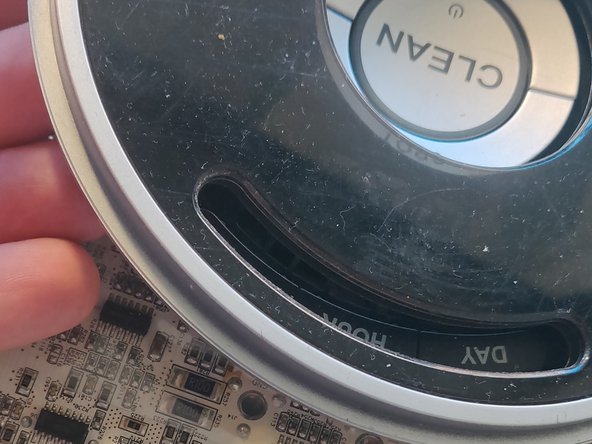
      • Remove the outer silver circle, black plastic cover, and black film from the central control board in that order.

      Frag FixBot

      Kommentar hinzufügen

    20. iRobot Roomba 560 Motherboard Replacement, Control board removal: Schritt 20, Bild 1 von 1
      • Using the Phillips #1 driver, unscrew the four 10 mm screws that surround the clean button.

      Frag FixBot

      Kommentar hinzufügen

    21. iRobot Roomba 560 Motherboard Replacement, Remove panel: Schritt 21, Bild 1 von 1
      • Lift off the panel.

      Frag FixBot

      Kommentar hinzufügen

    22. iRobot Roomba 560 Motherboard Replacement, Remove the protective sheet: Schritt 22, Bild 1 von 2 iRobot Roomba 560 Motherboard Replacement, Remove the protective sheet: Schritt 22, Bild 2 von 2
      • Lift off the plastic sheet.

      Frag FixBot

      Kommentar hinzufügen

    23. iRobot Roomba 560 Motherboard Replacement, Remove the connectors: Schritt 23, Bild 1 von 3 iRobot Roomba 560 Motherboard Replacement, Remove the connectors: Schritt 23, Bild 2 von 3 iRobot Roomba 560 Motherboard Replacement, Remove the connectors: Schritt 23, Bild 3 von 3
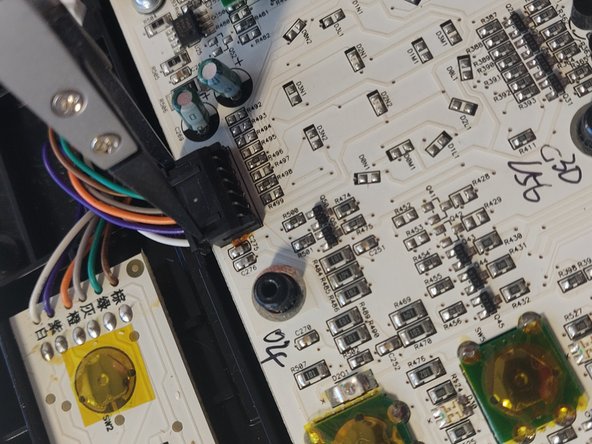
      • Remove all the top connectors to the mainboard.

      • You can use ifixit's reverse pliers but you can also use your hands.

      Frag FixBot

      Kommentar hinzufügen

    24. iRobot Roomba 560 Motherboard Replacement, Remove mainboard screws: Schritt 24, Bild 1 von 1
      • Using the Phillips #1 driver, unscrew the five screws on the mainboard.

      • Do not rip out mainboard now!

      Frag FixBot

      Kommentar hinzufügen

    25. iRobot Roomba 560 Motherboard Replacement, Lift off mainboard carefully: Schritt 25, Bild 1 von 3 iRobot Roomba 560 Motherboard Replacement, Lift off mainboard carefully: Schritt 25, Bild 2 von 3 iRobot Roomba 560 Motherboard Replacement, Lift off mainboard carefully: Schritt 25, Bild 3 von 3
      • Carefully lift off the mainboard, moving it towards you.

      • Be very careful with the connected connectors.

      Frag FixBot

      Kommentar hinzufügen

    26. iRobot Roomba 560 Motherboard Replacement, Remove connectors: Schritt 26, Bild 1 von 1
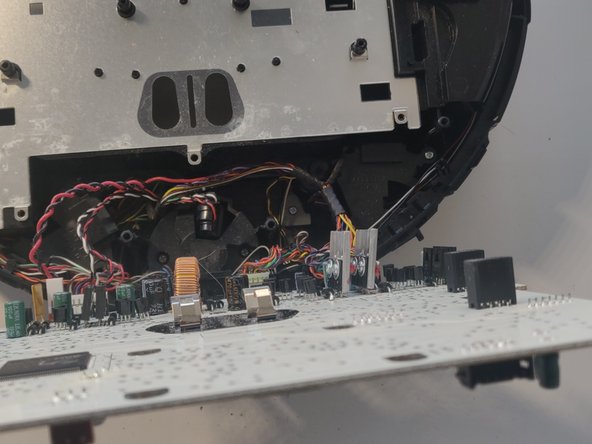
      • Very carefully disconnect the connections off the mainboard.

      • You can ifixit's reverse pliers.

      Frag FixBot

      Kommentar hinzufügen

    27. iRobot Roomba 560 Motherboard Replacement, Remove sensor and replace board: Schritt 27, Bild 1 von 2 iRobot Roomba 560 Motherboard Replacement, Remove sensor and replace board: Schritt 27, Bild 2 von 2
      • The sensor might still be attached/is not attached to the main unit but mainboard. Just unplug it.

      • You can now replace the mainboard and complete the steps from the bottom up to finish the replacement.

      Frag FixBot

      Kommentar hinzufügen

Abschluss

To reassemble your device, follow these instructions in reverse order.

Rückgängig: Ich habe diese Anleitung nicht absolviert.

4 weitere Personen haben diese Anleitung absolviert.

1 Kommentar zur Anleitung

Greetings. I have two Model 560 sweepers. Neither of them has ever had a software update. I've tried resetting them to see if it will get them to complete a cleaning cycle, but they either short cycle back to the charger base, or crap out prematurely. I've installed a generic 5000 mAh battery, so there should be adequate power to complete two rooms with less than 50% carpet. Is there anybody out there who has one of the "Osmo" software updaters? I like the Model 560, and I have updated the gear drives and dust collectors, so I'd prefer NOT to junk them. Please advise.

Ed Allen, a.k.a. nostrodamos@live.com

Pasco, WA

(509) 542-1004

Ed Allen - Antwort Teilen

Kommentar hinzufügen

Seitenaufrufe:

Letzte 24 Stunden: 1

Letzte 7 Tage: 10

Letzte 30 Tage: 66

Insgesamt: 5,848