
Acer Aspire R5-571T-59DC Display Replacement
Einleitung
Zu Schritt 1 der AnleitungThis guide will show the reader how to replace the display in their Acer Aspire R5-571T-59DC.
It may be necessary to replace this component if the screen is physically damaged or incorrectly displaying images.
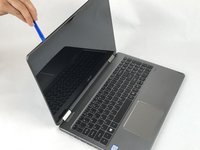
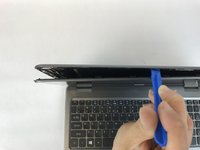
Please take care to be gentle when releasing the snaps in the cover lining the display - gentle prying with a credit card or spudger should be sufficient to loosen the cover.
Was du brauchst


-
-
Disconnect all power from the laptop and turn over so the bottom is facing you.
-
Remove the twelve 07.mm Phillips #0 screws from the back cover.
-
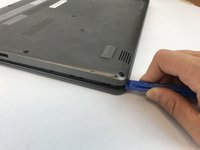
Work a plastic opening tool underneath and around the perimeter of the bottom cover.
-
Once unclipped, remove the bottom cover.
-
-
-
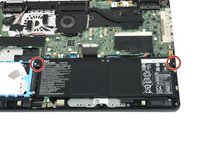
Remove the two 0.7mm Phillips #00 screws from the battery and unplug the battery from the motherboard.
-
Lift the battery out of the case.
-
-
-
-
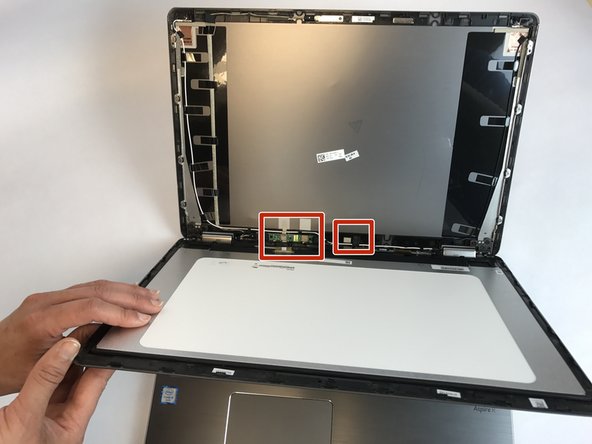
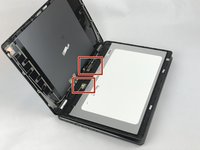
Remove the tape covering the connector cables once the screen is separated from the display board.
-
-
-
Use a spudger to flip up the retaining flap on the display ribbon cable ZIF socket.
-
Pull the ribbon cables out of the sockets.
-


To reassemble your device, follow these instructions in reverse order.
To reassemble your device, follow these instructions in reverse order.
Rückgängig: Ich habe diese Anleitung nicht absolviert.
2 weitere Personen haben diese Anleitung absolviert.
Team

USF Tampa, Team S20-G2, Passmore Spring 2018 Mitglied von USF Tampa, Team S20-G2, Passmore Spring 2018
USFT-PASSMORE-S18S20G2
3 Mitglieder
7 Anleitungen geschrieben
Ein Kommentar
I wish I found this tutorial before my fiance’ attempted to do this on his own. Now the replacement screen, albeit is not cracked, but the touch screen is pretty nonfunctional in my opinion. The corners don’t really work , sometimes it picks up my touch, sometimes it goes bonkers. The bottom corner of are bent and I’m continuously having to snap them back together. I’ve bought my laptop one year ago and I feel I already need to look into another. Any suggestions to try?? any help would be super appreciated.
What's the best way to safely remove and replace the bottom cover to prevent bending and otherwise stressing the casing and ports as you wiggle it loose and set it back in place?
Alberto Einsteino - Antwort