
Acer Chromebook C710-2833 Fan Replacement
Einleitung
Zu Schritt 1 der AnleitungIn this replacement guide, you will learn how to safely remove and install a cooling fan.
Was du brauchst


-
-
Locate the 6 mm Phillips #00 screw that holds the back cover together. Use your driver with the PH00 bit attached to unscrew it.
-
Once completely unscrewed, carefully lift the cover off.
-
Place the cover and screw safely to the side for now.
-
-
-
In diesem Schritt verwendetes Werkzeug:Anti-Static Wrist Strap$7.95
-
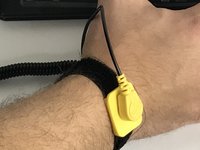
Now take your anti-static wrist strap and place it tightly on your wrist.
-
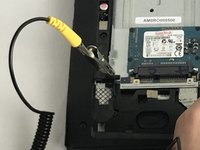
Attach the alligator clamp of the wrist strap to something that will ground yourself to avoid possible electric zaps.
-
-
-
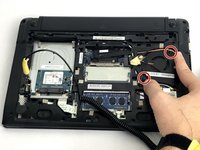
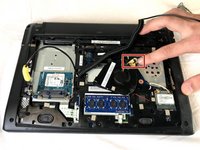
Locate the two 6 mm Phillips #00 screws on the fan port.
-
Unscrew the two screws and place them aside for now.
-
-
-
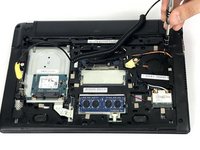
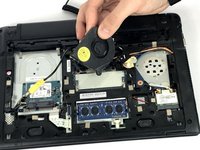
Carefully remove the fan from its port. You may need to use a little force as there will be an adhesive on the right side of the fan keeping it in place.
-
Locate the Molex cable connecting the fan to its port in the top left corner.
-
Disconnect the cable.
-


To reassemble your device, follow these instructions in reverse order.
To reassemble your device, follow these instructions in reverse order.
Rückgängig: Ich habe diese Anleitung nicht absolviert.
Eine weitere Person hat diese Anleitung absolviert.
Team

USF Tampa, Team S1-G6, Nance Fall 2017 Mitglied von USF Tampa, Team S1-G6, Nance Fall 2017
USFT-NANCE-F17S1G6
4 Mitglieder
10 Anleitungen geschrieben