Einleitung
Use this guide to replace a worn-out or dead battery in your Huawei P40 Pro.
If your battery is swollen, take appropriate precautions. For your safety, discharge your battery below 25% before disassembling your phone. This reduces the risk of a dangerous thermal event if the battery is accidentally damaged during the repair.
You’ll need replacement adhesive to reattach components when reassembling the device.
Was du brauchst
-
-
Apply a heated iOpener to the rear glass to loosen the adhesive underneath. Apply the iOpener for at least two minutes.
-
-
-
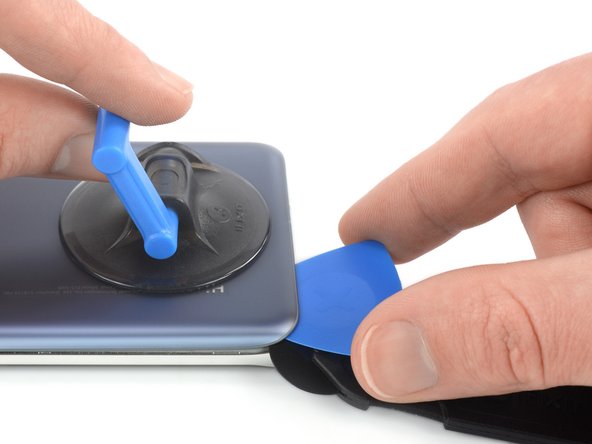
Secure a suction handle to the bottom edge of the rear glass, as close to the curved edge as possible.
-
Lift the back cover with the suction handle to create a small gap between the back cover and the frame.
-
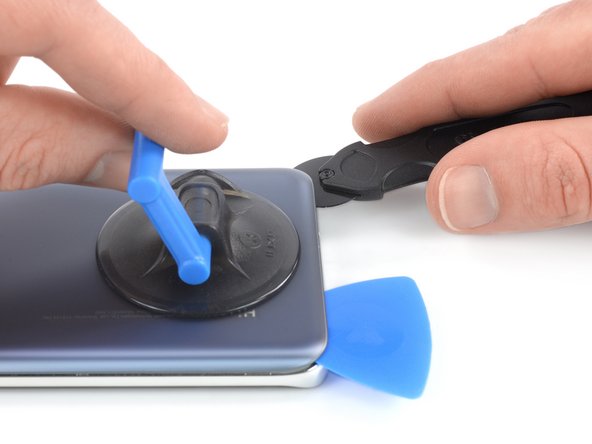
Insert an iMac opening wheel into the gap.
-
Slide the opening wheel to the bottom left corner to slice the adhesive.
-
-
-
Insert an opening pick into the gap between rear glass and frame at the bottom left corner of your phone to prevent the adhesive from resealing.
-
-
-
Reinsert the opening wheel at the bottom edge of the rear glass.
-
Slide the opening wheel to the bottom right corner to slice the adhesive.
-
Insert an opening pick underneath the bottom right corner of the rear glass, next to the opening wheel to prevent the adhesive from resealing.
-
-
-
Insert the opening wheel underneath the bottom left corner of the rear glass.
-
Slide the opening wheel along the left edge of your Huawei P40 Pro to cut the adhesive.
-
Insert an opening pick underneath the top left corner of the rear glass, next to the opening wheel to prevent the adhesive from resealing.
-
-
-
Insert the opening wheel underneath the top left corner of the rear glass.
-
Slide the opening wheel along the top edge of your phone to cut the adhesive.
-
Insert an opening pick underneath the top right corner of the rear glass, next to the opening wheel to prevent the adhesive from resealing
-
-
-
Insert the opening wheel underneath the top right corner of the rear glass.
-
Slide the opening wheel along the right edge of your phone to cut the remaining adhesive.
-
-
-
-
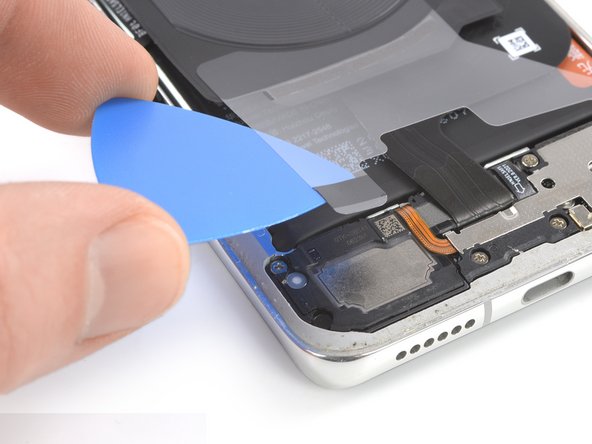
Slide an opening pick underneath the bottom right corner of the protective foil.
-
Use the opening pick to gently peel the protective foil off the daughterboard cover.
-
Repeat the previous procedure to peel the bottom left protective foil corner off the speaker.
-
-
-
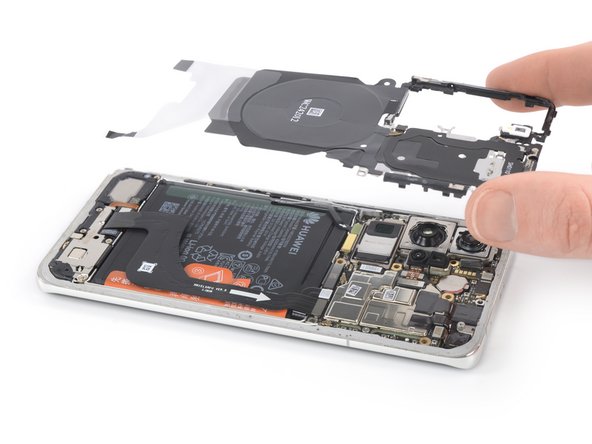
Slide an opening pick underneath the bottom left corner of the plastic midframe.
-
Slide the opening pick along the left edge of the midframe to release the plastic clips holding it in place.
-
-
-
Insert the tip of an opening pick at the top edge of the midframe next to the top left corner.
-
Tilt the opening pick downwards to pop the plastic clips out of their sockets.
-
Slide the opening pick along the top edge of the midframe to release the remaining plastic clips.
-
-
-
Use the flat end of a spudger to pry up and disconnect the interconnect cable.
-
-
-
Use the flat end of a spudger to pry up and disconnect the battery cable.
-
-
-
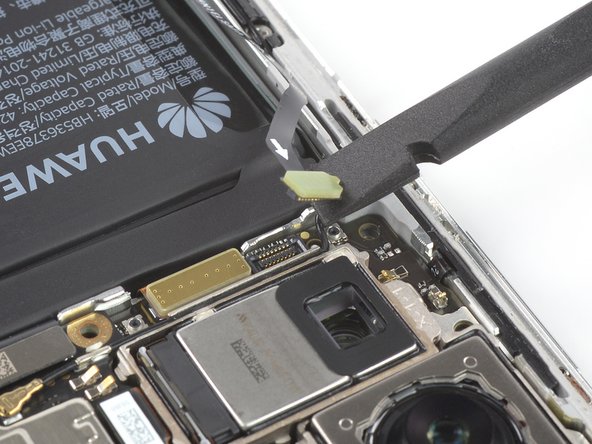
Use a spudger tor pry up and disconnect the antenna flex cable.
-
-
-
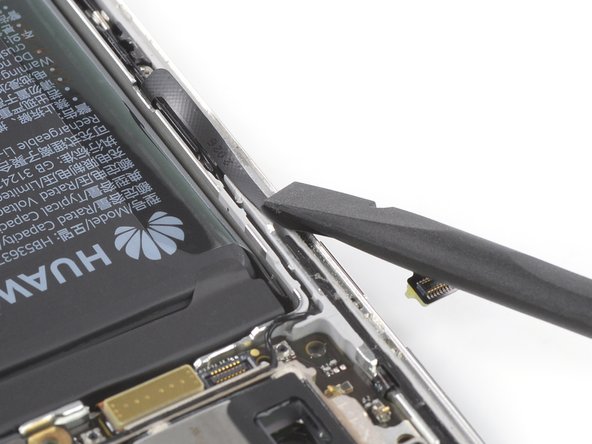
Fold the antenna cable to the side to avoid damaging it during the battery removal.
-
-
-
Fold the interconnect flex cable toward the charging port in order to get access to the battery pull tabs.
-
-
-
Use a pair of blunt nose tweezers or a clean fingernail to peel the orange adhesive strip labelled with a 1 off the battery.
-
-
-
Use a pair of blunt nose tweezers or a clean fingernail to peel the orange adhesive strip labelled with a 2 off the battery.
-
-
-
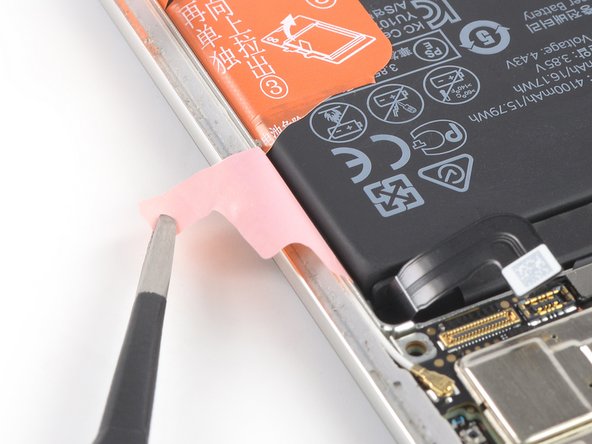
Peel the orange adhesive strip labelled with a 3 off the battery.
-
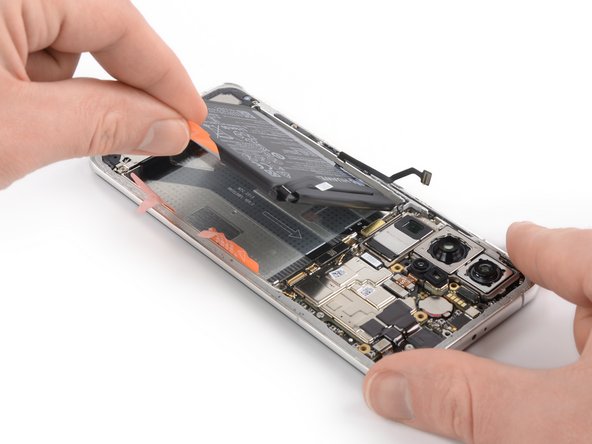
Pull up on the orange adhesive strip to lift the battery out of its recess and swing it up to an upright position.
-
-
-
Peel the battery off the remaining adhesive.
-
Remove the battery.
-
Peel the battery's adhesive sticker off the midframe.
-
If possible, turn on your device and test your repair before installing new adhesive and resealing.
Secure the new battery with pre-cut adhesive or double-sided adhesive tape. In order to position it correctly, apply the new adhesive into the device at the places where the old adhesive was located, not directly onto the battery. Press the new battery firmly into place.
To reassemble your device, follow these instructions in reverse order. Apply new adhesive where necessary after cleaning the relevant areas with isopropyl alcohol (>90%).
For optimal performance, after completing this guide, calibrate your newly installed battery.
Take your e-waste to an R2 or e-Stewards certified recycler.
Repair didn’t go as planned? Try some basic troubleshooting, or ask our Answers community for help.
Rückgängig: Ich habe diese Anleitung nicht absolviert.
4 weitere Nutzer:innen haben diese Anleitung absolviert.


