
iPod Touch 5th Generation Battery Replacement
Einleitung
Zu Schritt 1 der AnleitungPrerequisite only, loosen the battery from the rear case.
Was du brauchst


-
-
Remove three 1.6 mm #000 Phillips screws securing the logic board to the rear case.
-
-
-
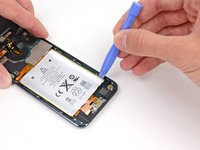
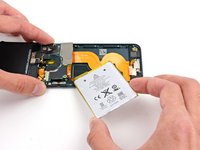
There are two strips of adhesive keeping the battery in place.
-
Turn the iPod over and heat the BACK of the aluminium iPod case. Do not heat the battery.
-
The aluminium case does not have to be hot; you should always be able to touch heated parts with your fingers at all times without it being uncomfortable.
-
-
-
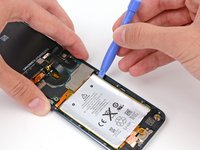
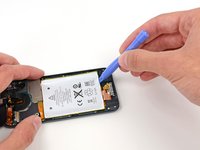
Insert a plastic opening tool into the top right notch and gently pry up on the battery.
-
-
-
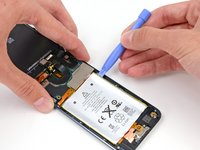
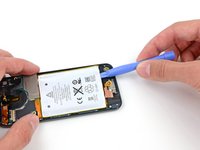
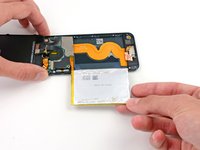
Continue with the lower right notch. Insert the plastic opening tool into the notch, and gently pry up on the side of the battery.
-
-
-
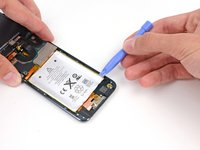
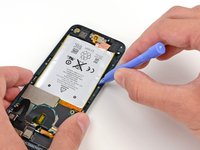
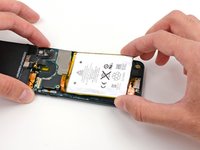
Once all of the adhesive is loosened, lift the battery up from the bottom and swing it out over the left side of the rear case.
-
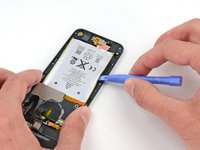
Flip the battery over to straighten its cable and set it down.
-


To reassemble your device, follow these instructions in reverse order.
To reassemble your device, follow these instructions in reverse order.
Rückgängig: Ich habe diese Anleitung nicht absolviert.
Eine weitere Person hat diese Anleitung absolviert.

3 Kommentare
This isn't even half of the procedure - the battery isn't even completely removed, much less replaced! Helpful but nowhere near complete.
Yeah, you might have skipped the most critical steps, like glass and bezel removal, desoldering, soldering etc..