
iPod Touch 6th Generation Display Assembly Replacement

Was du brauchst
Fix Kit
Dieses Kit enthält alle Ersatzteile und Werkzeuge, die für die Anleitung benötigt werden.

Ersatzteile

Werkzeuge


Mehr anzeigen …
-
-
Make sure you iPod is powered off before starting the repair
-
Hold the Sleep/Wake Button (Power Button) for about 3-5 seconds.
-
-
-
The bottom of the screen is held in place with adhesive.
-
Use the iOpener or Heat gun to soften the adhesive
-
-
-
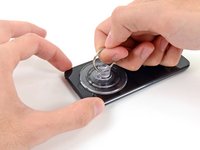
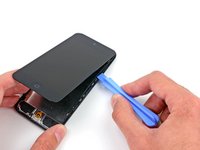
Place a suction cup just above the home button, towards the lower section of the glass.
-
Press it firmly to ensure the cup has a strong seal.
-
Hold iPod firmly on a hard surface
-
Start to Lift the suction cup, and start to firmly pull constantly until the adhesive breaks, and the display comes up from the rear case.
-
When lifting the screen apart if adhesive is still sticking to the display you may get a razor blade to cut the adhesive.
-
-
-
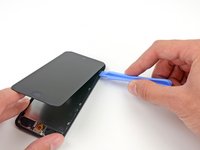
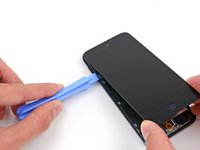
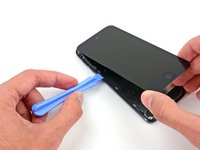
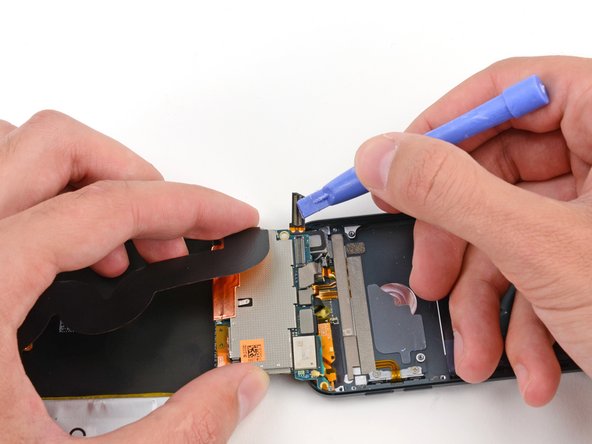
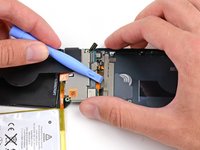
Start at the top of the Bezel, Using a plastic opening tool, insert it into the gap between the plastic frame and the rear case.
-
Slid to tool down the Bezel to loosen it from the case.
-
-
-
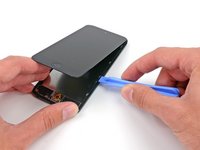
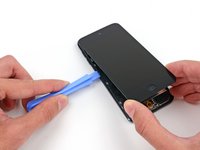
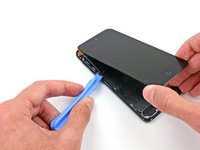
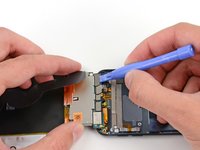
Insert the plastic opening tool between the frame and the rear case behind the first clip.
-
Rock the tool sideways, to spread the gap behind the clip and separate it from the rear case.
-
Repeat the procedure with the next two clips on that side
-
-
-
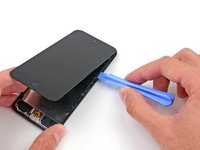
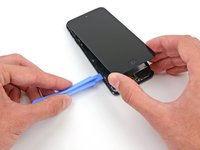
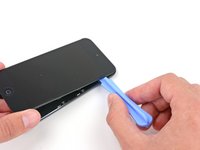
Moving onto the left side of the bezel, insert the plastic opening tool into the gap between the frame and the rear case near the top.
-
Now slide the tool down, loosening the frame from the case.
-
-
-
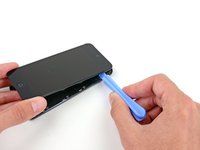
Insert the plastic opening tool between the frame and the rear case behind the first clip.
-
Rock the tool sideways, to spread the gap behind the clip and separate it from the rear case.
-
Repeat the procedure with the next two clips on that side
-
-
-
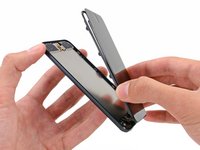
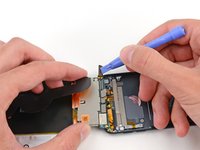
Insert the plastic opening tool between the display assembly and the rear case near the top of the iPod.
-
Barley twist the opening tool to lift the front panel up from the rear case.
-
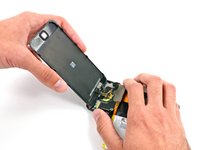
Separate the display assembly from the iPod.
-
-
-
-
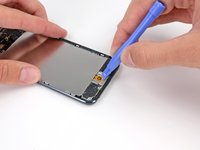
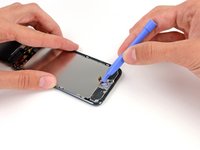
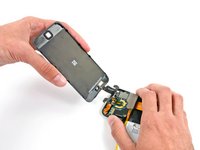
Carefully fold the display over away from the rest of the iPod, watching out not to disconnect or break any of the ribbon cables. Set the two halves flat on a flat surface
-
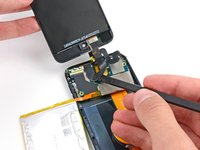
Use a plastic opening tool to pry the home button switch up from the LCD Plate
-
Do not try to remove the home button switch, because it is connected to components below the LCD plate.
-
-
-
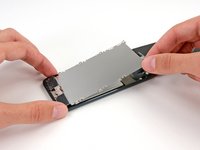
Remove the following screws securing the LCD plate to the rear case:
-
Two 1.2 mm #00 Phillips screws
-
Nine 1.6 mm #00 Phillips screws
-
One 2.3 mm #00 Phillips screw
-
-
-
Remove three 1.6 mm #00 Phillips screws that are securing the logic board onto the rear case.
-
-
-
Turn the iPod to the back were you can see the Apple logo and apply heat there to soften adhesive
-
-
-
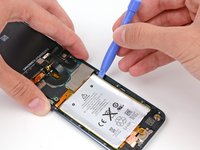
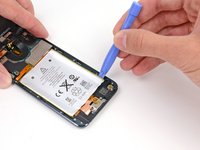
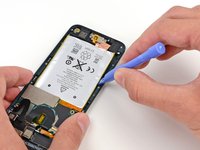
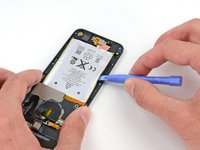
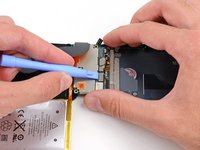
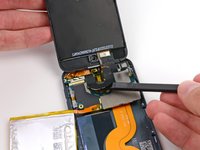
Insert a plastic opening tool into the top right notch and gently pry up on the battery.
-
Continue with the lower right notch. Insert a plastic opening tool into the notch, and gently lift up on the side of the battery.
-
-
-
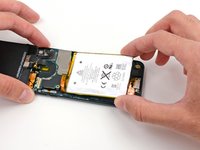
Once all of the adhesive is loose, lift the battery up from the bottom and sway it out over the left side of the rear case.
-
Once battery is out of case turn the battery over to straighten its cable and set it down.
-
-
-
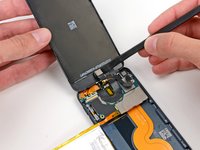
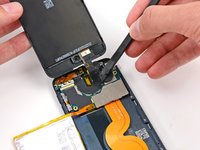
Get a spudger and use the flat end of it to take out facing camera out of its socket in the display assembly.
-
-
-
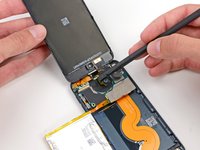
Use the tip of a spudger to peel back a piece of tape covering a screw on the side of the headphone jack.
-
-
-
Remove the following screws securing the headphone jack, Lightning connector, and speaker.
-
Three 2.6 mm #00 Phillips screws
-
Two 2.0 mm #00 Phillips screws
-
-
-
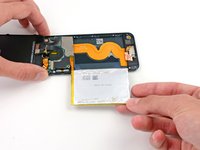
Gripping the large ribbon cable, gently pull the Lightning connector assembly out of the bottom of the case.
-
-
-
Flip the entire assembly over, showing the back of the logic board.
-
Use a plastic opening tool to disconnect the digitizer cable from the logic board.
-
-
-
Flip the Lightning connector/logic board assembly back over to expose the top of the logic board.
-
The display cable is lightly adhered to the top of the logic board.
-
Use the flat end of a spudger to peel the display cable up from the logic board.
-


To reassemble your device, follow these instructions in reverse order.
To reassemble your device, follow these instructions in reverse order.
Rückgängig: Ich habe diese Anleitung nicht absolviert.
16 weitere Personen haben diese Anleitung absolviert.

Team

Aiden's Tech Repairs Mitglied von Aiden's Tech Repairs
Business
1 Mitglied
6 Anleitungen geschrieben
2 Kommentare
This is a very comprehensive guide, but it is way beyond me.
I’d rather live with erratic behaviour in my current iPod, or ditch it and rely on my Android cell-phone for the same functions.