
iPad 2 Wi-Fi EMC 2560 Kopfhörerbuchse tauschen

Einleitung
Zu Schritt 1 der AnleitungVerwende diese Anleitung, um eine nicht funktionierende Kopfhörerbuchse auszutauschen, deine Mitbewohner werden es dir danken.


-
-
Erhitze den iOpener für dreißig Sekunden.
-
Im Verlauf der Reparatur kühlt sich der iOpener wieder ab. Erhitze ihn dann noch einmal für dreißig Sekunden.
-
-
-
Halte den iOpener an einem der flachen Enden und vermeide die heiße Mitte, während du ihn aus der Mikrowelle nimmst.
-
-
-
Fülle einen Topf oder eine tiefe Pfanne mit ausreichend Wasser, um den iOpener komplett damit bedecken zu können.
-
Erhitze das Wasser (ohne den iOpener) bis es kocht. Schalte die Wärmezufuhr (Platte) aus.
-
Lege den iOpener für etwa 2-3 Minuten in das heiße Wasser. Stelle sicher, dass der iOpener komplett mit Wasser bedeckt ist.
-
Nimm den iOpener mit einer Küchenzange aus dem Wasser heraus.
-
Trockne den iOpener gründlich mit einem Küchen- oder Handtuch ab.
-
Der iOpener kann jetzt verwendet werden. Solltest du den iOpener erneut erwärmen müssen, erhitze das Wasser nochmal bis zum Siedepunkt, schalte die Wärmezufuhr aus, und lege den iOpener wieder für 2-3 Minuten vollständig in das Wasser.
-
-
-
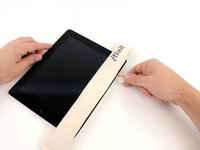
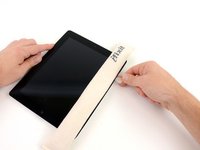
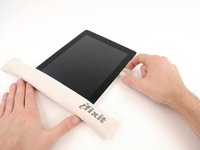
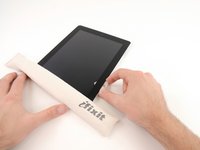
Wenn das Displayglas gesprungen ist, versuche die Splitter unter Verschluss zu halten und Verletzungen während der Reparatur zu vermeiden, indem du das Glas mit Tape zusammenhälst.
-
Lege sich überlappende Streifen aus durchsichtigem Packtape über das iPad Display, bis die ganze Oberfläche bedeckt ist.
-
Gib dein Bestes, um den Rest der Anleitung wie beschrieben zu folgen. Da das Glas jedoch, sobald es einmal gebrochen ist, höchstwahrscheinlich weiter zersplittern wird, brauchst du eventuell ein metallenes Hebelwerkzeug, um das Glas herauszudrücken.
-
-
In diesem Schritt verwendetes Werkzeug:Safety Glasses$3.19
-
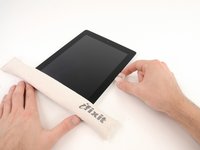
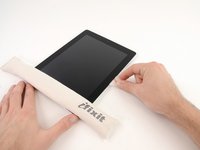
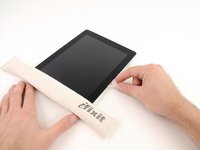
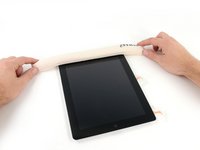
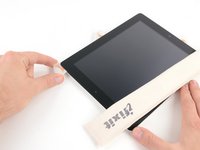
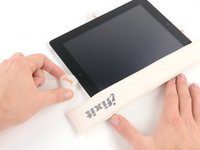
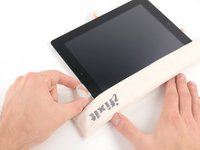
Lege den iOpener flach auf die rechte Kante des iPads und glätte es, sodass ein guter Kontakt zwischen der iPad- und der iOpener-Oberfläche besteht.
-
Lasse den Beutel etwa 90 Sekungen auf dem iPad liegen, bevor du versuchst, das Front Panel zu öffnen.
-
-
-
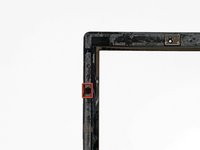
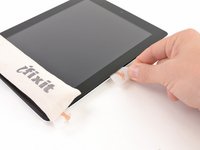
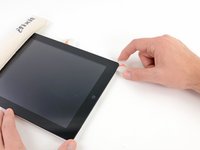
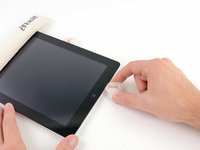
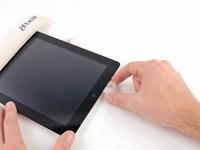
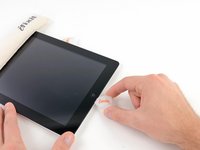
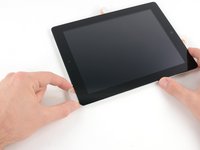
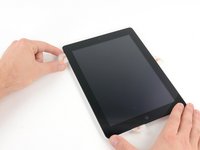
Der Klebering weist in der oberen rechten Ecke des iPads, etwa 5 cm von der oberen Kante entfernt, eine kleine Lücke auf. Diese Schwäche wirst du ausnutzen.
-
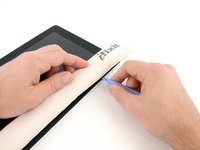
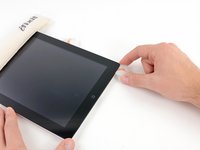
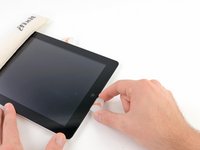
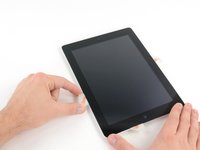
Richte das Werkzeug auf die Stummtaste aus. Führe die Spitze eines Plastic Opening Tools in die Lücke zwischen dem Frontglas und der Kunststoffeinfassung. Führe nur die äußerste Spitze des Öffnungswerkzeuges ein, gerade weit genug um den Spalt zu weiten.
-
-
-
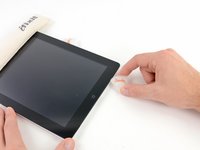
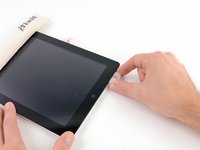
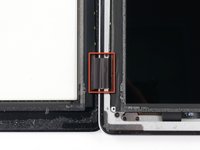
Achte darauf, dass das Werkzeug an der richtigen Stelle einführst - zwischen der Kunststoffeinfassung des Displays und dem Front Panel Glas.
-
-
-
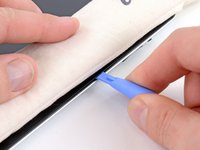
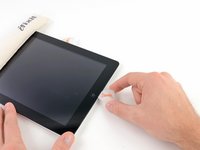
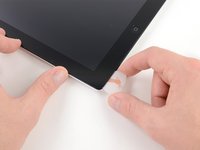
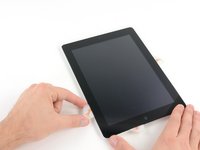
Lasse die Spitze des Plastic Opening Tools eingekeilt zwischen dem Frontglas und der Kunststoffeinfassung und führe ein Opening Pick in die Lücke, direkt neben dem Plastic Opening Tool.
-
-
-
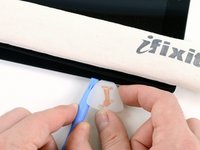
Entferne das Plastic Opening Tool vom iPad und schiebe das Opening Pick weiter unter das Frontglas bis zu einer Tiefe von etwa 1-1,5 cm.
-
-
-
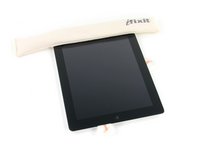
Während du daran arbeitest, den Kleber auf der rechten Seite des iPad zu lösen, erhitze den iOpener erneut und platziere ihn auf der unteren Kante des iPads.
-
-
-
Während die Unterkante vom iOpener erhitzt wird, fange an, den Kleber an der rechten Kante des iPads zu lösen.
-
Fahre mit dem Opening Pick die Kante des iPads entlang nach unten und löse dabei den Kleber.
-
-
-
Wenn das Opening Pick im Kleber hängen bleibt, "walze" das Pick entlang der Seitenkante des iPads und löse dabei weiter den Kleber.
-
-
-
Bevor du das erste Opening Pick aus der unteren Ecke des iPads entfernst, platziere ein zweites Pick unter der rechten Ecke des Frontglases, um zu verhindern, dass der Kleber wieder anzieht.
-
Erhitze den iOpener erneut und platziere ihn an der Oberkante des iPads.
-
-
-
Du musst den Kleber, der Antenne und Front Panel verbindet, entfernen, ohne die empfindlichen Teile, mit denen die Antenne unten am iPad befestigt ist, zu beschädigen. Sei vorsichtig beim weiteren Vorgehen.
-
-
-
Fahre mit dem Opening Pick entlang der rechten unten Ecke des iPads und löse dabei den Kleber dort.
-
-
-
Fahre mit der Spitze des Opening Picks entlang der unteren Kante des iPads und entferne so den Kleber über der Wi-Fi Antenne.
-
-
-
Sobald du hinter der Wi-Fi Antenne angekommen bist (etwa 75 mm entfernt von der rechten Ecke bzw. direkt neben dem Home Button, führe das Opening Pick wieder soweit ein, wie es geht.
-
Fahre mit dem Pick nach rechts und löse so den Kleber, der Wi-Fi Antenne und Frontglas verbindet.
-
Die Antenne ist unten am iPad mit Schrauben und einem Kabel befestigt. Mit diesem Schritt wird die Antenne vom Front Panel getrennt, wobei sichergestellt ist, dass die Antenne nicht beschädigt wird, wenn du das Panel entfernst.
-
-
-
-
Fahre damit fort, den Kleber entlang der Unterseite des iPads zu lösen. Ziehe dazu das Opening Pick weit genug heraus, um den Home Button zu umschiffen und führe es wieder etwa 1 cm tief ein, sobald du den Home Button passiert hast.
-
-
-
Fahre damit fort, den Kleber entlang der Unterkante des iPads zu lösen.
-
Lasse das Opening Pick eingekeilt unter dem Frontglas nahe dem Home Button.
-
-
-
Erhitze den iOpener wieder in der Mikrowelle und lege ihn auf die linke Seite des iPads, um den Kleber in diesem Bereich zu erwärmen.
-
-
-
Fahre mit dem Opening Pick entlang der Oberkante des iPads und ziehe es leicht heraus, um den Bügel der Frontkamera zu umfahren
-
Der Kleber ist in diesem Bereich sehr dick aufgetragen, weswegen beträchtlich Kraft aufgewendet werden muss. Arbeite langsam und vorsichtig und achte darauf, nicht abzurutschen und dir oder dem iPad keinen Schaden zuzufügen.
-
-
-
Fahre damit fort, den Kleber entlang der oberen Kante des iPads zu lösen und fahre mit dem Opening Pick um die linke obere Ecke.
-
-
-
Fahre mit dem Plektrum entlang der linken Kante des iPads und löse dabei den Kleber. Der Klebestreifen ist hier durch den Digitizer an der ganzen linken Seite sehr dünn. Schiebe das Pick deswegen nicht tiefer als 1 cm ein, um Schäden am Digitizer zu vermeiden.
-
-
-
Löse den Kleber entlang der linken unteren Ecke mit dem Pick, dass sich noch an der Unterkante des iPads befindet.
-
-
-
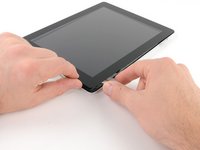
Heble mit einem Opening Pick die rechte untere Ecke des iPads nach oben und ergreife es.
-
-
In diesem Schritt verwendetes Werkzeug:Microfiber Cleaning Cloths$3.99
-
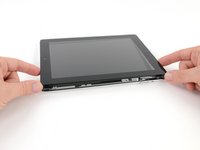
Halte das iPad an der unteren und oberen rechten Ecke fest und klappe das Frontglas vom iPad weg.
-
-
-
Entferne die vier 2,0 mm Kreuzschlitzschrauben, die den LCD am hinteren Gehäuse befestigen.
-
-
-
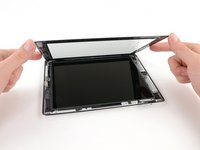
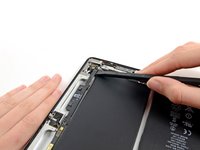
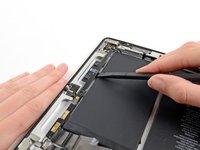
Hebe das LCD an der langen Kante auf der Lautsprecherreglerseite an und klappe es vorsichtig aus dem hinteren Gehäuse heraus —so als ob du eine Buchseite umblätterst.
-
Lege das LCD umgekehrt auf das Front Panel.
-
-
In diesem Schritt verwendetes Werkzeug:Tweezers$4.99
-
Entferne, falls vorhanden, mit einer Pinzette das Stückchen Klebeband vom Ende des Kabels zur Frontkamera.
-
-
-
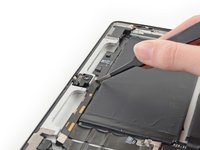
Hebele den Stecker vorsichtig mit dem flachen Ende des Spudgers aus seinem Anschluss auf der Kontrollplatine.
-
-
-
Trenne die Klebeverbindung des Frontkamerakabels zur Kontrollplatine mit dem flachen Ende des Spudgers auf.
-
-
-
Heble die Frontkamera aus dem Klebeschaumstoff heraus, mit dem sie am Rückgehäuse verklebt ist.
-
Entferne die Frontkamera.
-
-
In diesem Schritt verwendetes Werkzeug:Tweezers$4.99
-
Entferne mit einer Pinzette die Gummiabdeckung vom Gehäuse der Rückkamera.
-
-
-
Entferne die einzelne 3,3 mm Kreuzschlitzschraube von der Metallhalterung der Rückkamera.
-
-
-
Hebe die Metallhalterung der Rückkamera gerade aus ihrer Vertiefung im Rückgehäuse heraus.
-
-
-
Hebele den Stecker der Rückkamera mit einem Plastiköffnungswerkzeug aus seinem Anschluss auf der Kontrollplatine hoch.
-
Entferne die Rückkamera.
-
-
-
Entferne die einzelne 2,1 mm Kreuzschlitzschraube aus dem Gehäuse der Rückkamera.
-
Nimm das Kameragehäuse vom Rückgehäuse ab.
-
-
-
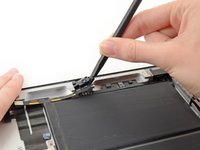
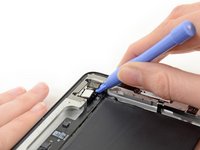
Verwende das flache Ende eines Spudgers, um die Sicherungsbügel am ZIF-Anschluss des Flachbandkabels der Tasteneinheit hochzuklappen.
-
-
-
Fahre mit der Spitze eines Spudgers unter das Kabel der Tasteneinheit, um es aus dem Anschluss zu lösen.
-
-
-
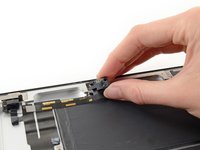
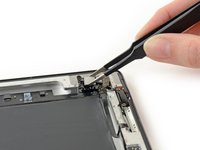
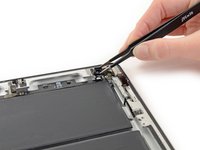
Verwende das flache Ende eines Spudgers, um den Sicherungsbügel am ZIF-Anschluss des Mikrofon-Flachbandkabels hochzuklappen.
-
-
In diesem Schritt verwendetes Werkzeug:Tweezers$4.99
-
Ziehe das Mikrofon-Flachbandkabel mit einer Pinzette gerade heraus.
-
Biege das Kabel leicht, damit es nicht im Weg ist.
-
-
-
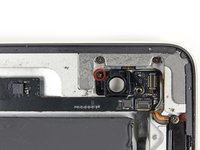
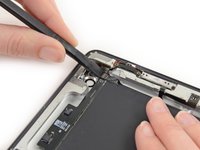
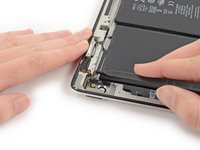
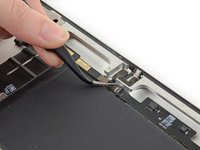
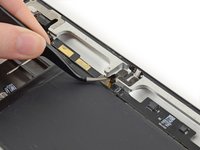
Entferne die beiden 2,9 mm Kreuzschlitzschrauben, mit denen die Kopfhörerbuchse am Rückgehäuse befestigt ist.
-
Ziehe die Kopfhörerbuchse aus ihrer Öffnung im Rückgehäuse und klappe sie weg.
-
-
-
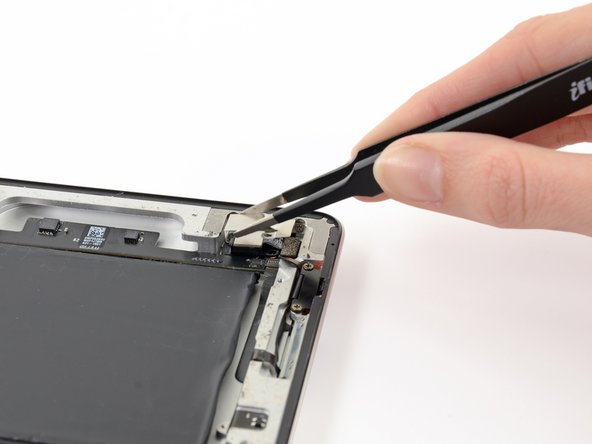
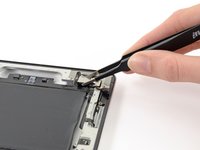
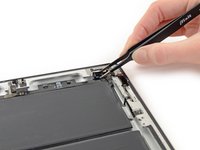
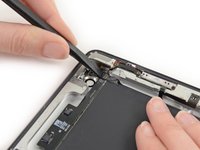
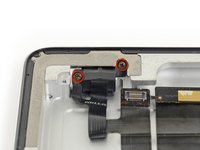
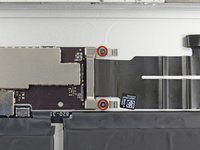
Entferne die beiden 2,1 mm Kreuzschlitzschrauben, mit denen die Metallhalterung am Rückgehäuse befestigt ist.
-
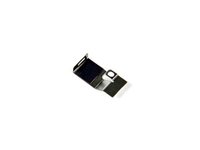
Entferne die Metallhalterung vom Rückgehäuse.
-
-
-
Falls vorhanden, entferne mit einer Pinzette das Stück Klebeband, das das Ende des Kabels der Kopfhörerbuchse/Steuerplatine bedeckt.
-
-
-
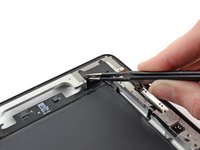
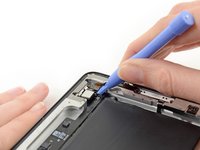
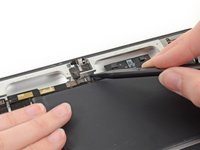
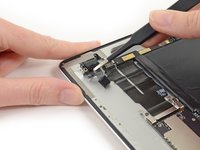
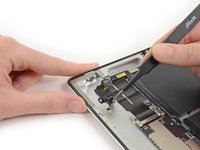
Verwende das flache Ende eines Spudgers, um den Sicherungsbügel am ZIF-Anschluss der Kopfhörerbuchse/des Kabels der Steuerplatine hochzuklappen.
-
-
-
Schiebe die Spitze eines Spudgers unter das Flachbandkabel, um es abzutrennen.
-
-
-
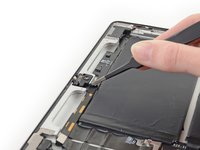
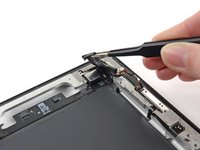
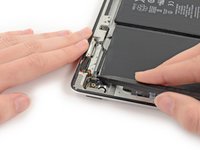
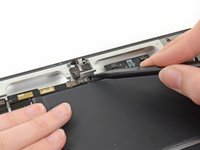
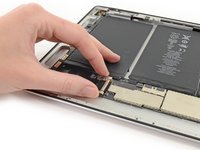
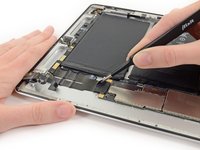
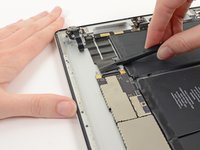
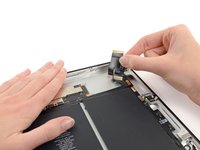
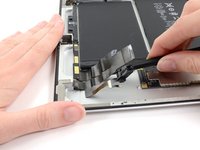
Ziehe das Flachbandkabel der Kopfhörerbuchse/Steuerplatine vorsichtig vom Rückgehäuse ab, um es vom Kleber zu lösen.
-
-
-
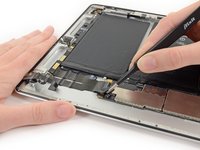
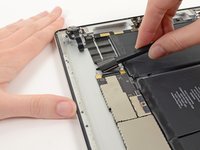
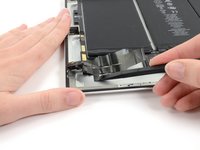
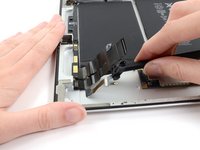
Benutze das flache Ende eines Spudgers, um den Kleber unter dem schmaleren Teil des Flachbandkabels in der Nähe der Kopfhörerbuchse zu lösen.
-
-
-
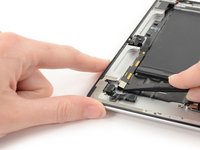
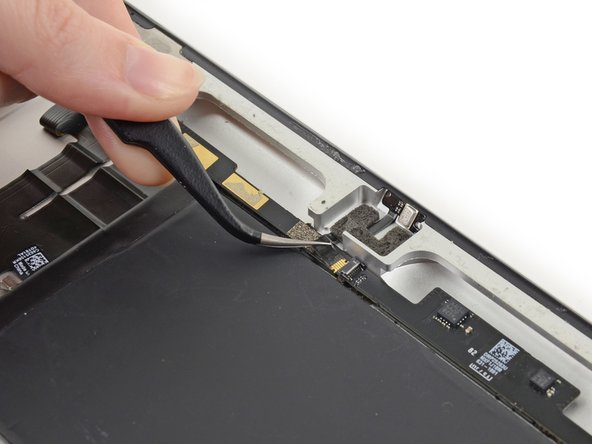
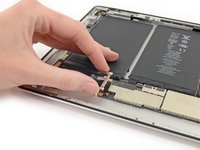
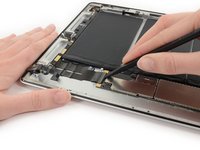
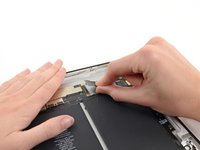
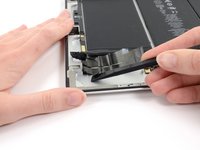
Schiebe das flache Ende eines Spudgers unter den mittleren Teil des Flachbandkabels, um den Kleber zu lösen, mit dem es am Rückgehäuse befestigt ist.
-
-
-
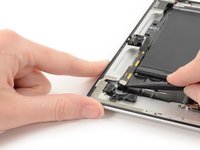
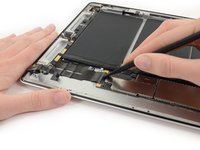
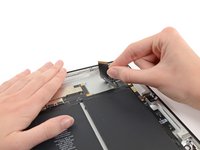
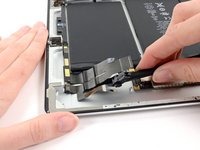
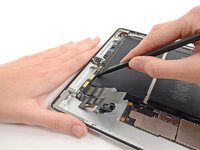
Schiebe das flache Ende eines Spudgers unter den breitesten Teil des Kabels, um vom Rückgehäuse zu lösen.
-
-
-
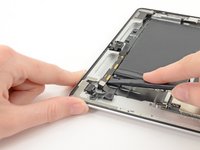
Um sie vom Kleber zu lösen, hebelst du vorsichtig unter der Steuerplatine in der Nähe des fFrontkamera-Anschlusses.
-
-
-
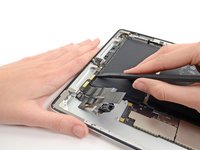
Heble vorsichtig unter der Steuerplatine in der Nähe der Frontkamera.
-
Heble vorsichtig unter dem breitesten Teil der Platine, um die Einheit vom letzten Kleber zu lösen.
-


Um dein Gerät wieder zusammenzubauen, folge den Schritten dieser Anleitung in umgekehrter Reihenfolge und benutze unsere Anleitung für die iPad 2 Wi-Fi EMC 2560 Front Panel Klebestreifen, um das Front Panel wieder zu befestigen.
Um dein Gerät wieder zusammenzubauen, folge den Schritten dieser Anleitung in umgekehrter Reihenfolge und benutze unsere Anleitung für die iPad 2 Wi-Fi EMC 2560 Front Panel Klebestreifen, um das Front Panel wieder zu befestigen.
Rückgängig: Ich habe diese Anleitung nicht absolviert.
15 weitere Personen haben diese Anleitung absolviert.
Besonderer Dank geht an diese Übersetzer:innen:
100%

Annika Faelker hilft uns, die Welt in Ordnung zu bringen! Wie kann ich mithelfen?
Hier starten ›

