Einleitung
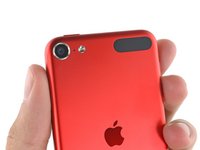
Zu Schritt 1 der AnleitungApple has literally been calling their iPod Touch 6th Generation "the best iPod touch yet." While they are giving their music box some of the iPhone's newest duds, only teardown will tell if this iPod is up to repairability snuff. Join us for some sweet disassembly, and some spicy X-ray action.
As always, keep in touch (get it, haha) with us by following iFixit on Facebook, Twitter, and Instagram.
Was du brauchst
Werkzeuge


Mehr anzeigen …
Einführungsvideo
-
-
With the same A8 processor and M8 coprocessor as the iPhone 6, it's hard not to get excited about the next-generation iPod Touch. Let's check specs:
-
4-inch 1136 x 640 pixels (326 ppi) Multi-Touch IPS Retina display
-
802.11a/b/g/n/ac Wi‑Fi + Bluetooth 4.1 wireless technology (a whole .1 better than the 5th gen!)
-
Six-axis gyro + accelerometer
-
8 MP, 1080p iSight camera with ƒ/2.4 aperture and 1.2 MP, 720p HD Facetime camera with ƒ/2.2 aperture
-
Shiny new model number: A1574
-
-
-
Being that the iPod Touch hasn't seen a full-blown update since 2012, we'd like to see what we're up against.
-
Fortunately, we brought friends. With superpowers.
-
Cry havoc and let fly the X-rays.
-
-
-
This new Touch now comes in gold, in addition to blue, pink, (Product)Red, silver, and space gray.
-
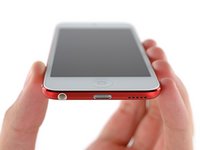
The bottom of the device contains no surprises with a now-familiar Lightning port, headphone jack, and speaker grille.
-
Unlike recent iPhones, this Touch lacks a Touch ID sensor. Although it sacrifices Apple Pay, this is good news for repairability since Touch ID buttons are paired to their corresponding processor.
-
On the other side, the inside, we catch a glimpse of the home button and Lightning connector.
-
-
In diesem Schritt verwendetes Werkzeug:iSclack$24.99
-
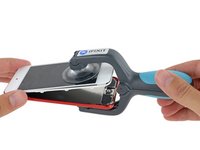
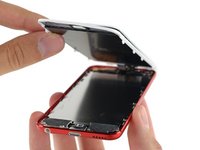
Heat. iSclack. Repeat—this digitizer/LCD panel is no match for our opening procedure.
-
With the display assembly out of the way, we're one step closer to the innards.
-
-
-
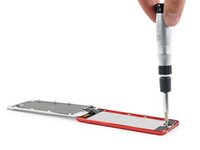
We're eager to delve deeper into this new Touch, so we grab a screwdriver and set to work on extracting the EMI shield.
-
Lifting the shield, we get a glimpse of familiar territory. So far things look pretty darn similar to the 2012 vintage.
-
-
-
-
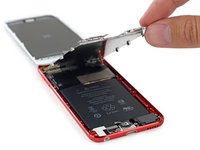
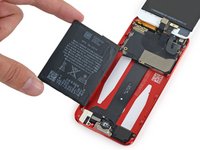
We've been down this road before, and we're pretty confident in our technique for getting the battery out. Unless of course, something has changed...
-
This Touch totes a 3.83 V, 3.99 Wh battery with a rating of 1043 mAh, as opposed to the 3.7 V, 3.8 Wh, 1030 mAh rated battery found in the 5th Generation Touch.
-
-
-
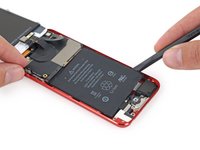
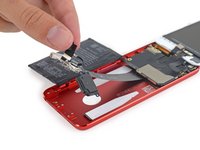
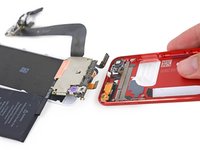
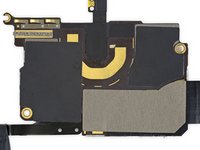
After the battery comes the lower assembly, home to the Lightning connector, speaker, microphone, headphone jack, and home button switch. Say that five times fast.
-
In lieu of that wiggly yellow flex cable, a new, straight ribbon cable connects the lower assembly to the underside of the logic board.
-
-
-
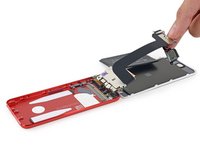
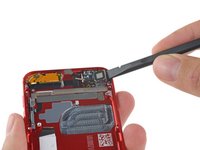
A little bit of careful spudgering goes a long way.
-
We pop off these connectors and are free to separate the two assemblies—the rear case assembly, and the "everything else" assembly.
-
Leftover in the rear case:
-
Antenna assembly
-
Battery adhesive (oops)
-
Snarled volume button/power button/rear flash/microphone cable assembly
-
-
-
With a gentle flick of the wrist, the rear-facing camera is free and ready to pass inspection alongside its cousin, the iPhone 6 camera...
-
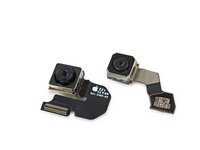
For your viewing pleasure: the 8 MP iPhone 6 camera (left) and the 8MP iPod Touch camera (right).
-
Physical size serves as a pretty accurate indicator of relative quality. Despite the equal pixel count, the Touch's camera lacks some of its cousin's finer features, such as the sapphire crystal lens cover and auto image stabilization.
-
The Touch's ƒ/2.4 aperture also falls short of the 6's ƒ/2.2.
-
-
-
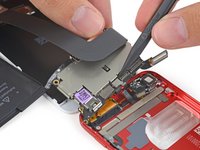
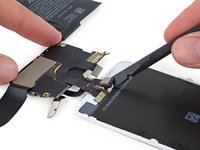
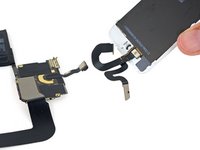
Turning our attention to the "everything else" assembly, we quickly set to work on liberating the front-facing camera, and find ourselves facing a tangle of display cables. It's a good thing our teardown engineer has the touch it takes to handle this messy bundle.
-
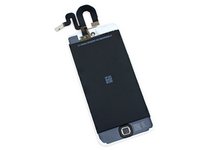
With some deft tweezing, we are able to extract the front panel.
-
The display is almost the same as previous Touches, but hey, it has a white bezel now!
-
-
-
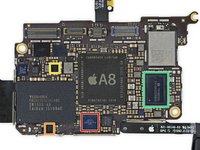
Let's touch some of these chips, shall we? This logic board is packing:
-
Apple A8 APL1011 SoC + SK Hynix RAM H9CKNNN8KTMRWR-NTH 1 GB LPDDR3 RAM (Same as iPhone 6, but underclocked to 1.10 GHz per core)
-
NXP Semiconductors LPC18B1UK ARM Cortex-M3 Microcontroller (better known as the M8 Motion Coprocessor)
-
Toshiba THGBX3G7D2KLA0C 128 Gb (16 GB) NAND Flash
-
InvenSense MP67B 6-axis Gyroscope and Accelerometer
-
Universal Scientific Industrial 339S0231 Bluetooth/Wi-Fi Module (Probably based on Broadcom BCM4354)
-
Broadcom BCM5976 Touchscreen Controller
-
Texas Instruments 343S0645 Touchscreen Controller
-
-
-
More chips, more fun.
-
Apple 338S1116 Cirrus Audio Codec
-
NXP Semiconductors 1610A2 Display Interface Controller
-
Texas Instruments TPS65730A0P Power Management IC
-
Apple 338S00040-AZ Power Management IC (presumably a variation of the 338S1251-AZ PMIC found in the iPhone 6)
-
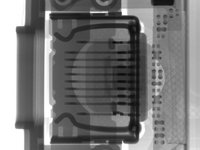
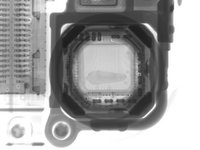
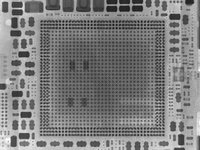
X-ray bonus round! Let's not forget our closer look at the uber-powerful A8 processor.
-
-
-
iPod
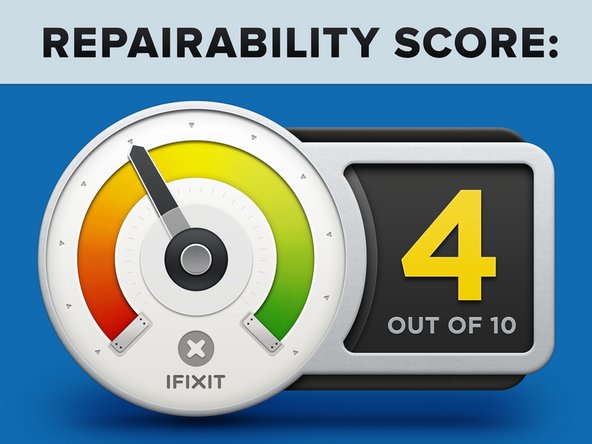
turtleTouch 6th Generation Repairability Score: 4 out of 10 (10 is easiest to repair) -
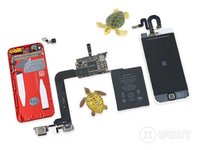
While very difficult, opening the case and replacing components is not impossible.
-
The battery is adhered with pull tabs that should aid in battery replacement.
-
Many components are soldered together, requiring either a very difficult or a very expensive repair if any one part breaks.
-
There are no external screws. Instead, a combo of clips and adhesive makes it difficult to open the case.
-
Ribbon cables connected to the logic board run over the top and connect on the bottom, making it difficult to remove the board or disconnect the cables.
-
And of course, a big high-five to our pals at Creative Electron for their awesome images and expertise!
-


25 Kommentare
The top shield pops off but then the support assembly that holds the shield will cover some components. It was a real pain trying to clean out corrosion in the upper right corner. Can be removed via hot air though.
Joe -
iFixit didn't mention the new, much larger (and therefore louder) speaker thanks to the removal of the Apple Loop connector! That's a real win!
What about the Hard Drive? I didn't see one any where in there. I have a 32GB model and I would like to upgrade to a SSD, is that possible? Mine constantly needs to be rebooted for some reason (in fact now it won't even reboot). Is there a way to fix it?
There is no hard drive. All memory is solid state (IC’s) soldered to the logic board.