
Huawei Mate 8 Display Replacement

Einleitung
Zu Schritt 1 der AnleitungUse this guide to replace the defective display of your Huawei Mate 8.
Was du brauchst
Fix Kit
Dieses Kit enthält alle Ersatzteile und Werkzeuge, die für die Anleitung benötigt werden.

Ersatzteile

Werkzeuge


Mehr anzeigen …
-
-
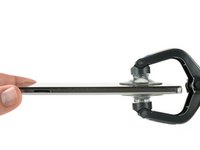
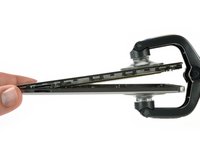
Use an iSclack or a suction handle in the bottom area of your phone to separate the display unit from the rear panel.
-
-
-
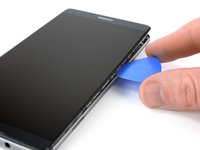
Use an opening pick to fully separate the clips, releasing the phone.
-
Open the phone like a book from the SIM tray side.
-
Use a spudger, to disconnect the fingerprint sensor cable.
-
-
-
Remove the liquid indicator sticker.
-
Remove the Phillips #00 screw that holds down the metal shield.
-
Use a spudger to remove the metal shield.
-
-
-
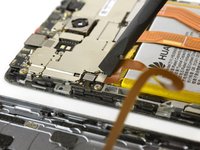
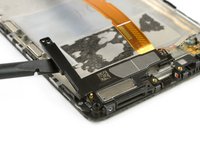
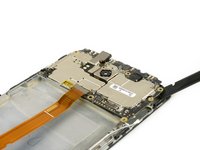
Use the flat end of a spudger to disconnect the display, daughterboard interconnect, and battery cables.
-
-
-
-
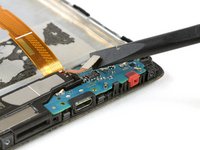
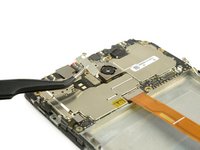
Lift the coaxial connector off of its socket to allow access to the daughterboard interconnect cable bracket.
-
Remove the bracket.
-
-
-
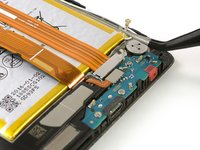
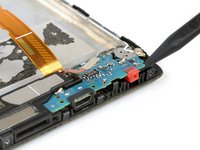
Use a spudger to disconnect the interconnect cable.
-
Remove the interconnect cable.
-
-
-
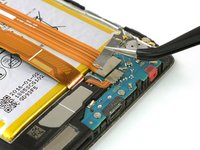
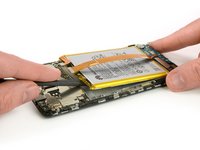
Get a good grip on the pull tab near the power button and peel out the adhesive strip by steadily pulling at the tab in a flat angle.
-
-
-
Heat an iOpener and place it on the phone for about a minute to loosen the remaining adhesive.
-
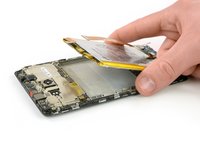
Carefully insert the flat end of a spudger to separate any remaining adhesive at the top of the battery.
-
-
-
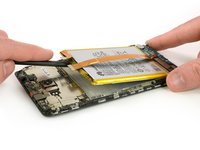
Lift the top end of the battery to pull the battery off of the remaining adhesive strip.
-
-
-
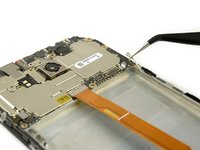
Remove the four Phillips #00 screws holding the daughterboard and loudspeaker to the phone.
-
-
-
Use the flat end of a spudger to disconnect the loudspeaker connector cable.
-
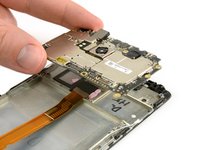
Use the tip of a spudger to lift the daughterboard from the phone.
-
-
In diesem Schritt verwendetes Werkzeug:Tweezers$4.99
-
Insert the flat end of a spudger under the loudspeaker at the gap on the left side.
-
Work the spudger under the loudspeaker to seperate it from the adhesive and remove the loudspeaker.
-
Use tweezers to take the vibration unit out of its housing.
-
-
-
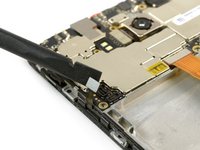
Remove the bracket from the rear camera flex cable.
-
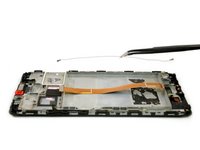
Use tweezers to disconnect the antenna cable.
-
-
-
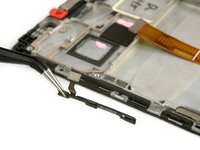
Use the flat end of a spudger to disconnect the volume and power flex cable on the bottom left side of the mainboard.
-
Work the flat end of a spudger under the top right side of the mainboard to pry it out.
-
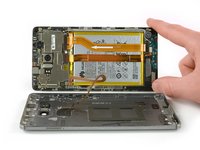
Remove the mainboard.
-
-
-
Remove the antenna interconnect cable.
-
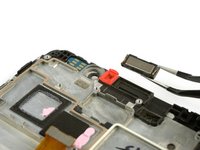
Remove the power and volume switch assembly.
-
-
-
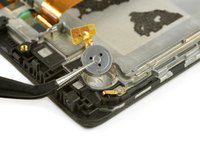
Use tweezers to remove the earpiece speaker.
-
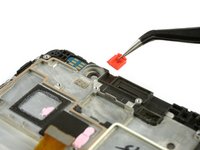
Remove the red rubber gasket.
-
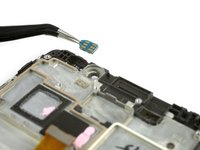
Remove the ambient light and proximity sensor.
-


To reassemble your device, follow these instructions in reverse order.
To reassemble your device, follow these instructions in reverse order.
Rückgängig: Ich habe diese Anleitung nicht absolviert.
9 weitere Personen haben diese Anleitung absolviert.

