
Lenovo Thinkpad X1 Carbon 4th Gen Lithium Battery Replacement
Einleitung
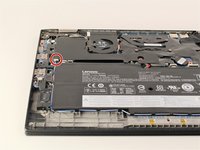
Zu Schritt 1 der AnleitungIf your Lenovo ThinkPad X1 Carbon 4th Gen (20FB002LUS) is not holding a charge or not charging at all, the battery may need to be replaced. Follow this guide to replace the main lithium-ion battery in your laptop.
The main lithium-ion battery in your laptop is responsible for powering your device when it is not plugged in. Over time, the battery may degrade and drain faster during use—this problem can be solved by replacing the battery.
This guide covers how to replace the primary battery on your laptop. If your device is not powering on at all, it’s recommended that you check the smaller coin cell battery first, since replacing the small coin cell is done more easily and costs less than the larger lithium-ion battery. A guide for replacing the coin cell battery can be found here.
Before starting this guide, make sure to power down the device fully and unplug any exterior sources of power from the laptop.
Was du brauchst
Fix Kit
Dieses Kit enthält alle Ersatzteile und Werkzeuge, die für die Anleitung benötigt werden.

Ersatzteile


Werkzeuge


Mehr anzeigen …
-
-
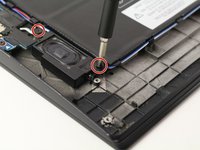
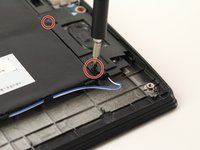
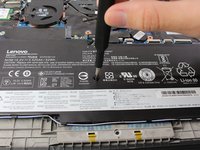
Unscrew the nine captive screws on the bottom cover of the laptop using a Phillips #1 screwdriver.
-
There are a few small clips around the edge that you may need to pry at to free them. An opening pick may be helpful for this process.
-
-
-
-
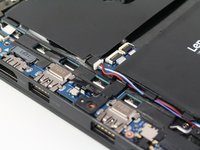
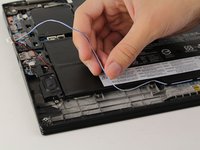
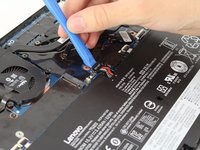
Unweave the blue and white wires from underneath the plastic tabs connected to the battery.
-
-
-
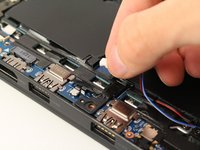
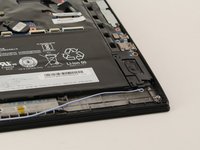
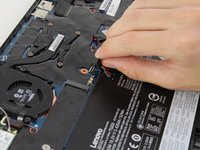
Carefully lift the far end of the battery connector with an opening tool facing towards you.
-
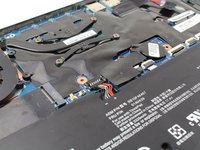
Remove the connector by pushing it forward and lifting.
-


To reassemble your device, follow these instructions in reverse order.
To reassemble your device, follow these instructions in reverse order.
Rückgängig: Ich habe diese Anleitung nicht absolviert.
12 weitere Personen haben diese Anleitung absolviert.
Team

Cal Poly, Team S1-G4, White Winter 2020 Mitglied von Cal Poly, Team S1-G4, White Winter 2020
CPSU-WHITE-W20S1G4
3 Mitglieder
19 Anleitungen geschrieben
3 Kommentare
Use a Phillips #0 not a #1 or P0 driver. It makes life a lot easier. ??
Amazing skills learned for a beginner like me, thanks for this valuable knowledge!