
Motorola Moto Z2 Play Fingerprint Sensor Replacement

Einleitung
Zu Schritt 1 der AnleitungUse this guide to replace the fingerprint sensor on your Motorola Z2 Play.
Warning: Because of the strong adhesive securing the display, minimal clearance for inserting your tools, and high heat required, there's a good chance of accidentally damaging the display when removing it. If you intend to re-use the display, take serious care when heating and inserting tools to separate the display from the rest of the device.
Was du brauchst


-
-
Heat the edges of your Motorola Moto Z2 Play screen for two to three minutes with a heat gun. You adjust the heat gun to 85 degrees centigrade, and be careful not to hold the heat gun on one position for too long; to avoid damaging, or "hotspotting" the LCD. The screen should be very warm, but not painful, to the touch. Reheat as necessary.
-
-
-
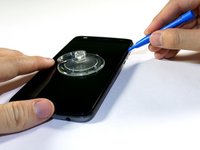
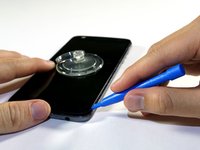
Pry the screen by wedging the plastic opening tool under the screen at the charging port.
-
Work your way around the screen with the plastic opening tool.
-
-
-
In diesem Schritt verwendetes Werkzeug:Plastic Cards$2.99
-
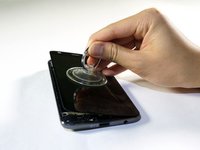
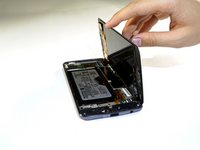
Use a suction cup to lift up screen from left to right.
-
-
-
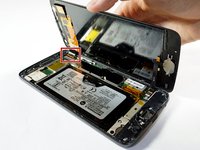
Identify ribbon connector at the top right of the phone.
-
Pry the black locking bar up gently with a plastic opening tool.
-
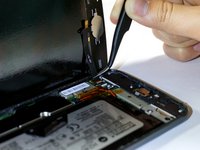
Remove the ribbon wires by pulling them out of the connector with a tweezer.
-
-
In diesem Schritt verwendetes Werkzeug:Tweezers$4.99
-
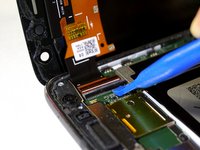
Identify the ribbon cable, located at the bottom right of the phone.
-
If present, remove kapton (orange) tape covering the cable connector.
-
Flip up the small locking flap on the ZIF connector and use tweezers to slide the cable straight out of its socket.
-
-
-
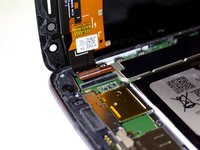
Apply an iOpener to the bottom edge of the display assembly for about a minute to loosen the adhesive beneath the fingerprint sensor.
-
-
-
Carefully pry off the fingerprint sensor by lifting it with the edge of an opening pick.
-
-
In diesem Schritt verwendetes Werkzeug:Tweezers$4.99
-
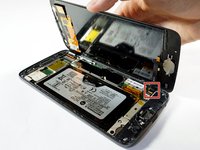
Remove the fingerprint sensor with a pair of tweezers.
-


Compare your new replacement part to the original part—you may need to transfer remaining components or remove adhesive backings from the new part before installing.
To reassemble your device, follow the above steps in reverse order.
Take your e-waste to an R2 or e-Stewards certified recycler.
Repair didn’t go as planned? Check out our Answers community for troubleshooting help.
