
Motorola Moto E4 Screen (No Fingerprint Sensor) Replacement

Einleitung
Zu Schritt 1 der AnleitungFollow this guide to remove and replace a cracked screen for the Moto E4. This replaces the front glass as well as the LCD panel.
Before you begin, download the Rescue and Smart Assistant app to backup your device and diagnose whether your problem is software or hardware related.
This guide is specifically for the Moto E4 that does not have a fingerprint sensor. If your phone has a fingerprint sensor at the bottom of the screen, do not follow this guide.


-
-
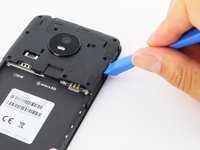
Remove the plastic cover by gently prying it up from the notch at the bottom right corner of the phone.
-
With the phone face down, lift the battery up by the labeled tab and remove it from the device.
-
-
-
Remove all nine 4 mm Phillips screws from the top plastic cover.
-
-
-
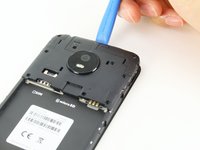
Gently pry up the plastic cover using a plastic opening tool.
-
Start by inserting the tool under the cover's right edge, as indicated by the first picture.
-
Pry up, and continue prying around the rest of the cover in a counter clockwise path.
-
Once loose, remove the plastic cover from the phone.
-
-
-
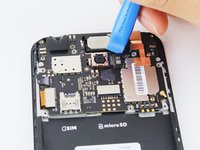
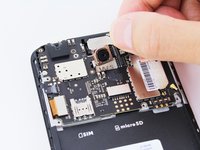
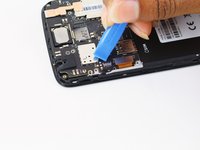
Disconnect the rear-facing camera by prying straight up on the connector on its right side.
-
Remove the rear-facing camera from the Moto E4.
-
-
-
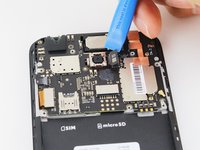
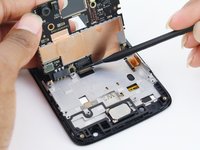
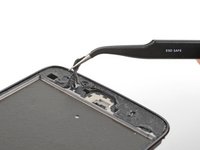
Disconnect the display cable by prying it straight up from the motherboard.
-
-
-
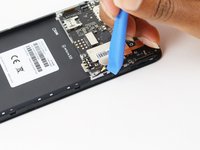
Unlock the ZIF connector for the side buttons by prying up the black locking flap opposite the cable.
-
Pull the cable carefully toward the edge of the phone to slide it from its socket.
-
-
In diesem Schritt verwendetes Werkzeug:Tweezers$4.99
-
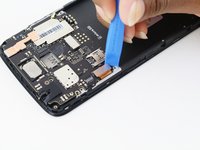
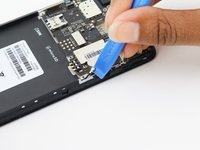
Disconnect the antenna cable by sliding a plastic pry tool or fine tweezers under the wire close to its socket, and then prying straight up.
-
-
-
-
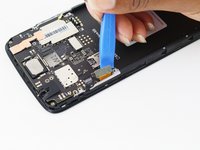
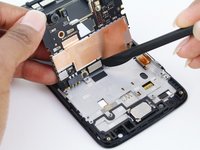
Grab the top edge of the motherboard and lift to hinge it upward (but don't try to fully remove it). While doing so, keep all other cables clear of the motherboard.
-
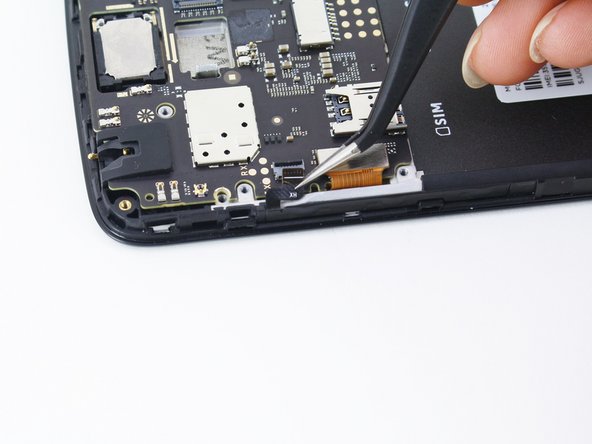
Use a spudger or other fine-tip pry tool to pry off and disconnect the last remaining ribbon cable on the underside of the motherboard.
-
Remove the Moto E4 motherboard.
-
-
-
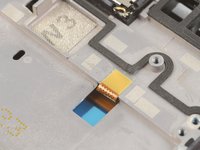
Use a plastic opening tool to carefully separate the cable until it detaches.
-
-
-
Heat an iOpener and apply it to the left edge of the screen for one minute to help soften the adhesive securing the screen.
-
-
-
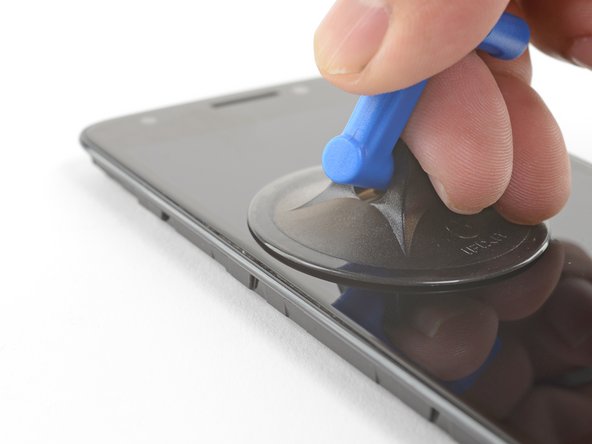
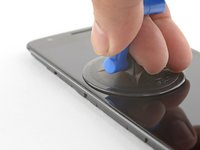
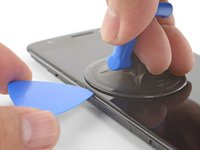
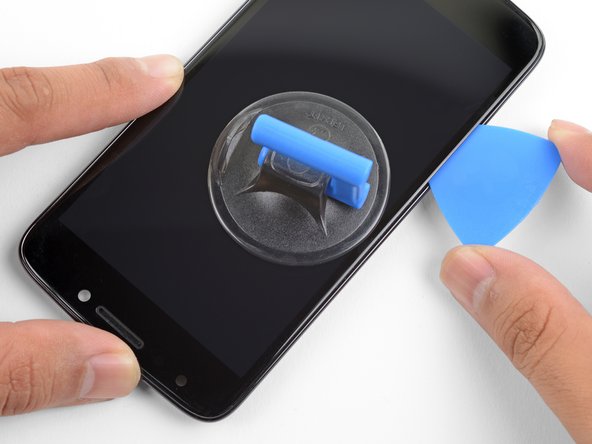
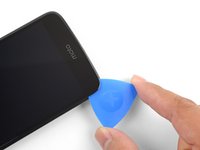
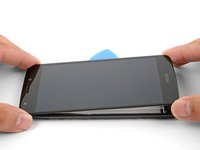
Apply a suction cup to the screen, near the heated edge of the phone.
-
Pull on the suction cup with strong, steady force to create a gap between the screen and frame.
-
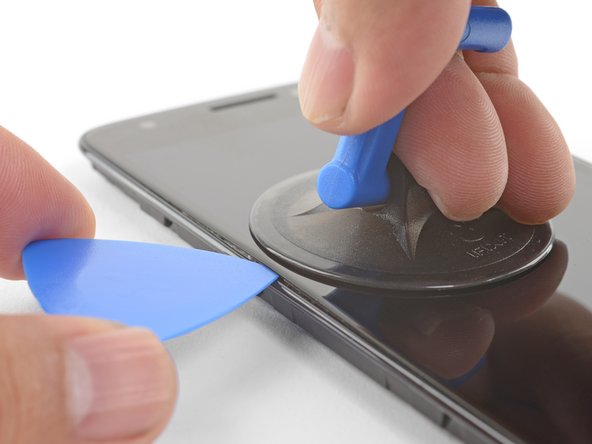
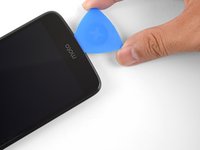
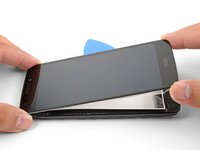
Insert the point of an opening pick into the gap.
-
-
-
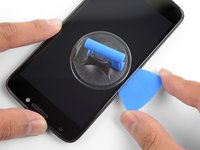
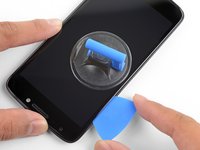
Slide the opening pick along the left edge to slice through the adhesive.
-
-
-
Apply a heated iOpener to the bottom edge of the phone for a minute to soften the adhesive.
-
Use an opening pick to slice through the adhesive at the bottom edge of the phone.
-
-
-
Continue heating and slicing along the right and top edges of the phone.
-
Leave an opening pick in the seam to prevent the adhesive from resealing.
-
-
-
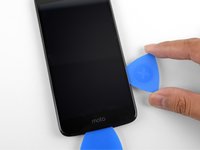
Lift up the bottom edge of the screen by a few degrees and slice any remaining adhesive.
-
-
-
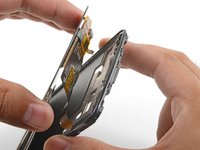
Grasp the phone near the top edge and slowly separate the screen and the display cable from the frame.
-
As you lift the screen away, thread the grounding cable and the screen cable through their respective cutouts.
-
-
-
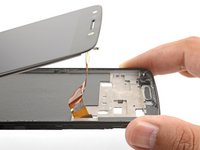
Remove the screen.
-
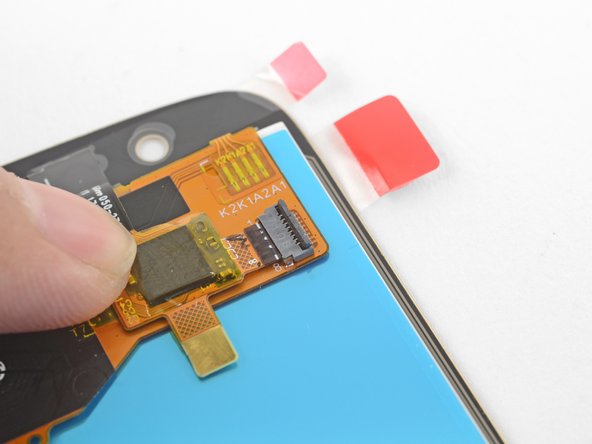
Compare your screen with the replacement part. You may need to transfer certain components such as the earpiece bezel to your replacement part.
-
-
-
If your replacement screen came with the digitizer cable disconnected, be sure to connect it before installation:
-
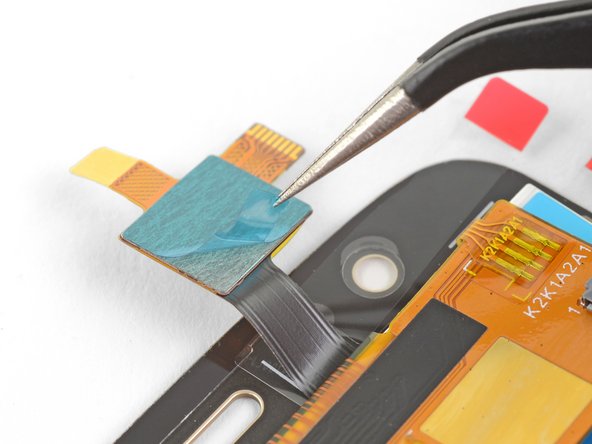
Use a spudger to flip up the digitizer cable ZIF socket's locking bar, located on the back of the screen near the top right corner.
-
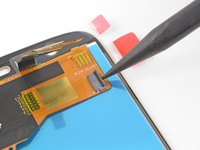
Peel off the small square plastic liner under the digitizer cable to expose the adhesive.
-
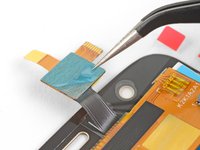
Press the cable down against the back of the screen.
-
Carefully feed the cable into the digitizer cable socket until the white bar printed on the cable is barely visible.
-
Flip the socket's locking bar down to secure the cable in place.
-
Peel all plastic liners from the replacement screen.
-
-
In diesem Schritt verwendetes Werkzeug:Tesa 61395 Tape$5.99


To reassemble your device, follow these instructions in reverse order.
Take your e-waste to an R2 or e-Stewards certified recycler.
Repair didn’t go as planned? Try some basic troubleshooting, or ask our Motorola E4 Answers community for help.
To reassemble your device, follow these instructions in reverse order.
Take your e-waste to an R2 or e-Stewards certified recycler.
Repair didn’t go as planned? Try some basic troubleshooting, or ask our Motorola E4 Answers community for help.
Rückgängig: Ich habe diese Anleitung nicht absolviert.
Eine weitere Person hat diese Anleitung absolviert.

