Diese Übersetzung enthält möglicherweise noch nicht die neuesten Änderungen der Original-Anleitung. Hilf mit, die Übersetzung zu aktualisieren oder sieh dir die Original-Anleitung an.

Nexus 5 LCD und Touchscreen Einheit ersetzen
Einleitung
Zu Schritt 1 der AnleitungVerwende diese Anleitung, um die LCD und Touchscreen Einheit deines Google Nexus 5 zu wechseln.
Was du brauchst
Fix Kit
Dieses Kit enthält alle Ersatzteile und Werkzeuge, die für die Anleitung benötigt werden.
Ersatzteile
Werkzeuge
Mehr anzeigen …
-
-
Führe ein SIM Card Eject Tool in das kleine Loch neben dem SIM Kartenslot, direkt unter dem Ein-/Ausschalter.
-
Drücke das Sim Card Eject Tool in das Loch hinein, bis der Kartenhalter herauskommt.
-
-
-
Nimm den SIM-Karte vorsichtig aus dem Gerät. Hierfür kannst du entweder deine Finger nehmen oder eine Pinzette, falls der Kartenhalter nicht ganz herausgekommen ist.
-
-
In diesem Schritt verwendetes Werkzeug:iFixit Opening Picks (Set of 6)$4.99
-
Löse mit einem Plastic Opening Tool die Clips oben und auf jeder Seite der Rückabdeckung.
Wireless QI and NFC.
Once I have put everything together with the new battery in place, I have as last replaced the plastic back cover, snapping all the clips back around the edges of the phone. Alas, I was quick to realise the QI Wireless charging has ceased to work.
I almost blamed the battery, or worse, me.
QUICK TIP: there is actually another clip in the middle of the plastic back cover - just press with your thumb just above the 'S' in NEXUS emblem and, voila! Snaps back in.
Wireless charge and NFC - works, once again.
you just saved me like 30 bucks. thank you so much.
+ 1, had the same issue and pressing just near the S fixed it! Thanks a lot!
nicco82 -
Just a me too, I had to press above the S and it was quite a snap
There seems to be two contacts that snap into place. One is in line with the led pretty much in the middle of the phone and the second one in line with the camera lens on the opposite side to the lens. The middle one for me snapped pretty lightly, but the side one required a bit more pressure. After that the nfc started working again. Thanks for posting this!
When I openend the back cover I damaged two clips. One about 2.5cm (1 inch) below the volume controls and one on the other side about same height. The cover fits good without those two but on one side there is a small gap where the clip broke. But I have a hard cover protector on my phone so it's not that bad.
The case around the sim slot is pretty thin and easy to break, best to avoid using the pry tool at this point.
Hey Author, i need to ur expert advice...i replaced my nexus 5's back cover. since the new one did not have the vibrators battery i had to take it from the old one and connect it to the new one...on removing i noticed that it was stuck to the cover by a glue
Question: what glue to use to hold the battery to the cover?
Any adhesive will do. I used a hot glue gun. You shouldn't need expert advice to figure that out. Use your head.
tjt263 -
-
-
-
Entferne die sechs 4,0 mm Kreuzschlitzschrauben #00, mit denen der Mittelrahmen am Smartphone befestigt ist.
-
Um das LCD und den Touchscreen zu ersetzen, entferne die zusätzlichen vier 4,0 mm Schrauben der Daughterboard-Abdeckung mit dem gleichen Schraubendreher.
I had a bit more success with the Phillips #000.
Step 4 (removing the screws in the protecting plate) needs to happen before Step 2 ( removing the connectors)
-
-
-
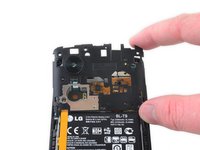
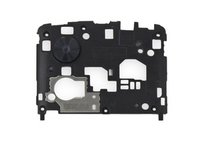
Entferne den Mittelrahmen vom Smartphone.
-
-
In diesem Schritt verwendetes Werkzeug:Spudger$2.99
-
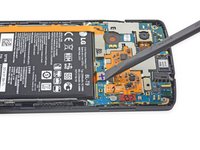
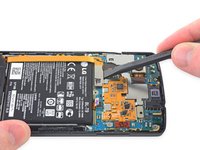
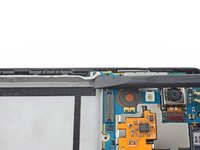
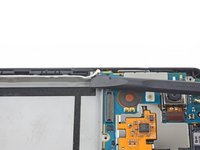
Verwende das flache Ende eines Spudgers, um den Akkuanschluss zu trennen.
-
-
-
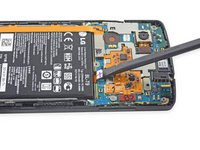
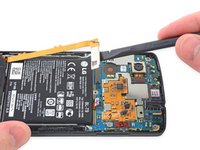
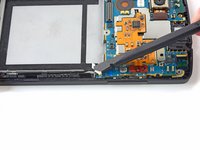
Verwende einen Spudger, um den Daughterboard-Anschluss zu trennen und ziehe es weg vom Akku.
-
-
-
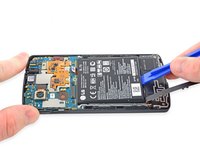
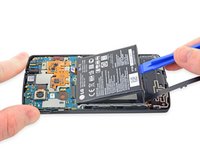
Heble den Akku mit einem Plastic Opening Tool aus dem Gehäuse.
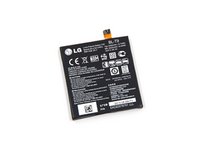
This part is very delicate. The adhesive is pretty solid and I did puncture the battery. It is dangerous and the battery should be replaced with a new one.
Thanks Chris for the notice. I have added a warning on your advise. Do you think about any better way to unglue the battery?
Gaetan -
Like another user, I had already taken my cover off plenty of times prior to. The issue of course was removing the battery. I purchased the opening tools and spudger and used them but to no avail. I ended up using a flat tip screwdriver and got the battery out within seconds with no puncturing.
I'll second the flathead screwdriver. Tried different plastic tools only to damage both the battery and a spring connector on the phone. With the flathead screwdriver battery came out quite easily lifting from the bottom end. There is an adhesive tape holding the battery firmly in place that retains the adhesive surface after removing the battery, so the new battery should attach properly.
Why do you need to remove the battery at all? Just replaced my rear camera without removing it. I mean, I realise that removing the power source would have been safer, but would it be enough just to detach the motherboard connector?
This guide is about the REPLACEMENT of the battery, and for that it seems necessary to remove it first. ;-)
Do you need to apply adhesive to the new battery to keep it in place?
no there is generally glue remaining and it stays in place pretty good
This was fantastic, thank you! I had never done anything like this before! You just saved me some money and also taught me something :D
The first time I tried to replace the battery I ended up breaking off the tab on the new battery. It needs to be bent properly to fit into the socket on the phone. The second time, I connected the tab t the socket BEFORE placing the new battery into the area of the phone where it sits. Then I was able to use the plastic tool to correctly bend the connector.
I have replaced the battery and after doing this there is a flashing red light. does this mean its just charging from empty or have I done something wrong? Do i need to press any buttons to make sure its charging properly? do i need to re open it up to check connections? what do i do? there is no mention of whether it should turn back on or what it should do/how long it will take to be up and running again.
I had the same "problem", though I had misplugged the battery. Just wait for a couple of minutes and your phone should start to charge. Also, I've been told to fully charge and discharge the battery 2-3 times before using it.
Why not remove the battery by pulling on the small ribbon cable at the top?
When you take out the battery, there are some sort of black tape (adhesive) around the inner circle of the empty battery chassis. I might have been too rough and taken the black tape out completely. Now with the newly replaced battery, Nexus 5 won't charge or power on. Does anyone know what the black tape is for? is it the reason or something else?
I found out that the heavy duty suction cup I bought to replace phone screens works quite effectively at removing the battery without bending or damaging it. Of course, this was being used on a battery that was itself a replacement of the original, so the adhesive may have weakened significantly.
-
-
-
-
Verwende das flache Ende eines Spudgers, um das linke Antennenkabel auszustecken.
-
-
-
Verwende das flache Ende eines Spudgers, um das rechte Antennenkabel auszustecken.
-
-
-
Verwende das flache Ende eines Spudgers, um das Flachbandkabel, das die Rückkamera mit dem Motherboard verbindet, zu trennen.
-
-
-
Verwende das flache Ende eines Spudgers, um das Flachbandkabel der Frontkamera zu trennen.
-
-
-
Schiebe einen Spudgers in die Öffnung zwischen dem Daughterboard und dem Plastikgehäuse ein.
-
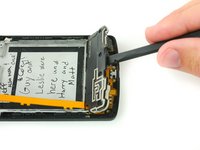
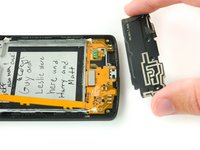
Hebe die Abdeckung des Daughterboards an, und entferne sie vom Rahmen.
-
-
-
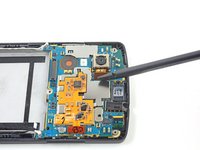
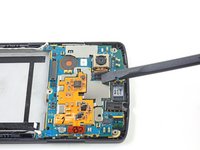
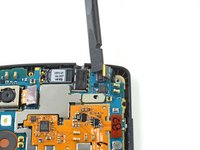
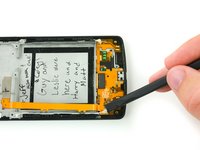
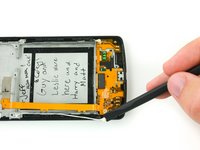
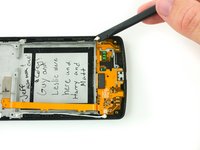
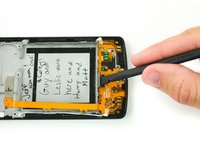
Verwende das flache Ende eines Spudgers, um den weiße und den schwarze Antennenstecker vom Daughterboard zu trennen.
-
-
-
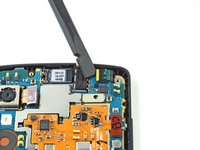
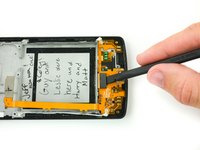
Verwende das flache Ende eines Spudgers, um den ZIF Verbinder des Touchscreen Kabels vom Daughterboard zu trennen.
-
-
-
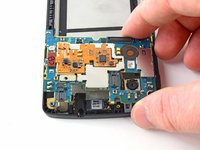
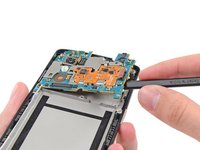
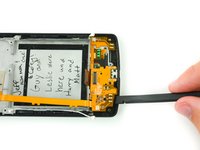
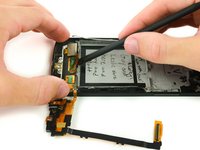
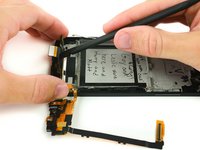
Führe einen Spudger in die Öffnung unter dem Daugherboard ein und hebele es aus dem Rahmen heraus.
-
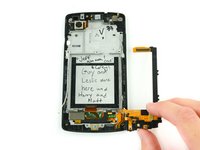
Trenne das Daughterboard nocht nicht komplett. Biege es vorsichtig zur Seite des Smartphones.
-
-
-
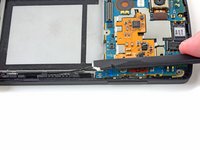
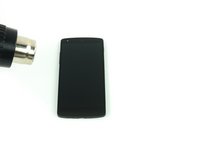
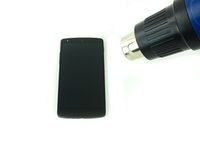
Verwende ein Heißluftgebläse, um vorsichtig den Kleber, der das Touch Panel am Rahmen befestigt, zu lösen.
-
-
-
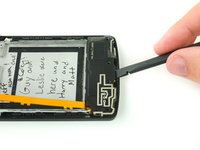
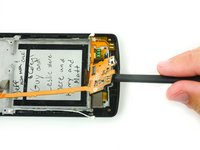
Setze das flachen Ende eines Spudgers unter das Touch Panel. Heble das Panel vorsichtig hoch, um es vom Klebstoff zu lösen.
-
-
-
Verwende ein Heißluftgebläse oder einen iOpener, um den Klebstoff entlang der Kanten des Displays aufzuweichen.
-
-
In diesem Schritt verwendetes Werkzeug:Heavy-Duty Suction Cups (Pair)$14.95
-
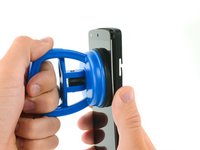
Verwende einen Heavy Duty Saugheber, um den Bildschirm entweder komplett vom Rahmen abzulösen, oder um einen Spalt zwischen Bildschirm und Rahmen zu erzeugen.
-
-
-
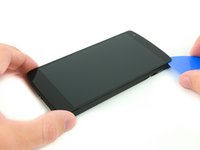
Schiebe ein Opening Pick zwischen das Display und den Rahmen.
-
Führe das Opening Pick an den Kanten des Displays entlang, um den ganzen Klebstoff zu trennen und die Displayeinheit abzulösen.
-
-
-
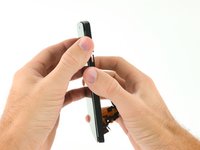
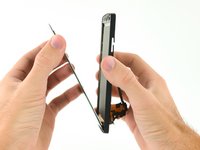
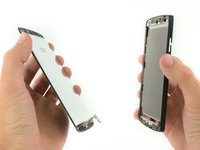
Entferne vorsichtig die LCD und Touchscreen Einheit.
I’ll second this request for a detailed description of gluing the new screen.
^THIS!
Oscar and Anton are on point.
I hate your site comment filters and settings too, but just focus on not screwing things up and making pro right to repair people look like jackasses when we have corporate and possibly state sponsored efforts to undermined us already.
Sum Guy -
I’ll make it easy on the mods, I did a two second google search to find the info and I am linking three videos here, here, and here.
If you are a mod, make sure the guy in charge of writing these things takes a few minutes out of his day to finish what he started three years ago, and if that is too hard the videos are right here for him to watch and he can just copy what he sees.
Hello everyone. I proposed some edits to this guide to include the few critical steps consisting of: 1) Cleaning the frame; 2) Applying the screen adhesive; 3) Applying the screen. The remainder of the reassembly can be done quite easily by just following the instructions in reverse. I do not know how quickly my proposed edits will be included in the “Verified Guide”, but you can see browse them in the “unverified version” here. Any feedback over there is of course welcome.
-
Arbeite die Schritte in umgekehrter Reihenfolge ab, um dein Gerät wieder zusammenzubauen.
Arbeite die Schritte in umgekehrter Reihenfolge ab, um dein Gerät wieder zusammenzubauen.
Rückgängig: Ich habe diese Anleitung nicht absolviert.
45 weitere Personen haben diese Anleitung absolviert.
Besonderer Dank geht an diese Übersetzer:innen:
85%
Diese Übersetzer:innen helfen uns, die Welt zu reparieren! Wie kann ich mithelfen?
Hier starten ›
10 Kommentare
This is a nice guide to understand how to disassemble and assemble your Nexus 5. 95% can be done with this guide.
Tip: read the comments!
My own tips are:
1) Search for instructions how to use glue or double sided adhesive tape. It's a must if you want succesfully put everything back together
2) You need to transfer the speaker protection from the inside of the glass to the new glass
3) The same needs to be done with with a white rectangle. It has something to do with your LED-light at the bottom.
Saw these tips in this YouTube video https://youtu.be/jQS618ayL5w
Thanks for the extra tips, Jeroen! These two steps can be found at 2:50 of the video for those who want to skip right to it. ;)
We do supply the tape as well: Tesa 61395 Tape
By the way, does the guy in this video remind anyone else of Thrawn from Star Wars Rebels (aka Lars Mikkelsen?)
Richard -
Hey, what size do I need for the tape? Is the mm size referring to width or thickness?
I assume it’s width and I need 1mm or 2mm to repair my Nexus 5, but which one?
I need a little help with this tutorial. I’ve bought a second hand N5 where someone replaced the screen, now the display lifts off slightly in the bottom left corner of the device. Pushing it back will only hold it in for a few minutes. Should I slide a tiny piece of double-sided adhesive tape underneath, or rather some modelmaking glue?
The new screen is not adhered as the old one was.. not sure what I would use for that. Not terribly important for me since it sits 99% flush, and lives in an enclosed case, but the guide should probably mention this.
there is no reason to fully disassemble your phone just to replace the screen all you have to do is pull off the back pannel unscrew the speaker/mic housing assembly then take it off, dissconnect the screen connector under that and lift out the little breakout board where all the connections to the phone go at this point pry off the bad screen and put in a new one plug it in and glue it down with something like rubber cement reassemble and done. I have done this about 50 times with my nexus 5. I refuse to be careful with my phone.
note: do not use super glue to glue in your screen, you want something rubber cementy because it will hold your screen good but it can be peeled away, and any excess is easally removed. I personally use Loctite “flexable adhesive” for “ vinyl fabric & plastic”.
I like to put it under some slightly heavy books wile it drys
oh and don’t forget your speaker grill for the phone speaker
Is it possible to replace the digitizer and re-use the factory screen? The screen on my phone is perfect with no scratches or cracks and I would hate to replace it with some knock-off glass. My phone just randomly stopped responding to touches but is otherwise pretty mint for being so old.
Do NOT use the ifixit display adhesive to attempt this repair, not only are there no instructions, it is really easy to remove the aluminum foil which is responsible for the backlight. I nearly destroyed my new display digitizer trying to attempt this repair. Get some epoxy from home depot, don’t waste your time


